
Feeding Grounds is an optional dungeon in Mortal Shell 2 located within the sealed building up north in the Stones of Remembrance. To get the doorway open, you’ll need to find and destroy three runic tombstones out in the overworld that match the sigil carved onto the building’s door, and once you clear the dungeon out, you’ll walk away with valuable upgrade materials like Laterite and the Myriad Stone Tarstone. This guide shows the tombstone puzzle solution and provides a full walkthrough to complete Feeding Grounds in Mortal Shell 2.
How to Open the Door in Stones of Remembrance

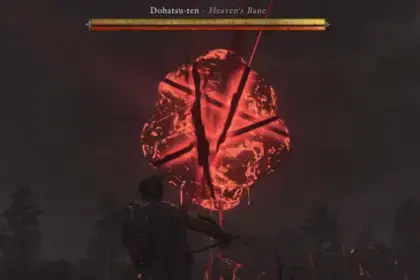
The entrance to Stones of Remembrance is sealed by three sigils that match the glowing symbols on gravestones around the cemetery outside. Walk up to each Golden Tombstone and strike it with a strong weapon to break it.
Optional: Before tracking down the stones, check behind the large knotted tree near the stone ruins to pick a Dorsalite.
- Tombstone #1: Found along the cliffside path covered in yellow flowers just below the main entrance trail.
- Tombstone #2: Found further down in the lower cemetery clearing against a tall arched stone monument.
- Tombstone #3: Placed right beside the stairs that lead back up toward the dungeon entrance.
Shattering the third gravestone will remove the seal blocking the entry and will give you access to the Feeding Grounds.


Mortal Shell 2 Feeding Grounds Dungeon Walkthrough

Enter through the unsealed archway, step into the Feeding Grounds’ fog entrance, and take the lift down into the cavern.

In the first chamber, two Cultists will attack, one armed with a spear and one casting poison. Bait the spear fighter back toward the tunnel to eliminate her before rushing the caster. Don’t cross the center of the room because the wooden floor is unstable and will collapse underfoot. Hug the left wall instead and smash the barrels to pick up Common Moonshine.

Drop down through the broken floor into the lower chamber, where two aggressive tree-like Tarred Vestiges will ambush you with grapple attacks and AoE ground strikes. Defeat them and loot the first piece of Laterite in the area. Stay mobile to avoid their overhead slams and wide sweeping attacks, focusing on one brute before taking down the other. Once enemies are dead, collect the Laterite from the node growing against the wall.

Walk toward the uphill ramp as shown in the image above, leading out of the lower level, where you will encounter a Greatsword Hunter along the path.

Just before you fight the Hunter, destroy the wooden crates by the left wall to reveal a hidden wall switch. Pressing this button will lift the barred iron gate on the upper floor.

Follow the ramp, collect the second Laterite at the top, and smash through the side wall to loop back to the main room. Head inside the newly opened chamber and loot the bone chest to get the Myriad Stone.
Feeding Grounds Rewards
- Myriad Stone x1
- Laterite x2
- Common Moonshine x1
Looking to pair your new triple-shot Sidearm with the right Shell, or still hunting for the rest of Fainweald’s hidden dungeons? Check out our Mortal Shell 2 walkthrough page for weapon locations, boss strategies, Tarstones, and progression roadmaps.