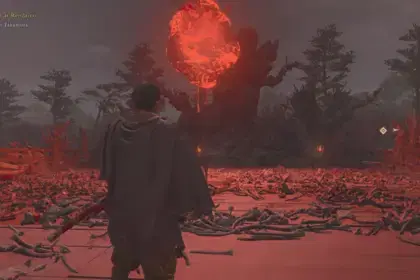

Yes, you can defeat the Tar Golem in Mortal Shell 2, but the fight ends the same way whether you win or lose. Taking it to minimum health unlocks the “No, You Still Can’t Win” trophy or achievement and drops Vatra’s Seal. That’s it! This guide tells you the Tar Golem location, the best boss fight strategy, and how to retry without replaying the prologue.
Can You Defeat Tar Golem?

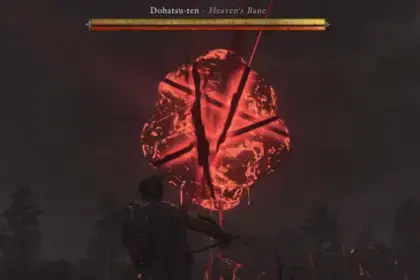
Although the Tar Golem is introduced as a tutorial roadblock to force a loss, you can deplete its full health bar, and the encounter ends when your Shell breaks, so you only get one shot at this.
Once you drain his stamina to 0, it forces Golem to execute an arena-wide double fire slam move that smashes you on the ground and eats all your remaining health. This plays the same cutscene as a normal defeat, destroying Harros’s Shell and leaving you in your bare Foundling form. Despite the lack of narrative impact, players who manage to defeat the Tar Golem will unlock the “No, You Still Can’t Win” achievement.
Where to Find Tar Golem in Mortal Shell 2

Tar Golem is found near the end of the prologue area past the Disciple’s Grotto Beacon. From the beacon, take the ramp down on the right toward the air shaft updraft. Ride the updraft to reach the upper ledge and move past the Elite Brigand and Ruk on the way. Interact with the teleporter to cross over to the boss arena and move through the Bone Gate to start the fight.
How to Retry the Tar Golem Fight
Because the game creates a save right as the final cutscene begins, getting defeated or dying usually locks you out of retrying on that save file. You can get around this by using a few system specific tricks:
- PC: As soon as your health drops to nil or the scene triggers, press Alt + F4 immediately to force-close the game before it autosaves. Choose Continue when you relaunch, and you’ll spawn outside the arena where you can enter the battlefield again and try your luck.
- PlayStation 5 (Cloud Backup): Before passing through the Bone Gate, manually upload your save data to PlayStation Plus Cloud Storage and turn off Auto-Sync for Mortal Shell 2. If you lose or die, exit the game, download your backup save from the cloud, and reload to fight again.
A few console players who quit in the middle of the cutscene reported losing their Gloom with no way to recover it. It’s rare, but spend your Gloom first if you plan to retry that way.


How to Beat Tar Golem in Mortal Shell 2

Tar Golem hits extremely hard and shifts between moves once its health drops below 50%. To deal with this creature, you have to parry its normal attacks, dodge the red ones, and build Break damage for a Riposte. The boss has a small moveset that deals serious damage, so the right timing matters more than gear.
Loadout & Ability Strategy
- Skip Harros’ Petrify / Stone Skin: Building Break damage with petrification sounds good on paper, but striking the Tar Golem with Stone Skin coats him in an angry red flame aura. This buffs his attack power and fills your screen with blind fire particles that obscure weapon tells.
- Abuse the Nailshot: Save your Resolve for the ranged sidearm. Nailshot deals steady chip damage, builds boss break meters from a safe distance, and lets you wear down his health without trading blows.
- Maximize Stagger Windows: When the posture breaks and you see the red flash on the Golem’s health bar, step forward and land one or two fully charged heavy attacks, then execute the Riposte right before the stagger timer runs out to double your burst damage.
Phase 1

Keep the boss at medium range in the opening phase. Lingering in point-blank melee baits out his lightning-fast, triple chop combo that’s very hard to deflect in time. If you hang back a bit instead, Golem will use heavily telegraphed, unblockable red attacks:
- Clap Attack (Red Indicator): Tar Golem will charge forward with both axes spread wide before clapping them together. Do not dodge early while he is running, or the explosion will catch your roll. Wait till the weapons start to snap shut, then dodge through or to the side.
- Fiery Charge (Red Indicator): He will plant both weapons into the ground and sprint forward. He can slightly track (or change direction) at the last second, so dash sideways right before he makes contact.
- Big Overhead Smash (Red Indicator): The boss will raise dual weapons and crash them down, sending a fiery wave forward. Dodge diagonally toward or around him, as doing it straight back will put you in the lingering line of fire.
- Leaping Plunge (Blockable): Tar Golem will slam down once, leap into the air, hover momentarily, and then crash into the ground, though you can guard against it normally. The long landing recovery creates a free window for two clean melee swings.
Phase 2

When the Tar Golem’s health is drained to about 50% to 60%, his weapons will ignite, and his standard attacks will expand from three hits to four.
- Double Momentum Swings: He will sweep both axes back and deliver two pairs of swings (hit-hit, hit-hit). You can easily guard the first and third strikes, or just hold your block down the whole time to absorb the combo if your timing slips.
- Delayed Slam Finisher: Golem will start with a wide double sweep, follow with two quick chops, and finish with a delayed overhead smash. Resist the urge to panic roll after the chops and wait out the slight pause on the final strike before dodging.
- Running Axe Stomp: When you back away too far, he’ll perform a small forward hop into a double sweep, a backswing, a foot stomp, and a violent downward axe crash.
To avoid the lethal running string in Phase 2, don’t keep mid-range distance from the boss as you did in Phase 1. Stick close to him, use Perfect Guards on his four-hit combos to build Break meter, and rely on Nailshot blasts to drain the remaining chunks of his health.