

In Elden Ring, mistakes in your build don’t have to be permanent. Larval Tears are the key items to respec your character, which lets you completely redistribute your attribute points with the help of Rennala, Queen of the Full Moon. But Larval Tears in Elden Ring are very limited, cannot be farmed, and many are hidden behind hard enemies or missable events.
To pivot into sorceries, experiment with Faith Elden Ring builds, or fix early leveling choices, you have to get every Larval Tear in the game. Our guide will tell you where to find all Larval Tears and how to respec your character using them.
All Larval Tear Locations in Elden Ring
These are all the locations where you can find Larvel Tears before you visit Rennala for rebirth. A couple of areas have more than one item, while others only give you a single.
Limgrave Larval Tear
Very early in the game near the Agheel Lake South Site of Grace, you’ll see what looks like a normal soldier standing on a cliff. Don’t be fooled — when defeated, he morphs into a giant Lesser Runebear. It’s a tough fight at lower levels, but if you manage to defeat the enemy, you’ll get your very first Larval Tear.
Liurnia of the Lakes Larvel Tear
Liurnia holds multiple of the game’s most memorable Larval Tear encounters involving to trick enemies or hidden NPCs.
- Rose Church – Southeast of the church, a massive lobster (disguised crayfish) patrols the waters around the gazebo you can reach by going northwest from the Boilprawn Shack Site of Grace. Killing it causes it to reveal its true form, a Grafted Scion. Survive the second transformation fight and you’ll earn a Tear.
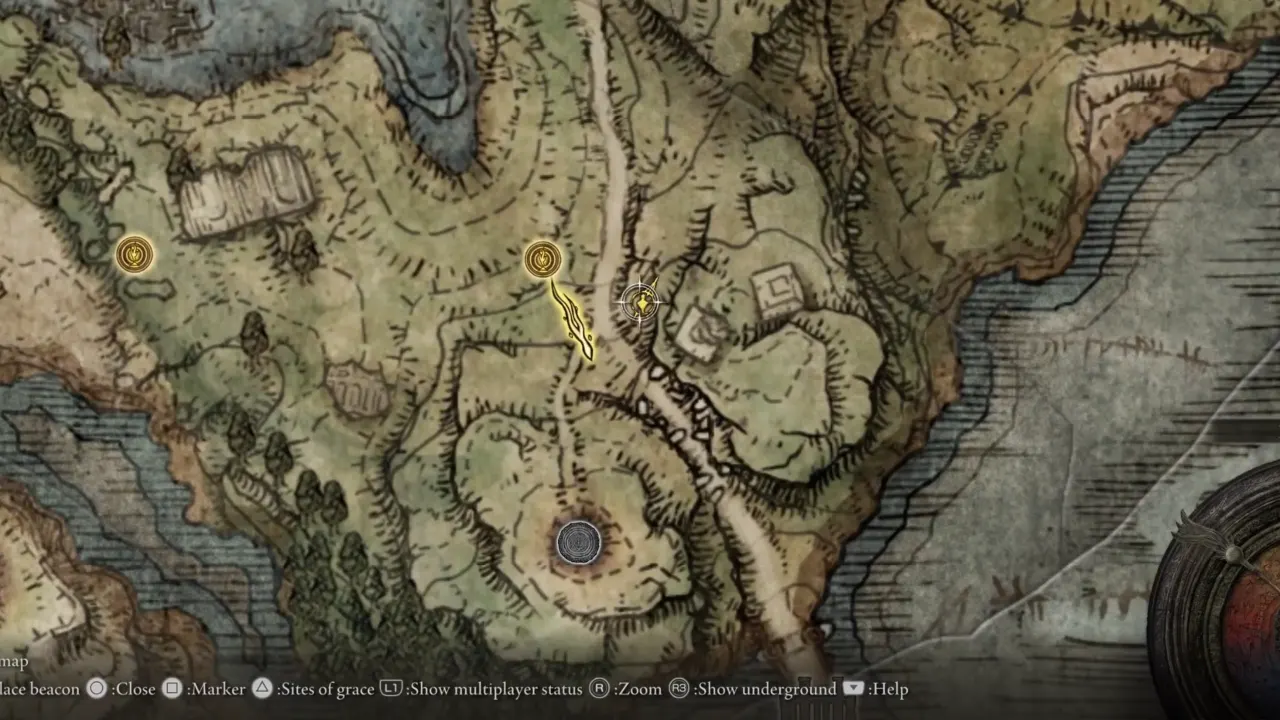
- Behind Caria Manor – Once you’ve cleared Caria Manor and defeated Royal Knight Loretta, the north plateau (Three Sisters) opens up. In a graveyard to the southeast, a spectral figure sits silently in a chair. Interact with it, and the apparition fades away, leaving a Larvel Tear and some other items behind. Watch out for the wolf pack and the Red Wolf variant lurking nearby.
- Pidia, Carian Servant – From the Three Sisters plateau, drop down into a lower part of Caria Manor where you meet Pidia, the manor’s servant. He sells one Larvel Tear for 3,000 Runes. If he’s dead due to Ranni’s or Seluvis’s questlines, you can still retrieve his bell bearing and buy the Tear from the Twin Maiden Husks at Roundtable Hold.
Siofra River Larvel Tear
The underground woods of Siofra are great to the eye, but also filled with swarming enemies. There is the Abandoned Merchant among the ruins west of the Worshippers’ Woods Site of Grace, in a shack high above the ground. From the Siofra River Well, take the lift inside to go down into the underground area. From there, climb all the way up and move along the Siofra River behind the waterfall. Once you get there, you can buy a Larval Tear for 3,000 Runes from the merchant.
Nokron, Eternal City Larvel Tear
When you progress through Ranni’s questline and reach Nokron, you’ll find the motherlode of Larval Tears.
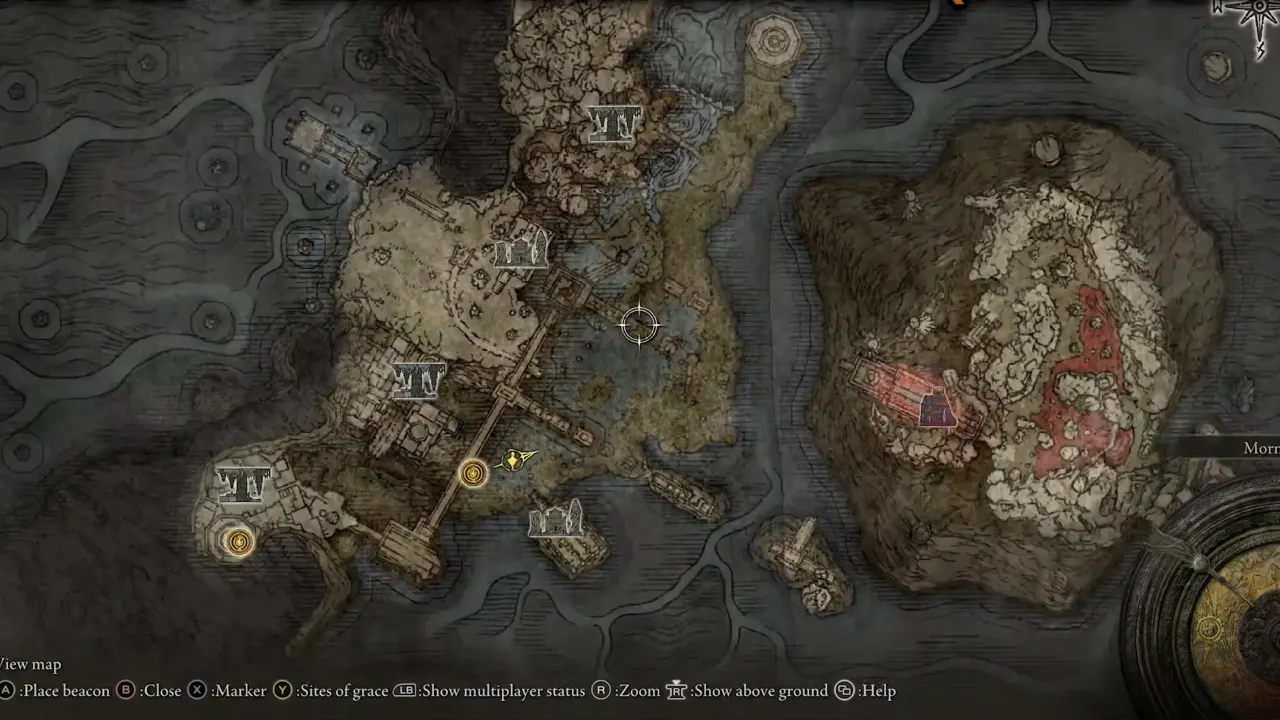
- Nokron Ruins – Near the Nokron, Eternal City Site of Grace, head southeast into a building with an open doorway. Inside, loot a Larvel Tear from a corpse.
- Slime Gazebo – As you head down the stairs toward the Mimic Tear boss fight, check the gazebo to the right. Defeat the slimes that ambush you there, then loot another respec item from the body.
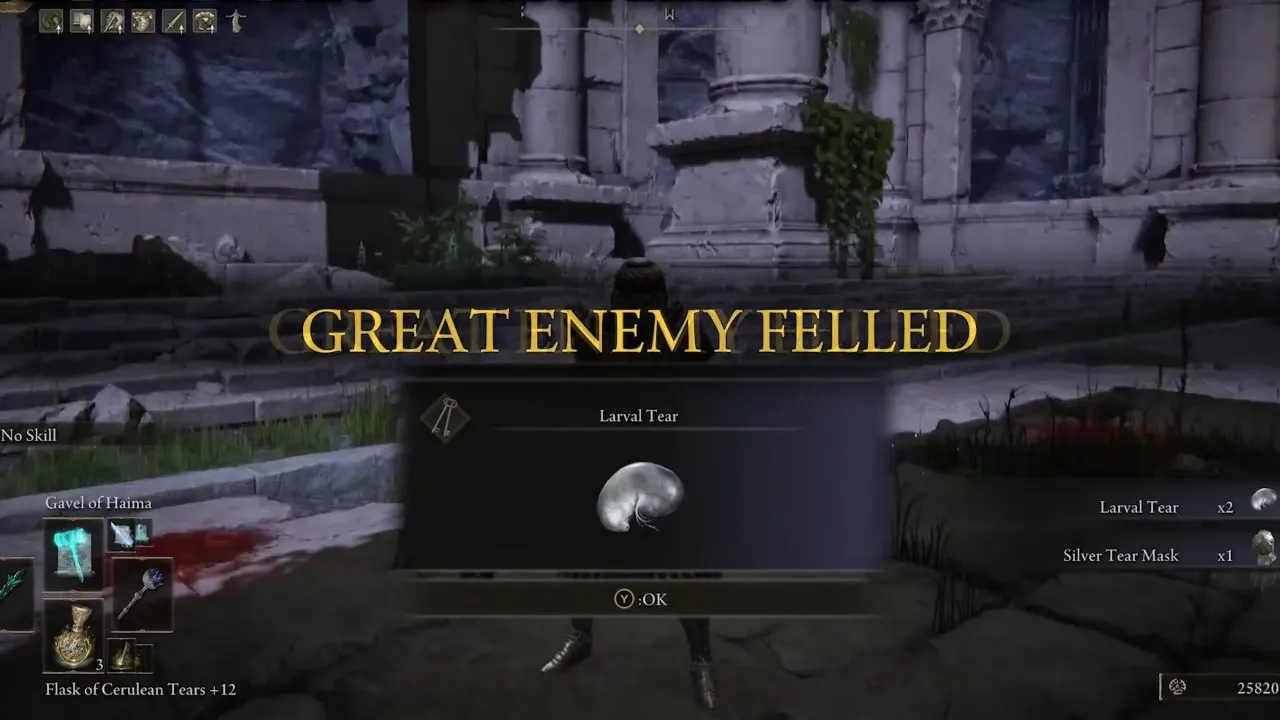
- Mimic Tear Boss – Defeating this doppelgänger fight not only pushes the story forward but also drops two Larval Tears along with one Silver Tear Mask as a reward.
- Night’s Sacred Ground – Progress through this sub-area until you reach the building filled with Silver Tear enemies down the church. You will be attacked by a big Silver Sphere which drops the fifth Nokron Tear.
Nokstella, Eternal City Larvel Tear
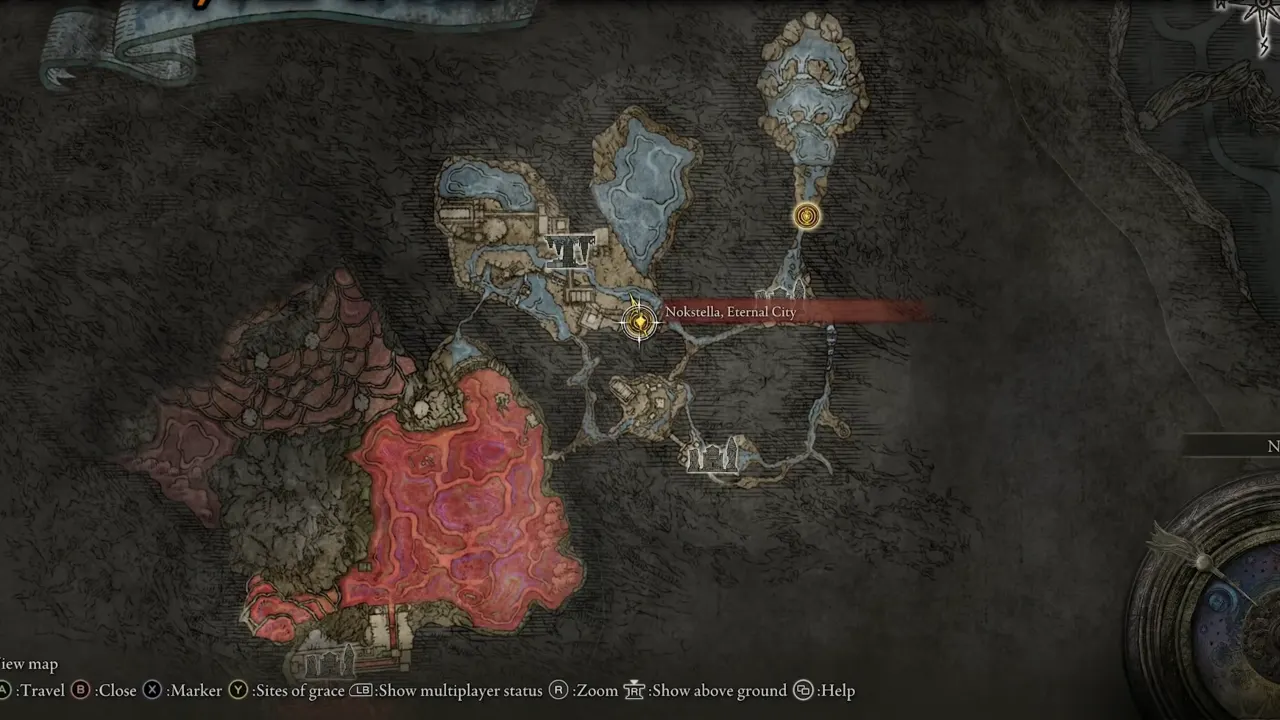
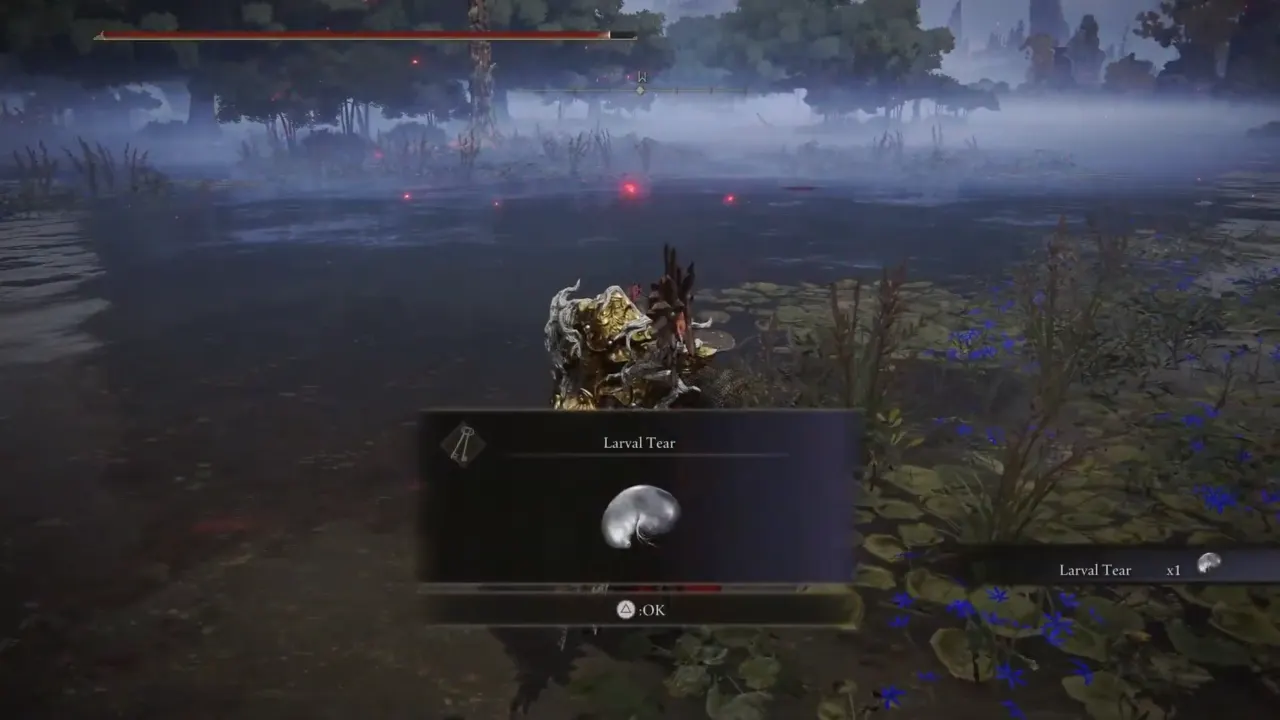
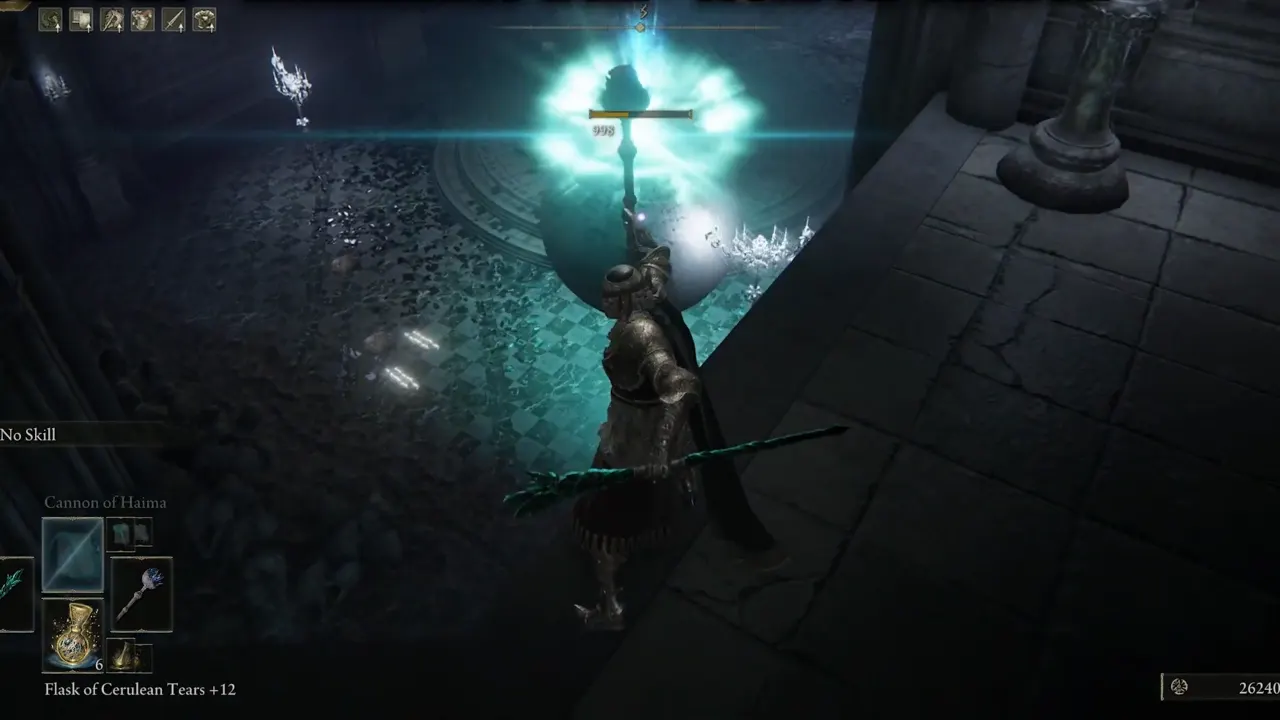
Nokstella is an underground area, reached during Ranni’s quest. Inside the city’s courtyards, you’ll find humanoid enemies that drop from the sky, known as Silver Tear Soldiers. Three of them drop Larval Tears when defeated.
- First Larval Tear – Humanoid Silver Tear near the entrance – As you enter Nokstella and move along the main road, one of the seemingly harmless Silver Sphere blobs will turn into a humanoid Silver Tear soldier. Defeat this enemy, and you’ll get your first Larval Tear in the city.
- Second Larval Tear – Humanoid Silver Tear by the riverbank – Continue further close to the river that cuts through the city. Here, another Silver Ball disguises itself and transforms into a humanoid when provoked. Like the first, it drops a Tear when defeated.
- Third Larval Tear – Upper Nokstella Silver Tear ambush – Up in the higher terraces of Nokstella (you reach after climbing through the courtyards and steps), the third enemy turns into a humanoid Silver Tear soldier. There usually are backup blob reinforcements, so be careful not to get mobbed. Defeat it, and you’ll earn the third and final Larval Tear from Nokstella.
Fights can be rough as these enemies deal heavy damage and fight in groups with minions. Spirit summons help you manage the crowd so you can focus on the Silver Tear.
Altus Plateau & Mt. Gelmir Larvel Tear
- Altus Plateau – Wandering Noble – On the plateau, one wandering noble isn’t what he seems. Take him out, and his disguise breaks, revealing a full Lion Guardian. These beasts are relentless with fast combos, high aggression, and little breathing room. The safest strategy is to fight on horseback, circling wide and punishing after its leaping swipes. Winning the fight rewards you with another Larval Tear.
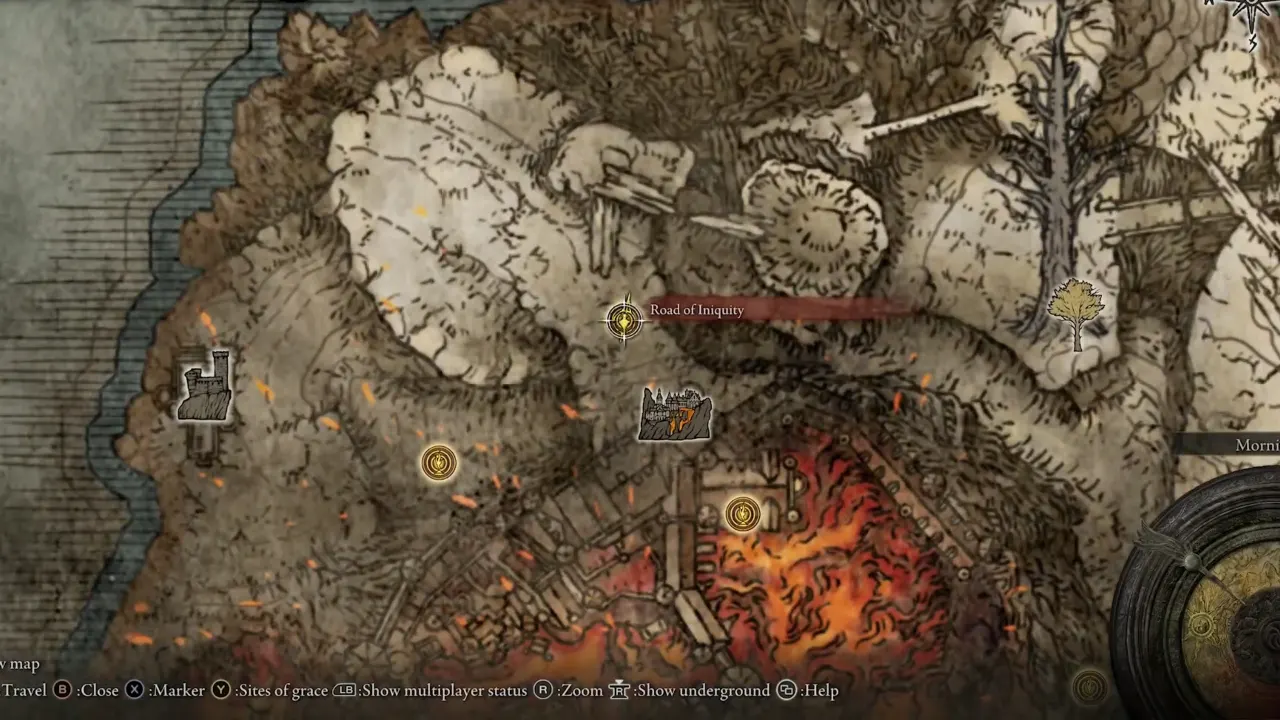
- Mt. Gelmir – Wormface Disguise – Near the Road of Iniquity Site of Grace, you’ll see a flaming Putrid Corpse (zombie enemy). Kill it, and it erupts into a Wormface. These things are infamous for their deathblight AoE — if the meter fills, you die instantly. Stay mobile, avoid the clouds, and chip away from range if possible. Defeating it drops another Tear.
Consecrated Snowfield Larvel Tear

Consecrated Snowfield is a hidden dangerous late-game zone, and getting there requires both halves of the Haligtree Secret Medallion. One half is found in the Village of the Albinaurics, and Commander Niall drops the other after the brutal fight at Castle Sol in the Mountaintops of the Giants. Once you’ve got both pieces, you can use the Grand Lift of Rold to unlock the Consecrated Snowfield region.
When you first enter this snowy wasteland, you’ll notice how open it is, and you will find three soldiers with one stuck in the snow. Once you attack them, the one in the snow transforms into Runebear, a massive enemy wielding a giant weapon. The fight happens out in the open, which means no walls or corners to cheese the fight, and is the toughest enemy than the ones you fought before.
You will also notice that his movement is quicker than a normal Runebear. Trading blows is a bad idea, this enemy hits incredibly hard and can flatten you fast. Instead, bait out its slow swings, dodge through or away, and punish during its recovery animations. Repeat patiently, and once the Troll Knight goes down, you’ll be rewarded with a Larval Tear.
How to Use Larval Tears in Elden Ring
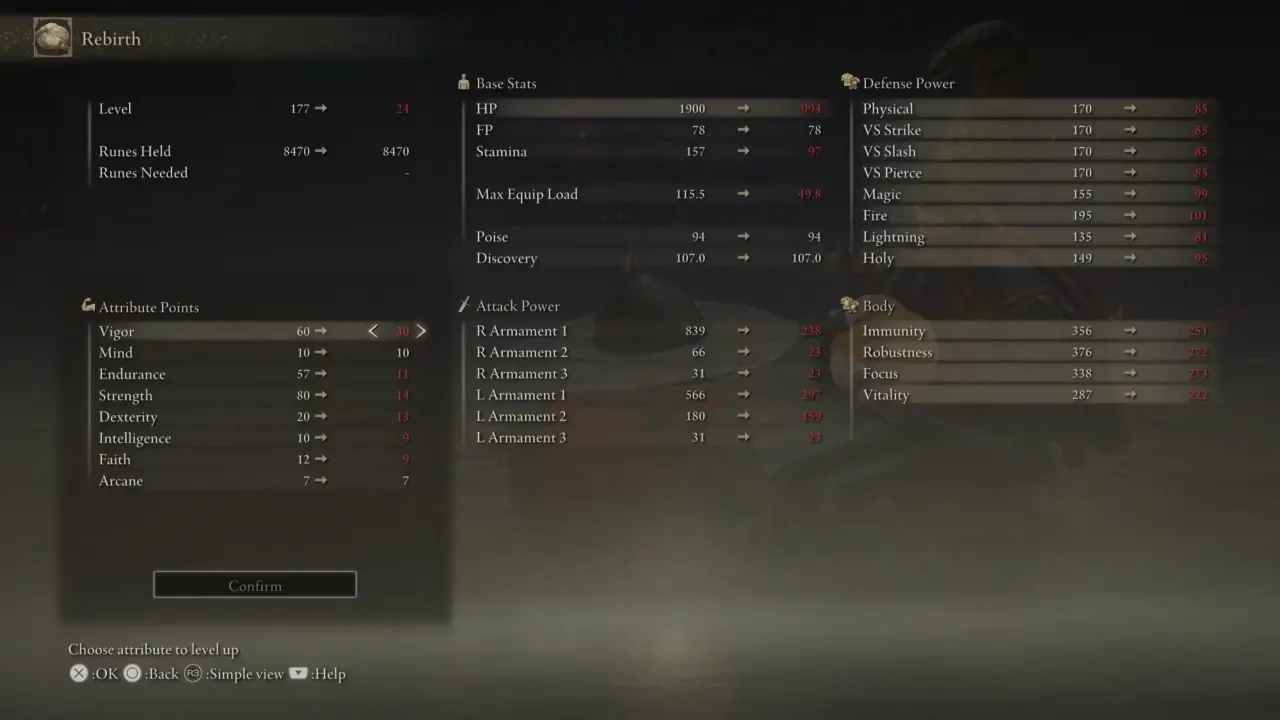
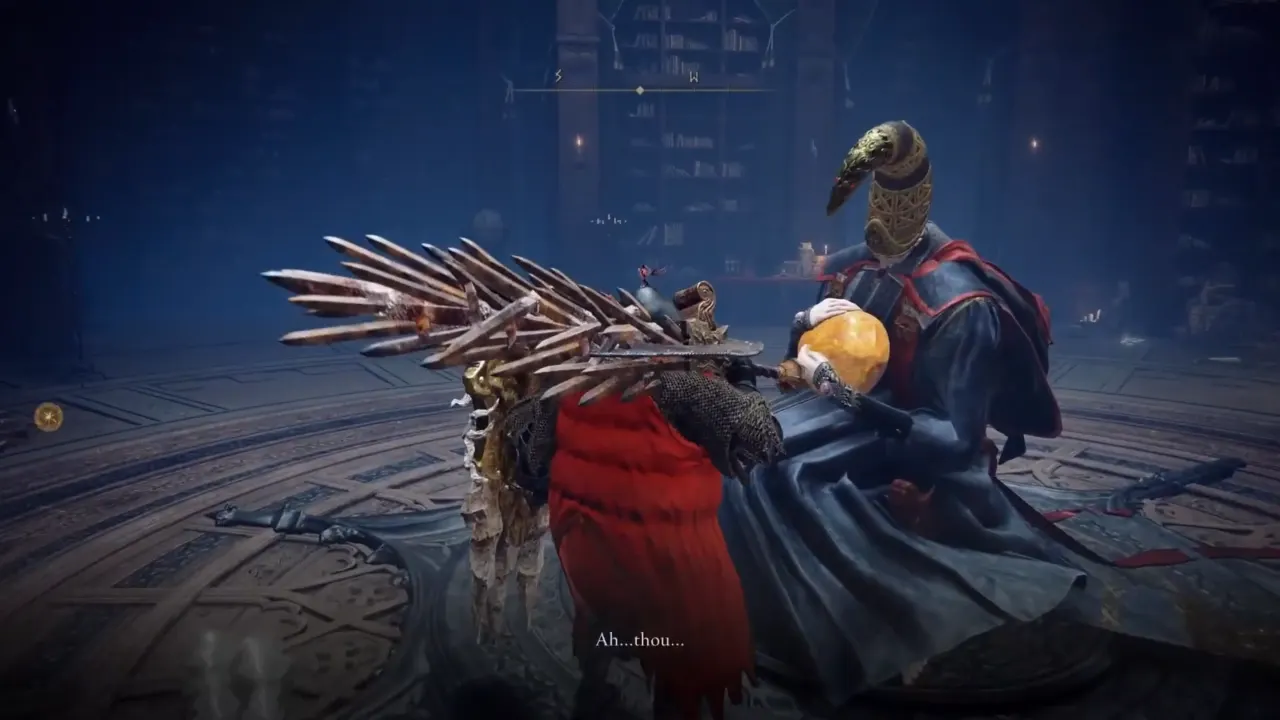
Larval Tears only unlock once you’ve defeated Rennala, Queen of the Full Moon, at the Academy of Raya Lucaria. After the fight, she remains in the Grand Library as a non-hostile NPC, and that’s where the Rebirth system becomes available. Whenever you want to respec, you must offer her one Larval Tear.
Rebirth lets you reset all your allocated attribute points and redistribute them however you like. The system has a few rules:
- You cannot go below your starting class’s base stats.
- You can freely reassign every level you’ve earned beyond that.
- Any attributes previously increased with leveling or items can be shifted however you like.
In practice, this means you can switch from a Strength-focused build to a Sorcery-focused build, or even overcome small mistakes you made early on in your Elden Ring playthrough.
Read Next:


