


Savage Beastfly 2 is the second encounter of the same boss in Hollow Knight: Silksong you fought back in the Chapel of the Beast. He is back once again faster, meaner, and surrounded by molten chaos. The fight takes place in the Far Fields, and between collapsing floors, deadly minions, and the Beastfly’s relentless dives, it’s one of the toughest late-game fights. But with the right prep and a smart approach, you can easily defeat the second Savage Beastfly in Silksong.
Where to Find Savage Beastfly 2 in Hollow Knight: Silksong
Savage Beastfly 2 can be found in Far Fields, at the old Fourth Chorus arena, which unlocks once you’ve completed the Grand Hunt quest and accepted the Savage Beastfly Wish from Bellhart. Until now, you will have already defeated the first Beastfly in the Chapel of the Beast and progressed into Act 2.
Savage Beastfly 2 Attack Patterns
Savage Beastfly 2 keeps most of its attacks from the first fight, but with fast movements and more aggression. These are all of his attacks and moves you need to take care of.
Vertical Slam
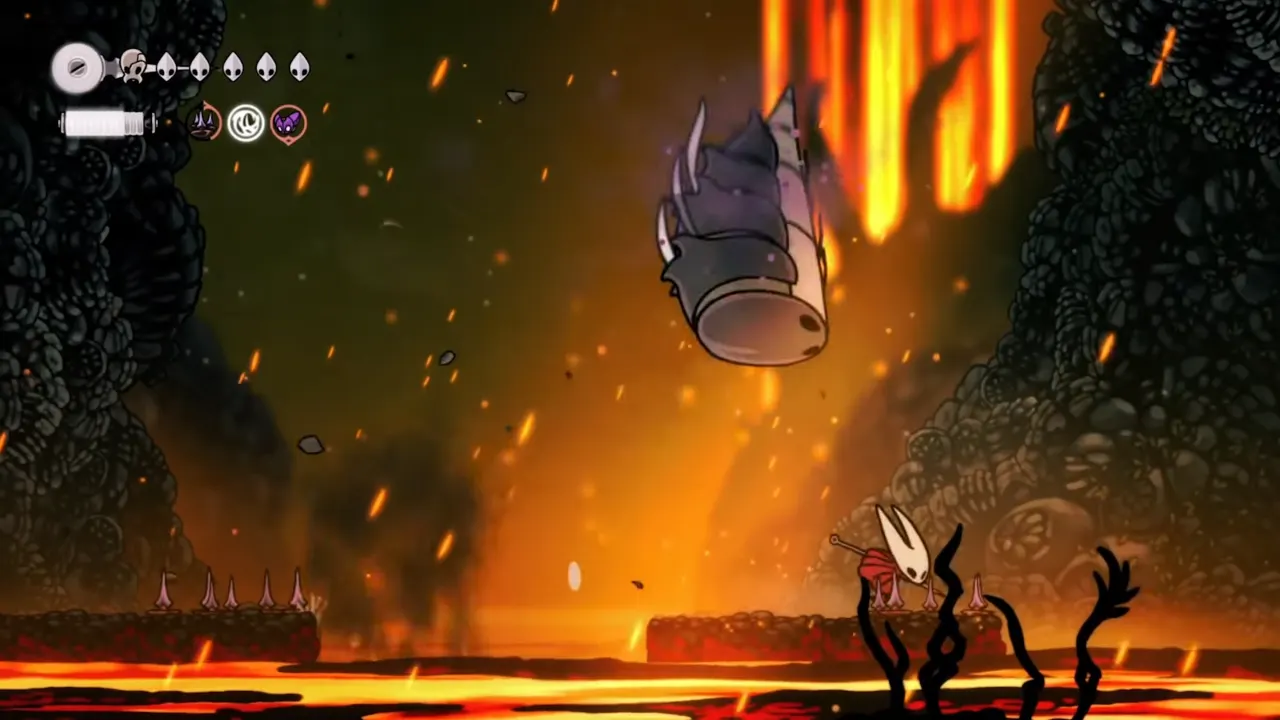
Beastfly goes into the air and performs straight drop attacks multiple times to try to hit Hornet with a force from the air. You don’t have to do much, be still, see where she is going to fall on the ground, and move away from its AoE. Then you can land a quick counter hit once her chain attack ends.
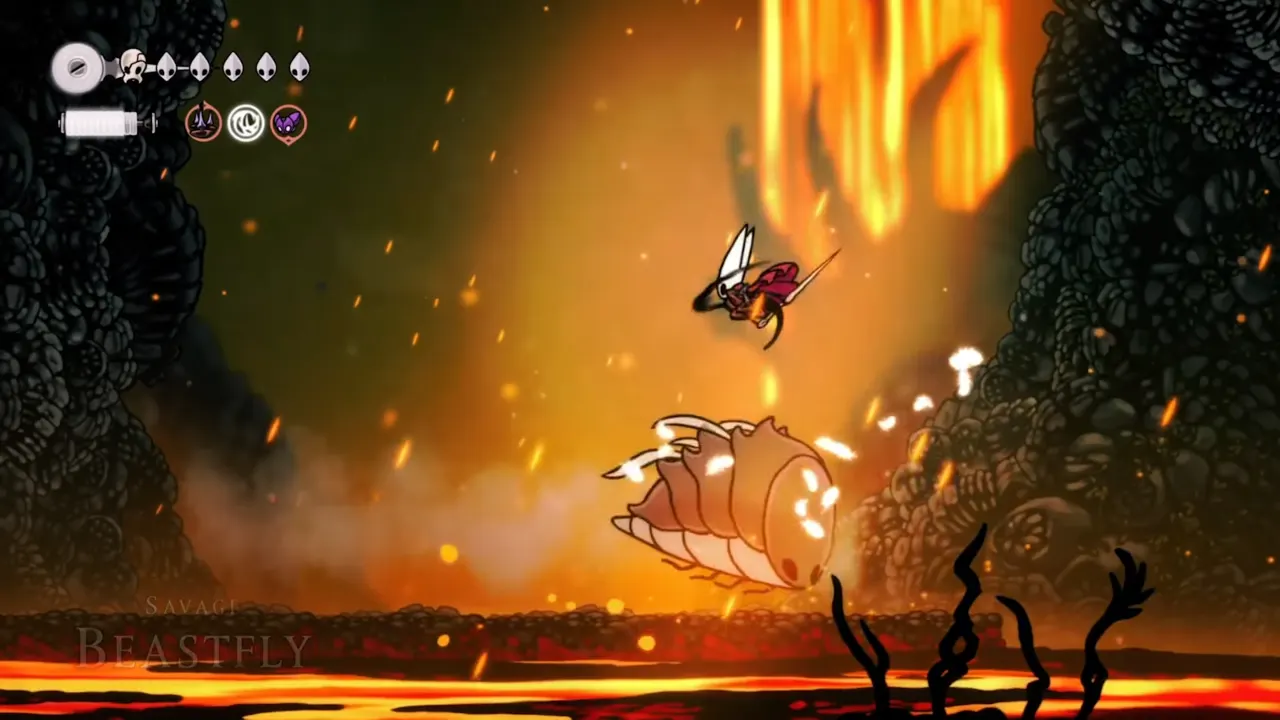
Dash Charge

Beastfly lines up on your height, pauses for a moment, then rockets across the screen. Stay grounded to bait it into a low charge, dash through or jump over it, then land a quick counter hit.
Summons
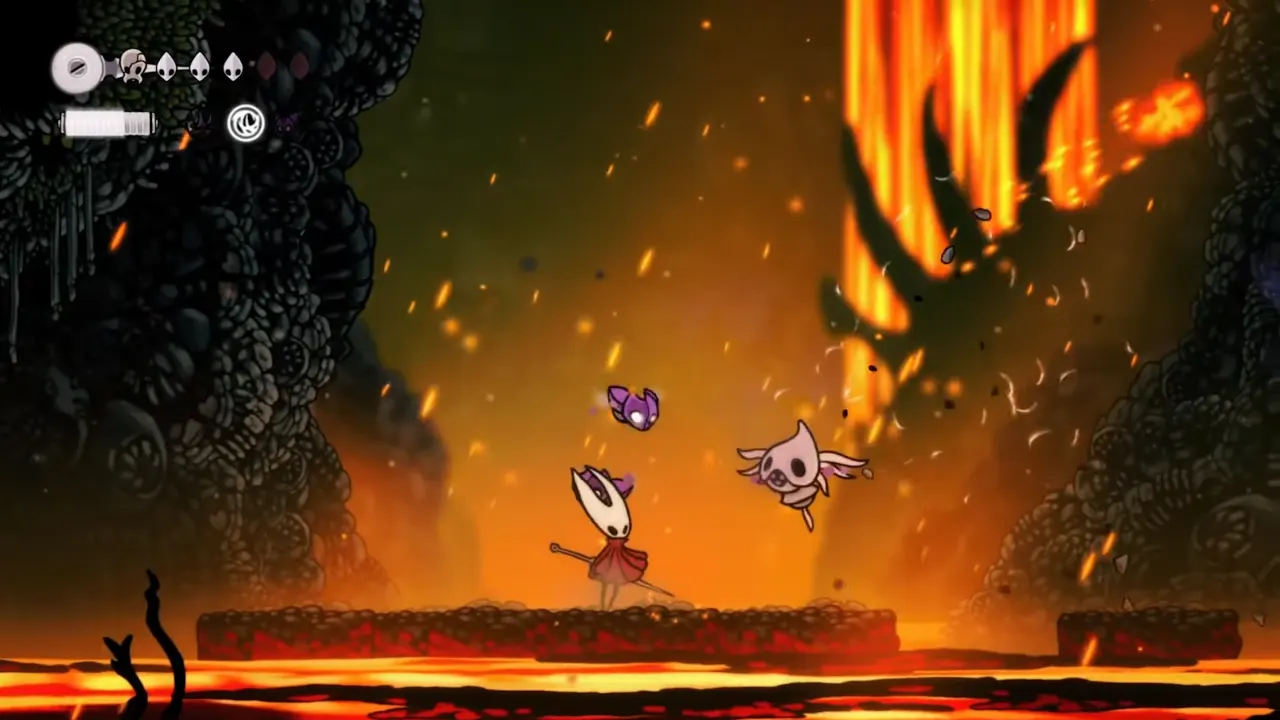
Beastfly spawns fiery drones like Kilik multiple times in fight that shoot magma shots, leaving lava puddles behind. These adds deal massive damage if ignored, so clear them immediately.
Aerial Combo
Occasionally, Beastfly will mix charges and slam into a quick aerial pattern, flying back and forth quickly. Just focus on dodging until it resets; attacking here is asking for trouble.
How to Beat Savage Beastfly 2 in Silksong
At the start, get in a couple of charged hits before it fully wakes up. Then settle down and move as little as possible. The less you dash, the easier it is to read its charges. When Beastfly lines up for a horizontal dash, hop, or dash through it and counter with one or two quick strikes. If it goes high, expect a vertical slam — sidestep the landing zone and punish when it recovers. Avoid pogoing unless necessary; it throws off the boss’s aim and can lead to awkward follow-ups.
When it dives into lava, watch for bubbling spots where it’ll resurface and instantly reposition. As you see, the platforms break a lot throughout the combat, so the Clawshot helps with quick escapes.
The boss summons the minions which can be a big threat, so kill them instantly. Use Threadstorm or Silk bombs if you have, or throwing knives to take them out from range. Each one spits magma that deals double damage — the projectile and the burning ground. If two spawn, move to the far side of the arena to avoid being pinned.
Equip the Magma Bell charm to halve lava and magma damage, and take a safe hit in lava instead of a fatal combo. Save silk for Threadstorm and emergency heals; your best healing window is right after Beastfly’s triple slam sequence.
If you manage to stagger Beastfly, pogo on its back to reach the upper arena and hit the two magma cores — it drops a boulder that kills the boss instantly. Otherwise, stay patient, handle adds first, and punish safely after charges. Survive the double-add phase, and the rest of the fight will be easy to defeat Savage Beastfly 2 in Hollow Knight: Silksong.


