


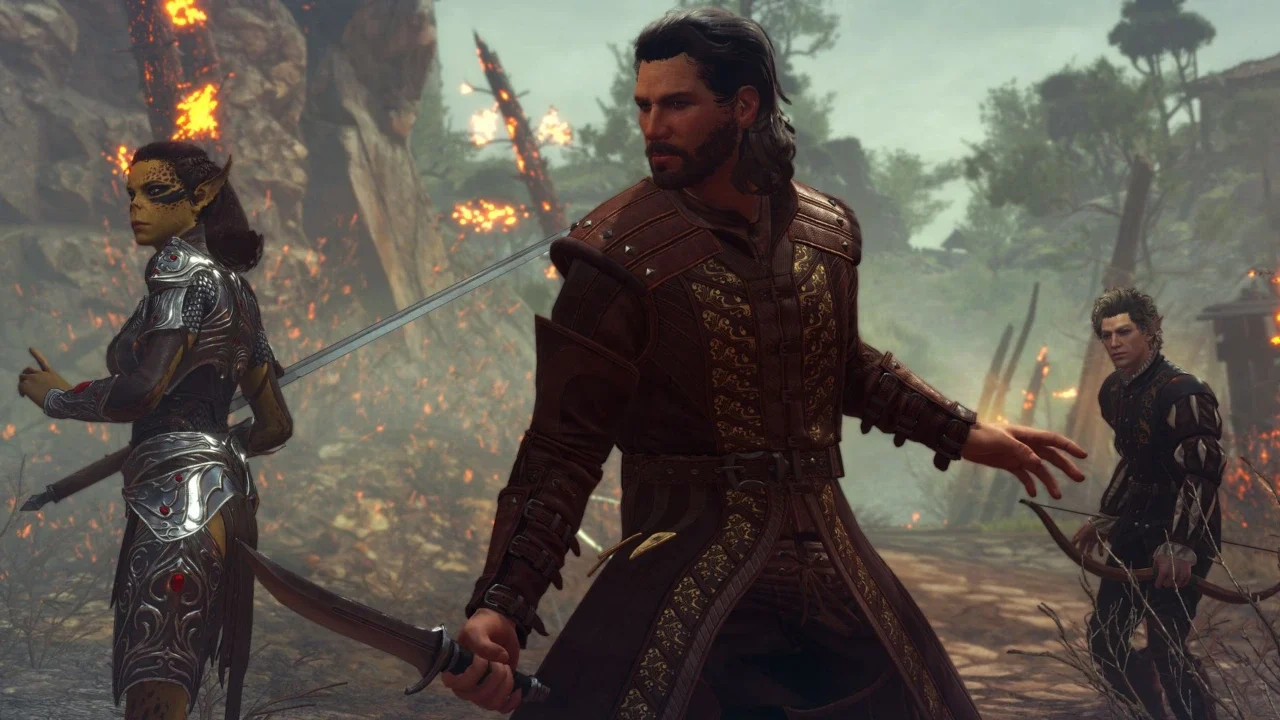
Baldur’s Gate 3 has a large number of endings based on how you played. Your choices carry weight here, and it’s the kind of game where you’ll probably want to finish it, then immediately start a second run to see how things change if you’re a jerk instead of a hero. Below, we’ve explained each ending and outlined the necessary actions to unlock them. We’ve also highlighted the most impactful choices throughout BG3 and their effects on the final outcome.
If this is your first time in BG3, close this page and just go play the game. Trust your gut and live with the consequences, even if they’re messy. You’ll have a better time if you aren’t trying to solve the narrative on your first go. But if you’re back for a specific outcome or want to know where the branching paths start, here’s the breakdown of the major Baldur’s Gate 3 endings and the specific decisions that trigger them.
What Happens to the Netherbrain in Baldur’s Gate 3
After you finally defeat the Netherbrain in Act Three’s climactic battle, you face the ultimate decision. The Netherstones give you control over this colossal threat, and what you do next decides which ending you’ll have.
Destroy the Brain – Good Ending
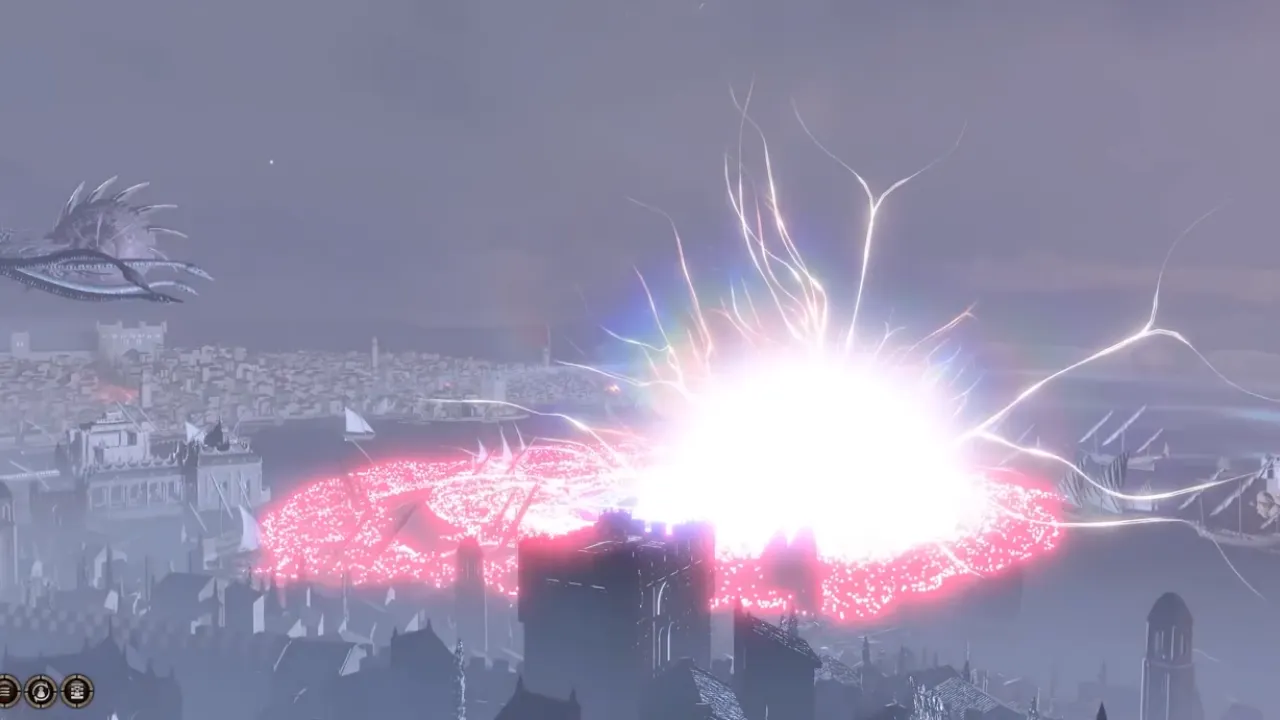
If you destroy the Netherbrain and all the tadpoles, you’ll get the heroic conclusion. The Crown of Karsus shatters and plummets into the River Chionthar, followed by the dying Elder Brain. When it hits the water, a massive wave of psionic energy erupts. Everyone experiences this death cry differently. If you have a tadpole, the pain will tear through your skull as it burns away. Half-illithid characters will feel their powers waning, combined with the burning sensation. Full mind flayers will get hit with overwhelming agony.
For Dark Urge players who resisted Bhaal, this moment means true freedom from the parasites and murderous compulsions. Regular characters can enjoy having their thoughts be entirely their own again. The camera cuts to your crew at the docks, probably after a swim to shore when the brain crashed down. This is where stories wrap up for each character, all based on what you did in the game.
Take Control of the Brain – Bad Ending
Dominating the Netherbrain instead of destroying it leads to some seriously dark outcomes. You can become the Absolute and either rule alongside the Emperor, claim power for yourself, or, as Dark Urge, seize control in Bhaal’s name.
Rule With the Emperor
If you kept the Emperor as your ally and convinced it to share power, things would go sideways fast. The Emperor takes its throne atop the brain with your enthralled party members cheering below. Back in Baldur’s Gate City, you’ll find yourself trapped. Try to kill the Emperor, and it will grow too powerful forces you to end your own life instead. If you agree to be his general, you’ll receive command of enthralled legions to conquer Faerûn and beyond.
Become Absolute and Rule Alone
You can choose to dominate the brain and sit on that throne yourself. Your companions cheer around you, though Vampire Ascendant Astarion and Minthara keep their free will somehow. Everyone else is completely under your control. When you descend to the citizens rounded up by mind flayers, you get some twisted options. If you’ve romanced Astarion or Minthara, you can share your rule with them or turn them into thralls like the rest.
Characters who gave in to the tadpole’s power but didn’t become illithid will now undergo ceremorphosis. You’ll need to pass a DC 25 Constitution check to resist the change. Fail that roll or choose to become a mind flayer willingly, and the illithid hivemind takes hold. It’ll push you toward the Grand Design with relentless force. If you miss another DC 25 Constitution check, you’ll be forcing ceremorphosis on citizens; that’s how new illithid empires begin. One failed save, then another, and you’re the architect of something terrible.
Domination Endings for Regular Characters
Assuming you avoided becoming a mind flayer or resisted the Grand Design’s pull, you’ll have some options for how to rule:
- Conquer Through War – Your enthralled citizens equip weapons and march off to conquer other worlds as your unstoppable army.
- Blissful Slavery – You trap citizens in an illusion of paradise while their bodies rebuild the city according to your vision, including erecting statues in your honor.
- Mass Execution – Simply kill everyone. You collar every living being, mind flayers included, and execute them all before lying down among the corpses.
- Chaos Unleashed – Turn the city into a warzone by compelling citizens to commit violent acts against each other, then walk through the wreckage while everyone else does the dirty work.
Origin Character Domination Paths
Unless they ended up as a mind flayer or decided to rule alongside the Emperor, every Origin character gets a unique ending that fits their specific story.
- Astarion – Sun King – Astarion thinks he’s meant to be a good ruler and draws the citizens to him in awe. Darkness creeps around the crowd as vampire-like creatures come out of nowhere. Astarion keeps up the act for a while, but then his instinct kicks in. Despite his delusions about being good, he chows down on someone who reaches out for help, showing his true colors as a vampire.
- Gale – Godslayer – The Netherese Orb no longer threatens Gale since it’s been sated by the Absolute’s power. He goes on a god-destroying rampage and opens a portal to the heavens. Beyond just asking people to cease their prayers, he enslaved the entire population, forcing them to destroy idols and tear down temples. He wants to starve the gods of their worship. It’s a bold opening move, but for Gale, it’s just the prelude. He won’t stop until he has wiped every single deity out of existence.
- Lae’zel – God-Regent – Lae’zel takes Vlaakith’s throne, and for that, she rallies her githyanki warriors and lets the mind flayers loose to cause enough chaos for a distraction. Then she calls in a red dragon, rides on its back, and opens a portal right into Vlaakith’s throne room. Since the lich queen’s defenses are tied up elsewhere, Lae’zel flies in and finishes it.
- Karlach – Hellfire Fury – Karlach gets angry with the people of Baldur’s Gate, blaming them for letting a tyrant like Gortash rule. To settle the score with the city that threw her away, she will open portals from Avernus, and this will lead to the streets crawling with devils. In the middle of the chaos, she reaches into her own chest and rips the Infernal Engine out of her ribcage. Any other time, she’d be dead, but the Absolute’s power keeps her alive.
- Shadowheart – New Faith – Shadowheart picks the new faith path, and things turn dark very fast. She rounds up everyone who follows Shar and Selûne, uses her enthralled citizens to kill them all, and chooses to start her own religion with herself being leader.
- Wyll – Forced Unity – Wyll turns every citizen into a mind flayer and plans to do this across the entire world because he thinks turning everyone into part of a hivemind will bring peace to the world.
Dark Urge: Claim for Bhaal
The Dark Urge can seize the Netherbrain in Bhaal’s name. If the Emperor holds the Netherstones, the Dark Urge kills it and takes control of the brain. Then comes the choice: slaughter your companions immediately or give them a head start before you take them down.
What follows is complete carnage. Blades tear through citizens and mind flayers as blood spreads across the city. Bodies pile up as the Elder Brain carries out the Urge’s commands, and the death toll climbs higher. Once the initial massacre ends, Bhaal sends a vision. The Dark Urge sees a blood-soaked environment that stretches endlessly with corpses everywhere, the future victims. Everyone in the world will die by the Urge’s hand.
Baldur’s Gate 3 Endings After the Brain Destruction
Once you’ve beaten the Netherbrain, you get to make a call to either use the Netherstones to order it to kill off its tadpoles and then self-destruct. With that, the crown shatters, the brain sinks into the Chionthar river, and then it detonates in a massive psionic blast. Next, the scene cuts to the docks, where everyone is on the shore, soaking wet, possibly crawled out of the harbor after the explosion.
The dialogue here is very reactive to how you played your cards. If you freed Wyll from Mizora’s contract, he’ll mention that his powers are fading. If you teamed up with the Emperor, Lae’zel or Astarion might show some gratitude, and you’ll get a moment to say your goodbyes to the flayer (or not). Astarion also has a specific line if you managed to finish the game without anyone in the group—minus the Emperor—turning into a mind flayer.
The sequence concludes with a dialogue prompt that changes based on who is left standing and the specific choices you made leading up to the pier.
Astarion and the Sunlight Problem
If you didn’t complete Astarion’s story by letting him become a Vampire Ascendant, he may become vulnerable to sunlight again, given the tadpoles are no more. He gets scorched and runs off-screen. This doesn’t prevent a romance cutscene with him later, but it will be the last time he can walk in daylight.
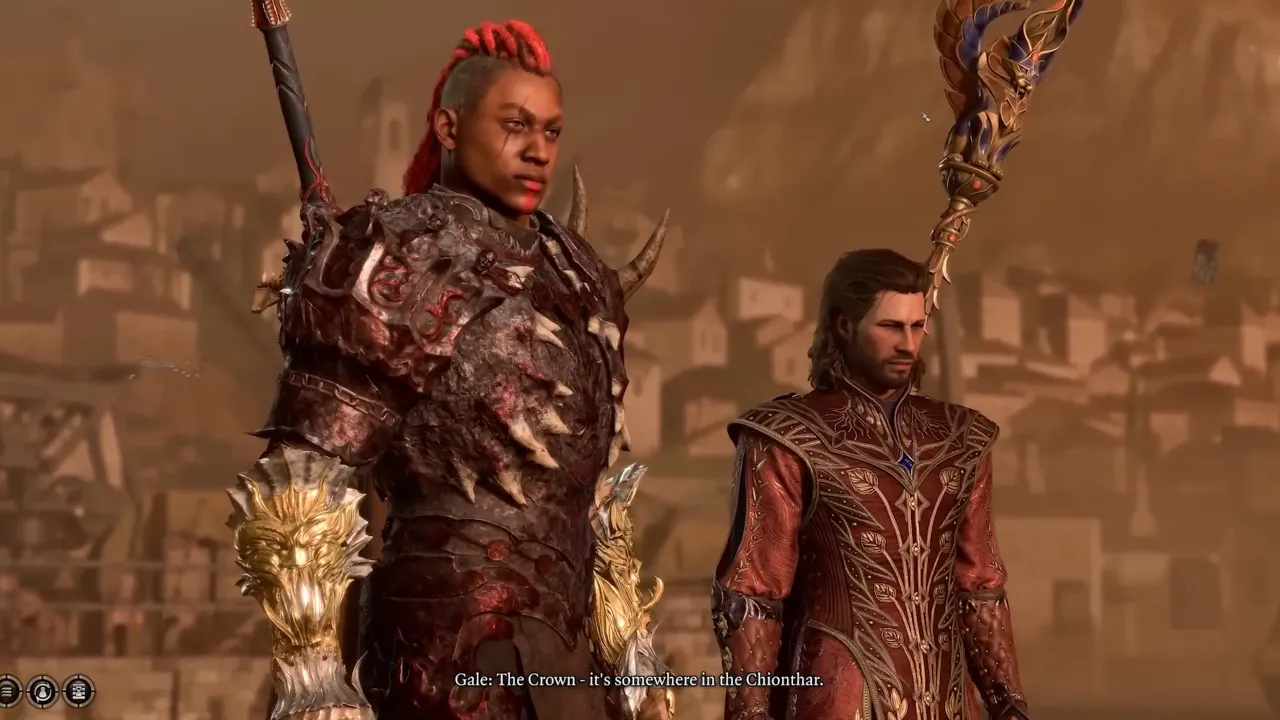
Gale and the Crown of Karsus
Gale knows the crown is at the bottom of the Chionthar. If he salvages the stones, he can retrieve and reforge the crown to claim the power of Karsus. But he’s confused about what happens next. You have one final chance to tell him how to handle it. You can suggest to him to hand the Crown over to Mystra, tell him to wear it himself and play god, or convince him to leave it in the river so nobody ever touches it again.
If your relation with Gale is maxed out at 100, you don’t have to pass any checks during this conversation. Gale trusts you enough to listen to what you say, whether you even romanced him or not.
Karlach’s Engine Crisis
Unless Karlach underwent ceremorphosis, her Infernal Engine gives out. You face a choice to let her die on the docks or convince her to return to Avernus.
Wyll offers to accompany her to the hells only if he becomes the Blade of Avernus during his companion quest. You can also go with her yourself, or both you and Wyll can join her. If you already died to avoid being a mind flayer or Bhaalspawn, Wyll will stay to comfort her while she dies, but he won’t take her back to the hells.
With maxed approval, she’ll agree to whatever you suggest without rolls. If Karlach returns to Avernus with companions, you will get a follow-up scene in which her engine stabilizes in the hells. She hands out cigars, and the group charges into a fight. It’s the best BG3 ending for her, assuming you can stomach her being stuck back in Zariel’s backyard.
Lae’zel’s Choices
Lae’zel has two main paths once the brain is dead, and both usually end with her leaving the party.
If you stay with the Emperor and don’t help Voss free Orpheus, Lae’zel stays loyal to Vlaakith. She’ll call for a red dragon and fly off to Tu’narath for her “ascension.” She is thrilled that she finally gets her own dragon, but the narrator frames it as an uncertain, likely grim fate. To keep her from leaving, you’ll have to pass a strong Persuasion check (might be as high as DC 30). Usually, Astarion or Jaheira will be the ones to prompt this conversation as the other dragons start flying away.
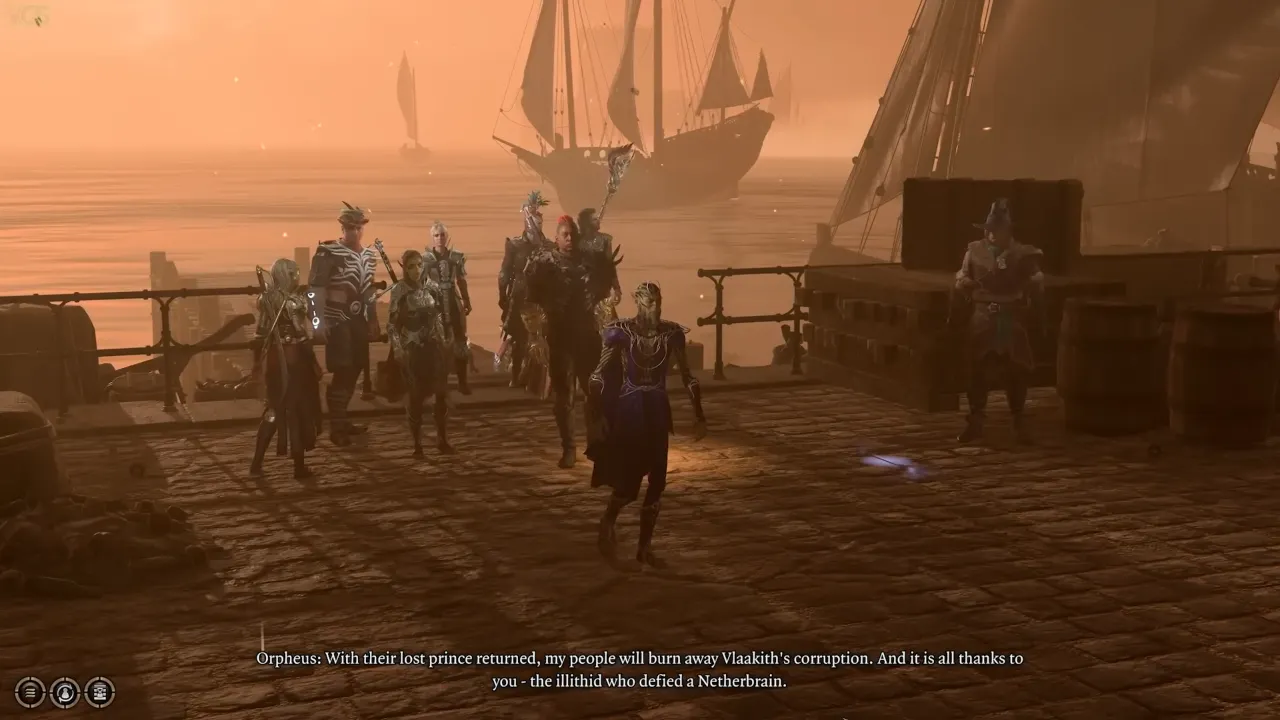
The other Lae’zel’s ending happens if you free Orpheus. As long as Orpheus survives the final battle as a Gith and doesn’t turn into a mind flayer, he’ll invite Lae’zel to lead the revolution against Vlaakith. If you’re playing a Githyanki, you’ll be invited too. Again, she is about to leave unless you talk her out of it with another difficult high DC Persuasion check.
Note: If your character turned into a mind flayer to win the war, Lae’zel won’t stay with you no matter what you roll. She is done with ghaik.
If Orpheus became the mind flayer, everything changes. Orpheus refuses to live as a ghaik and asks Lae’zel, your character, or both to continue his fight. He then requests someone kill him mercifully. If no one agrees, Orpheus commits suicide unless you convince him otherwise.
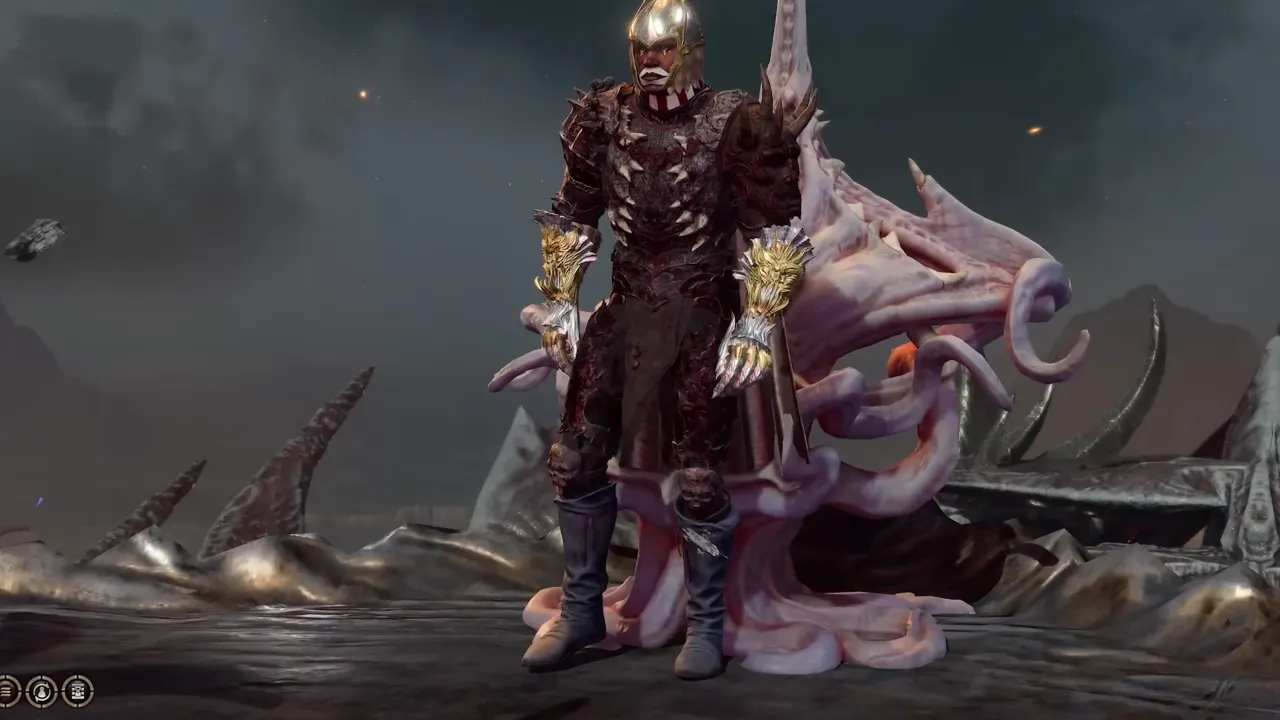
Mind Flayer Player Character
If you end the game as a Mind Flayer, you’re left with a grim choice: rot in a prison cell, end your life, or try to live with what you’ve become. If you pick the first two, your companions usually chime in, sometimes even try to talk you out of it, and give you one last warning to change your mind.
When you follow through with it, Withers will make a final visit. If you’re in a dungeon, he’ll find you there. If you killed yourself, he’ll meet you in the Fugue Plane. He is caught off guard and didn’t think a Mind Flayer could keep its soul, but apparently, yours survived. He gives you cryptic credit for the sacrifice and mentions that you aren’t done yet and will have your part to play in the future events.
The Emperor’s Departure
Once you’re no longer psychically linked, reading the Emperor becomes a guessing game. It was never easy to tell when he was lying, but now the wall is up for good.
He typically slips away as the party begins to wind down, sometimes when Gale proposes a celebration. He’ll decline to join the party, and a few companions react to it. Astarion has something to say, and Minsc (Stone Lord) definitely does. If someone gets sentimental, the Emperor likely says, “I’ll miss you too,” before he leaves.
Romance Conclusions – After the Docks Events
Each romanced companion gets a private scene with your character. These play out even if you became a mind flayer, though ceremorphosis affects the outcomes. Confirmed romance scenes exist for Astarion, Gale, Halsin, Karlach, Lae’zel, Minthara, Shadowheart, and Wyll. Halsin’s scene can trigger alongside another partner in polyamorous relationships. If you romance both Astarion and Halsin, both scenes will play.
Halsin won’t disappear once the Brain is dead. If you have completed Lift the Shadow Curse back in Act Two, he will return to Thaniel’s, now free from the curse lands, to set up a sanctuary for orphaned children from the Absolute war. For this ending, you must destroy the Brain—choosing to control it cancels this out, and the curse has to be broken. You don’t need to bring Halsin along for the final fight; as long as the quest is settled, he’ll be there at the end, overwhelmed (and soft-hearted) by the nine wagonloads of war orphans who have started calling him “Daddy Halsin.”
Shadowheart’s ending depends on choices in the Gauntlet of Shar, her Nightsong encounter, and the House of Grief. Spare the Nightsong and have her reject Shar for Selûne, then keep her parents alive at the House of Grief. She tells you she is building a home for them and wants you to stay with her. I know the game tempts you otherwise, but trust me on this.
Dark Urge Special Endings
The first unique ending happens when your character, as Dark Urge, rejects the Netherbrain but remains Bhaal’s Chosen. At the docks, you can choose to be imprisoned forever to keep the world safe from yourself. If you do, Withers arrives in your cell, pretty blunt about it that you didn’t break Bhaal’s hold over you. He warns that while history will probably forget who you were or what you did, he will record what you’ve done in the archives of fate anyway. Fast forward to the epilogue, your character escapes the cage and spies on Wither’s party.
Being Dark Urge, if you stab yourself to death on the docks to spite Bhaal, you’re gone for good. Withers meets you in the afterlife and gives you a pat on the back. You stopped the God of Murder’s plan and finally scrubbed his influence off your soul. You’re free, but also dead. Withers offers a clue that your journey isn’t over (even if your life is), but then the credits roll. You don’t get an epilogue because there’s nobody left to attend it.
Alternative Ending Before the Final Battle

You can completely skip Act Three’s final battle by having Gale detonate the Netherese Orb. This requires you to complete his companion quest, read tomes in the Sorcerous Sundries Vault, and speak with Mystra, who wants the Crown of Karsus.
When you reach the Netherbrain’s stem with Gale in your party, he suggests that he could destroy it completely using the orb. Accept his choice, and he will climb alone to detonate. Your group watches the explosion from the harbor in a scene similar to prematurely using the orb on Ketheric in Act Two. Gale’s romance scene can still trigger, even though he supposedly died, when other characters comment on his sacrifice, which might be a bug.
Early Game Over Screens
Certain conversation choices and failed combat conditions result in immediate Game Over screens that lack proper story resolutions and force a restart from a previous save.
Gather Your Allies
Who can come to your help for the final battle against the Netherbrain depends entirely on how many bridges you didn’t burn. The Gather Your Allies quest tracks all the characters who can offer buffs or can be summoned.
Your allies’ fates depend on completing specific quests and making necessary choices:
- Arabella gives all allies Freedom of Movement. Complete the Save Arabella quest in Act One, help her find her parents in the Shadow-Cursed Lands during Act 2, and then speak with her in the sewers or city streets in Act 3 once she has finished her training.
- Armored Owlbear and Dammon need you to recruit the Owlbear Cub in Act 1 and make sure Dammon stays alive through the Grove and the Last Light Inn during Dammon and Karlach’s Act Two quests. If he makes it to Act 3, he’ll plate the now-grown Owlbear in armor for the final fight. Summoning the bird can be glitchy during the brain fight.
- Vampire Ascendant Astarion brings a small army of undead, including some big skeletons, to the fight. Defeat Cazador and let Astarion complete the ascension ritual. It’s a huge power spike, though obviously the evil choice for his arc.
- Auntie Ethel gives a five-person invisibility buff. Believe it or not, the hag is a useful ally. To get her on your side, help her at the Riverside Teahouse early on and again during the Help the Hag Survivors quest in the city.
- Bhaal’s Blessing (Dark Urge only) requires you to fully lean into your heritage—impress the Murder Tribunal, take down Orin, and accept Bhaal’s gift. It grants a massive crit-rate buff and a Stunning Gaze ability.
- Counsellor Florrick provides a squad of Flaming Fist guards. You need to break her out of Wyrm’s Rock prison before she’s executed.
- Dame Aylin is probably the most powerful ally in the game. To get her, you have to save Isobel, spare Aylin in Gauntlet of Shar in the Shadowfell, and then help her beat Lorroakan at Sorcerous Sundries in Act 3.
- Duke Ravengard provides a temporary HP buff. Rescue him from the Iron Throne, either with Mizora’s help or on your own.
- The Gondians require you to save their families at the Iron Throne, get them out of the Foundry alive, and then keep them safe from the Iron Hand.
- Guild Allies summon two assassins into the fight. Take down the Zhentarim in Minsc’s battle, side with the Guild afterward, and see Stone Lord’s questline through to the end.
- Halsin/Thaniel grants allies extra movement and +1 to all Ability Scores through Spirit of the Land. Complete Halsin’s whole questline.
- Inspector Valeria summons three City Watch fighters. Solve the Open Hand Temple Murders, defeat the Murder Tribunal, and save Valeria from the sacrifice room.
- Isobel & Dame Aylin. Isobel is arguably the best healer in Baldur’s Gate 3, as it provides a massive 14d6 heal across 24 meters for six allies. Protect her at the Last Light Inn, kill Ketheric, and ensure Aylin survives the Shadowfell. If you sell Aylin out to Lorroakan later, you’ll lose both.
- The Ironhand Gnomes. You need their explosives. Rescue Wulbren from Moonrise in Act 2, then destroy the Steel Watch Foundry in Act 3. You’ll have to mediate the drama between Wulbren and Barcus, but as long as the Foundry is gone, you get the troops.
- Jaheira. Keep Jaheira alive through the Moonrise assault. Once you’re in the city, find the Harper hideout in Act Three and follow the quest to recruit Minsc. If you kill Stone Lord, Jaheira walks, and so do her Harper soldiers.
- Kith’rak Voss. This gets you a red dragon with devastating breath attacks. Side with him during the Rosymorn Monastery quest at the Mountain Pass, meet him at Sharess’ Caress in Act 3, and get your hands on the Orphic Hammer. You don’t have to use the hammer to free Orpheus to keep Voss; he only needs to know you have the means to do it.
- Lorroakan vs. Rolan. It’s one or the other because they both provide the same massive artillery strike from Sorcerous Sundries. Help Lorroakan capture the Nightsong, the evil route in which you lose Dame Aylin. Alternatively, keep Rolan (and his siblings) alive through Acts 1 and 2. In Act 3, kill Lorroakan and let Rolan take over the tower.
- Mol. She’s a powerhouse for crowd control and single-target damage, provides fire resistance, Charisma buffs, and Rays of Fire for everyone. Find her contract in the House of Hope and don’t tell her you’re the one who killed Raphael, or she might get cold feet.
- Miroza. To get her as a summonable ally, you have to play the long game. First, make sure to rescue her from the pod in Moonrise Towers during Act Two. In Act 3, she’ll appear with a specific proposal. Agree to it, and you get her on your side for the final stretch. She’s quite useful, mostly because she can cast Disintegrate and has decent AoE spells to clear out crowds.
- Shadowheart’s Sharrans (or Viconia DeVir). You get four mighty Sharran warriors. Choosing between them is a trade-off: either let Shadowheart go full Dark Justiciar by killing the Nightsong and her parents to take over the cult, or betray her entirely at the House of Grief to side with Viconia. You can’t have both.
- Strange Ox. It summons the Ox, which has 300 HP and can change forms. Just complete the Strange Ox quests in each Act to get it.
- The Gur. Save the kids from Cazador’s palace and bring them back to the Gur at the camp. They’ll send two melee fighters and a ranger to help you in the battle.
- The Zhentarim. Keep Rugan alive in Act One and don’t screw over the hideout. When you get to the Guildhall in Act Three, side with Roah Moonglow against Nine-Fingers Keene. Do that, and you get two Zhentarim assassins for the finale.
- Volo grants +2 to Ability Checks, Attack Rolls, and Saving Throws. Rescuing him from the goblin camp is just the start; you have to save him again from the mob outside the Steel Watch Foundry in Act Three. Once he’s safe, he grants a +2 buff to attack rolls and saving throws. You don’t need the eye surgery in Act One to get his help.
- Yurgir. When you face Raphael in the House of Hope, pass the persuasion check to talk Yurgir into switching sides. If you succeed, he’ll appear at the end to help you out.
- Zevlor. You can’t get this if you let the Grove die. Assuming they survived, find Zevlor trapped in a pod in the Mind Flayer Colony under Moonrise Towers. Break him out, and he’ll summon Hellrider Paladins (Tieflings) to the battle.
Your choice about Orpheus alters the possible endings in Baldur’s Gate 3. If you free Orpheus, the Emperor turns on you immediately and joins the Netherbrain instead. You’ll then fight the Emperor alongside everything else. But that’s not the worst part. Someone in your party must transform into a mind flayer. There’s no way around it if you want to stop the Absolute. Your choice here largely impacts character endings, particularly for Lae’zel and Karlach.
If you make a deal with Raphael for the Orphic Hammer, you will get an extra scene after Withers epilogue. Raphael will discuss plans to conquer other realms. You can skip this entirely by stealing the hammer from the House of Hope and killing Raphael instead.
After companion scenes conclude, Withers appears before a mural of the Dead Three—Bane, Bhaal, and Myrkul. He mocks them for thinking he wouldn’t notice their schemes. Turns out he has been working against these beings for a long time. What Withers actually is? Still a mystery.
Character Deaths and Missing Endings
Characters who die by dialogue choices or become permanently hostile won’t get ending scenes. Jaheira, Minsc, and Halsin mostly just offer random comments rather than dedicated conclusions, though Halsin does have his orphan sanctuary ending.
The sheer variety of endings makes Baldur’s Gate 3 worth playing multiple times. Change your party composition, pick different romances, and make new moral choices, and each playthrough feels different. Your decisions matter from Act One straight through to the end.


