


If you’re a Marathon player worth your salt, Pinwheel Base on Outpost is where it’s at. This central area has all sorts of high-tier loot and is a must visit place to complete the Parasitism 1 contract. While the base is heavily fortified, there are three ways to breach the perimeter and enter Pinwheel Base, depending on what you prefer or what you’ve on hand. Below, we have explained every way in which you can enter Pinwheel Base.
How to Get into Pinwheel Base in Marathon
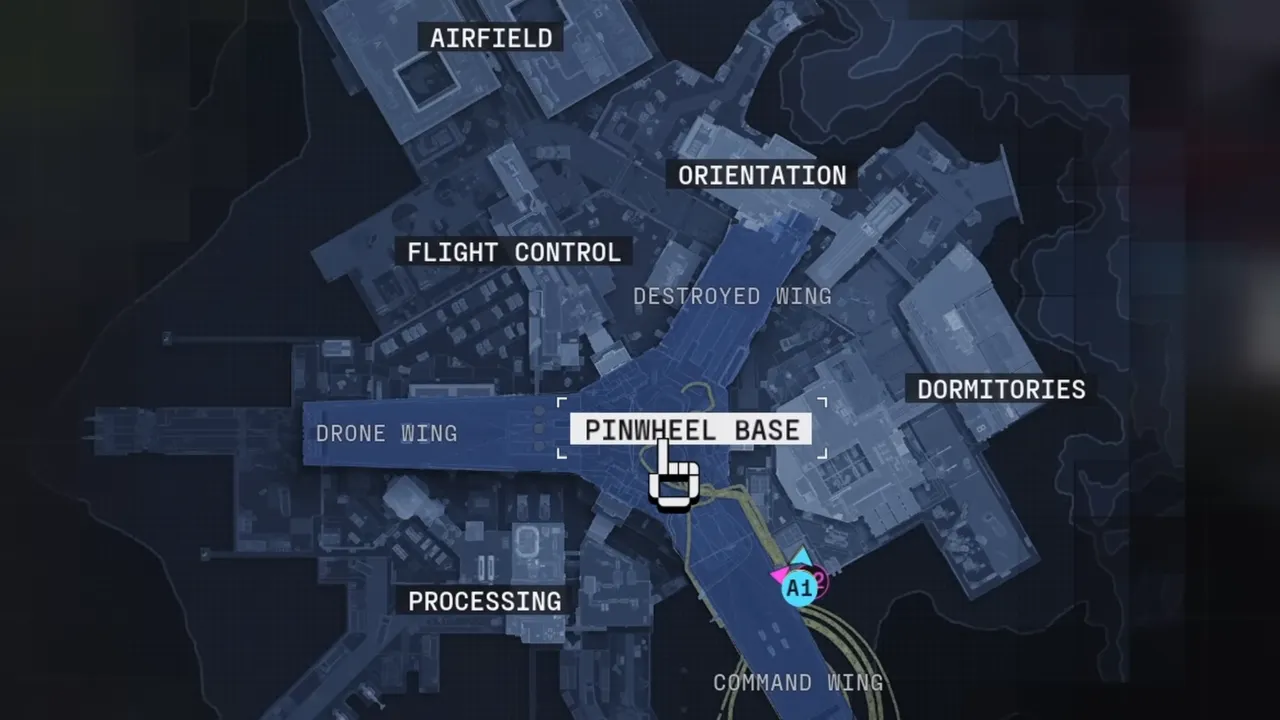
These are a few ways to unlock Pinwheel Base on Marathon’s Outpost:
- Use Clearance Codes at a terminal inside the Command Wing,
- Find a Conveyance Request keycard to summon a lift under the Drone Wing, or
- Destroy four generator boxes to drop the barrier on the Destroyed Wing.

Through Command Wing Using Supply Clearance Codes
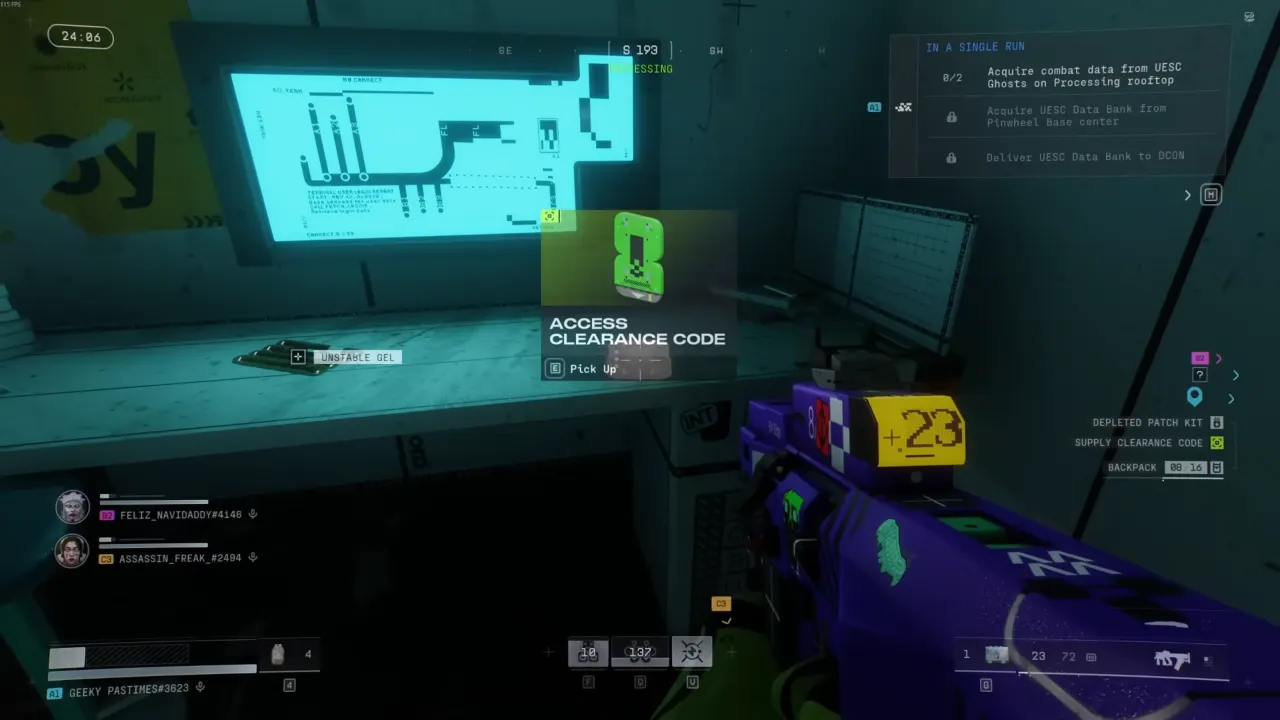
The terminal at the Command Wing entry accepts color-coded Clearance Codes, and the colors it demands change each run between green, yellow/orange, and red. You’ll need to check the terminal first to see what’s required before you hunt them down. Here’s how to acquire color codes:
- Green Codes spawn as loose loot around the map on desks, tabletops, and inside buildings. Completely random placement, but Processing tends to be a good spot.
- Yellow/Orange Codes can be found in white box machines throughout Outpost, usually in lab areas or processing hubs. Approach the machine, activate it, and wait for it to produce the card.
- Red Codes are available on rooftops. Find a machine very similar to a UAV scanner, interact with it, wait a few seconds, and it will eject the code. Be wary of lightning strikes on the roofs. They can cover large areas, so back off as soon as you see one coming.
You might need two codes in one run, often even two of the same color. So pick two green, one yellow, and one red for enough coverage regardless of what the terminal demands.
Move through Flight Control, Processing, or Dormitories toward the interior of the base. You can hack the door panel to get into Dormitories or climb through the windows. Expect UESC resistance as you move further, and make sure to have strong weapons and shields to survive the corridor.
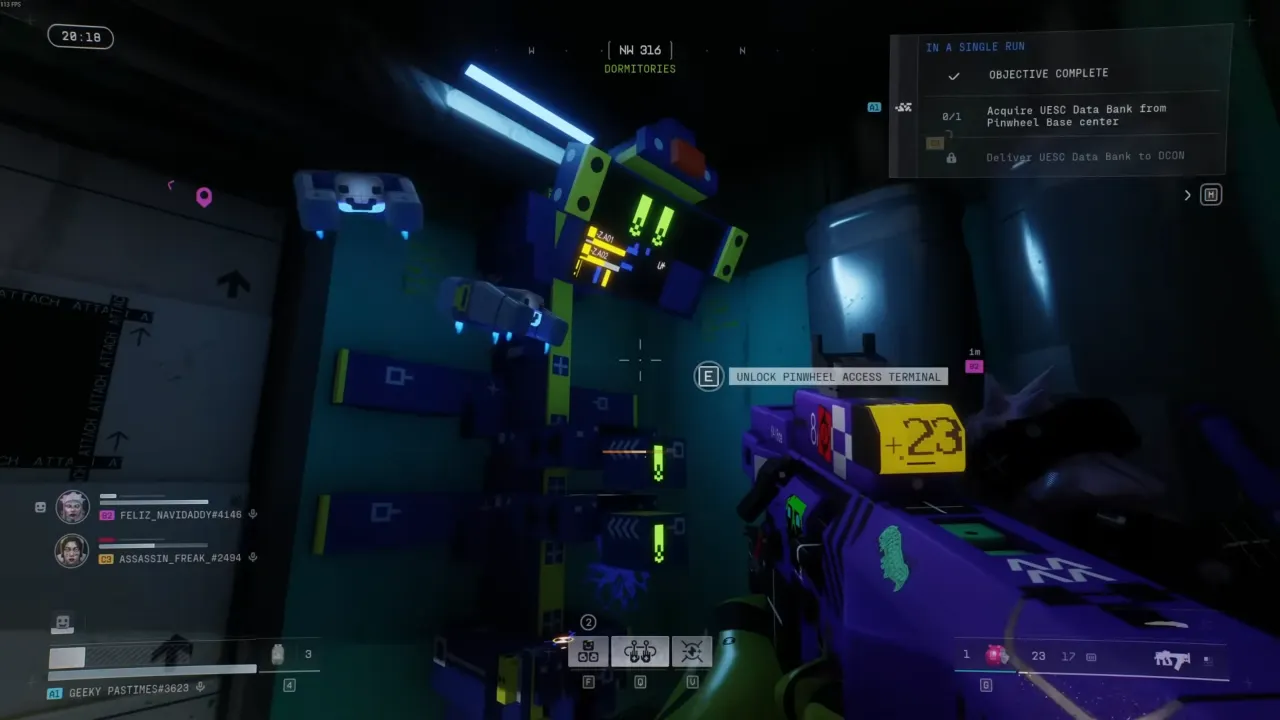
Interact with the Pinwheel Access terminal near the locked door and submit the Clearance Codes. The bulkhead will slowly fold open.
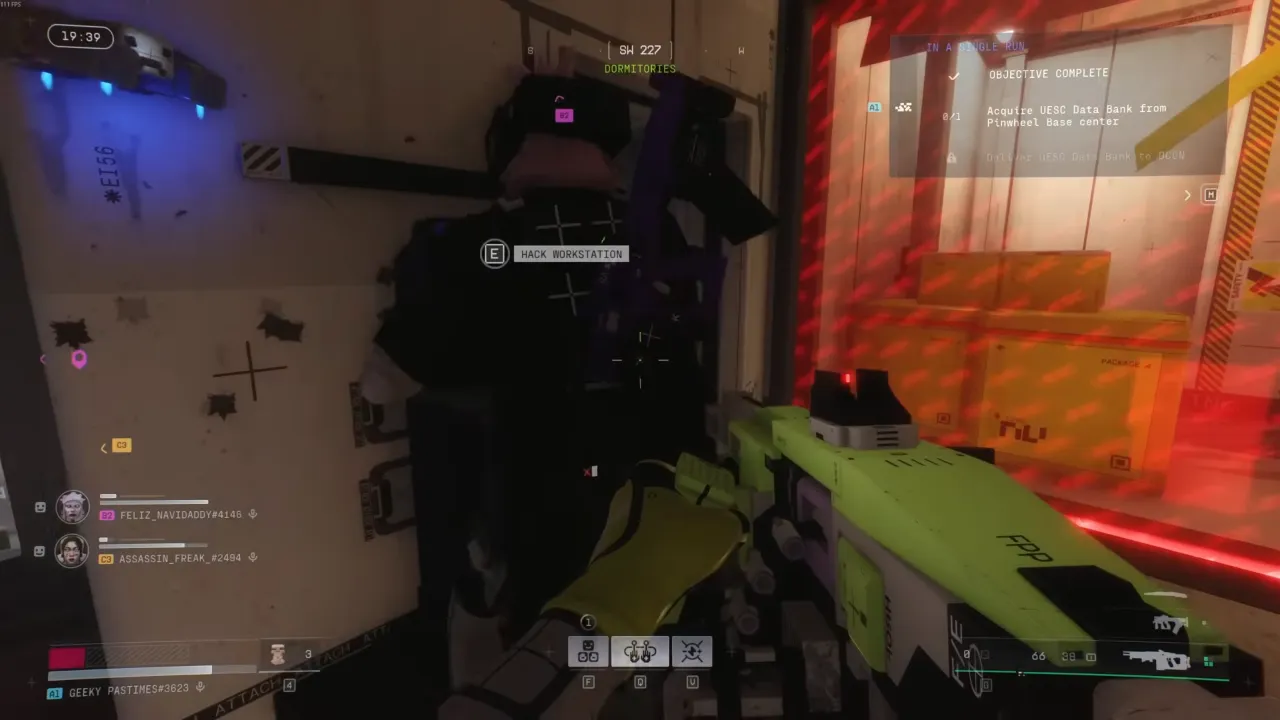
Kill UESCs and, at the far left end of the corridor, interact with the workstation to hack it. A yellow progress bar above it will track the hack that will take around a minute to complete, and UESC waves will keep attacking the whole time.
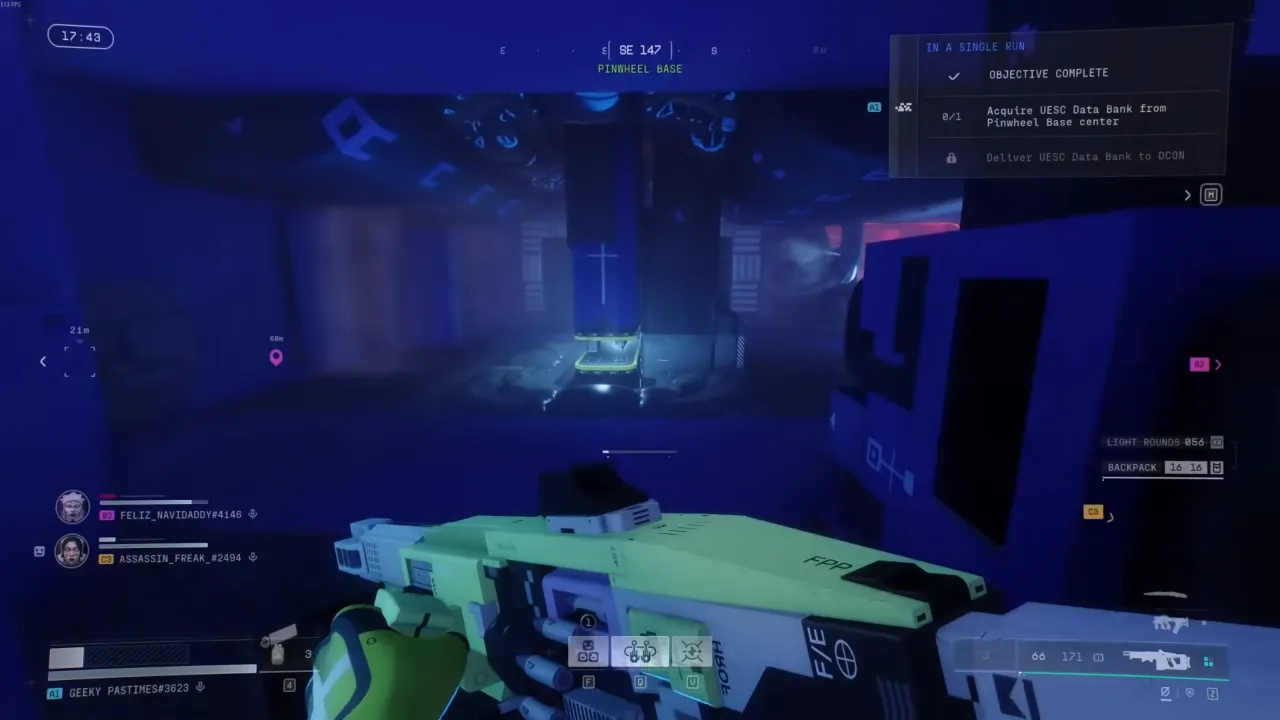
When the hack completes, a server-wide notification will broadcast telling every player on the map that Pinwheel Base has been breached and exactly where you broke in from. Expect company. Once the barrier drops, take the elevator up into Pinwheel Base. The layout inside is a bit maze-like, but the main loot and objective items are in the central white room.
Through the Elevator in the Drone Wing
Find a Conveyance Request keycard, most commonly found around Processing, though spawns aren’t fixed. Take the card to the area beneath the Drone Wing to summon a drone crane on an elevator that will lift you directly into the base without needing to play with bulkhead terminals.


Enter from the Destroyed Wing
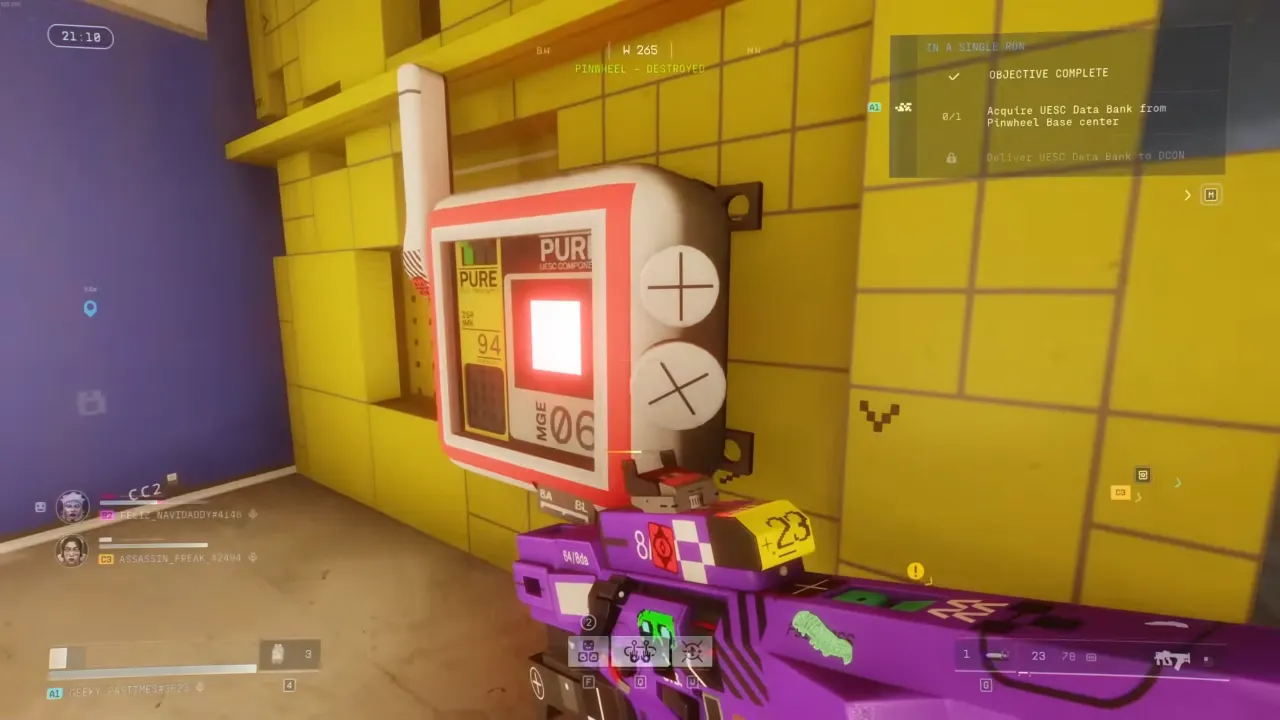
For players who prefer a more manual entry, head to the roof of Orientation and climb the scaffolding of the Destroyed Wing. You’ll encounter a door sealed by a red energy barrier with four lights above it.
To drop this shield, you have to find and destroy four white junction boxes with red light inside, hidden around the wing’s exterior. They are often tucked under ledges or on the sides of the structure. Shoot all four to kill the lights, and the barrier will vanish, giving you a clear path into the center of Pinwheel.
What’s Inside Pinwheel Base
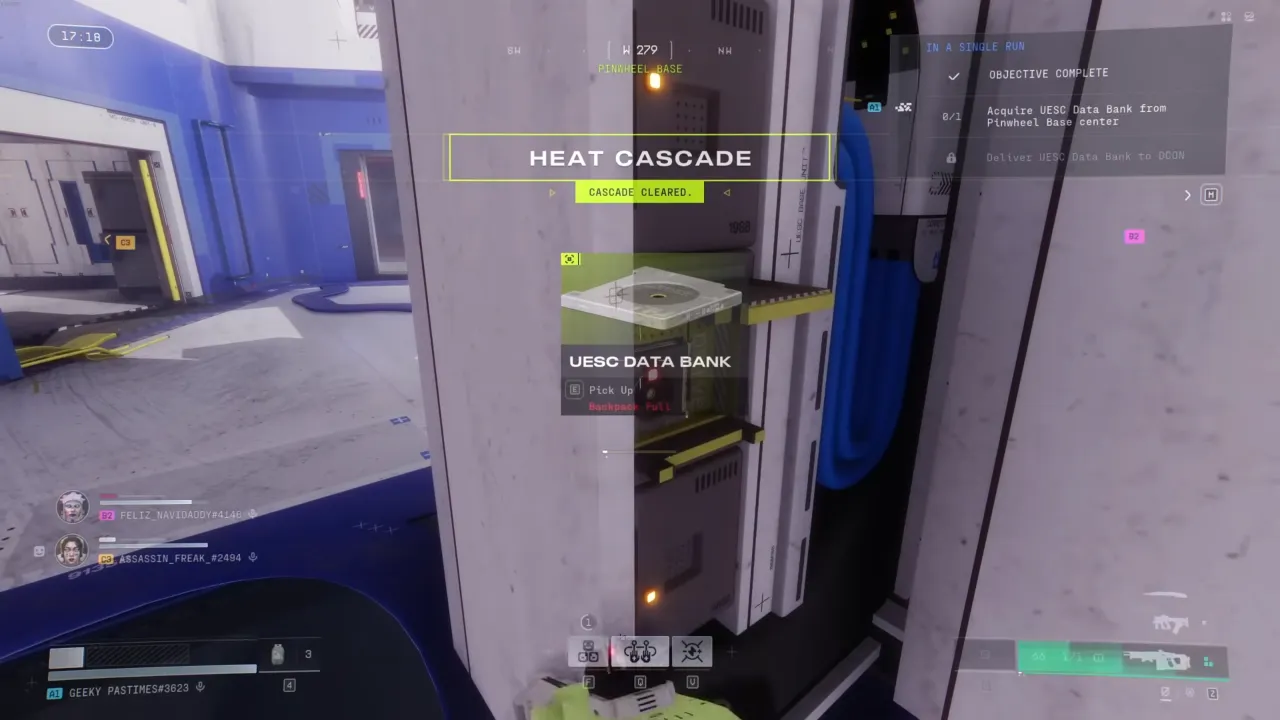
At the base, you’ll find trunks, weapon containers, valuables, and a guaranteed purple item on the chair in one of the side rooms. For Parasitism 1, the UESC Data Bank you need is in the central room; look for a server rack you can interact with to eject it. After that, get to a DCON on the same run to deposit it, because the entire mission will reset if you die before delivering. Elevators are available in both directions to escape, and you can go to the nearest DCON without backtracking through the entire entry route.


