


Sniping has always been one of Battlefield’s most satisfying roles, and Battlefield 6 takes that precision to the next level with its big maps and long sightlines. But even the best Recon marksmen miss the sniper shot 350 meters away when they misjudge distance. That’s where the Range Finder comes into play to zero in on targets and line up long-range hits. Here’s exactly how the Range Finder works and how to use it to hit the clean headshots long away.
Battlefield 6 Range Finder Explained
Range Finder is an attachment built for sniper rifles and DMRs. When equipped, it measures the exact distance to wherever your crosshair is pointed and calibrates (or “zeroes”) your weapon’s scope to that range. With it, you don’t have to manually compensate for bullet drop. The bullet lands right at the crosshair pointer unless calibrated correctly.
It’s not aim assist type or anything close to an aimbot but a smart game feature. This feature makes long-range sniping far more precise, especially on the bigger Conquest maps where engagements can easily stretch over 300 meters.
How to Unlock and Use the Range Finder in Battlefield 6
Range Finder unlocks at Rank 4 Mastery for specific rifles including the M2010 ESR for snipers or the M39 EMR for DMR users. It’s found under the Right Accessory slot in your weapon customization screen and costs 10 Attachment Points to equip. Once unlocked, make sure you have a magnified optic attached; the Range Finder won’t work with red dot, holographic sight, or small scopes.
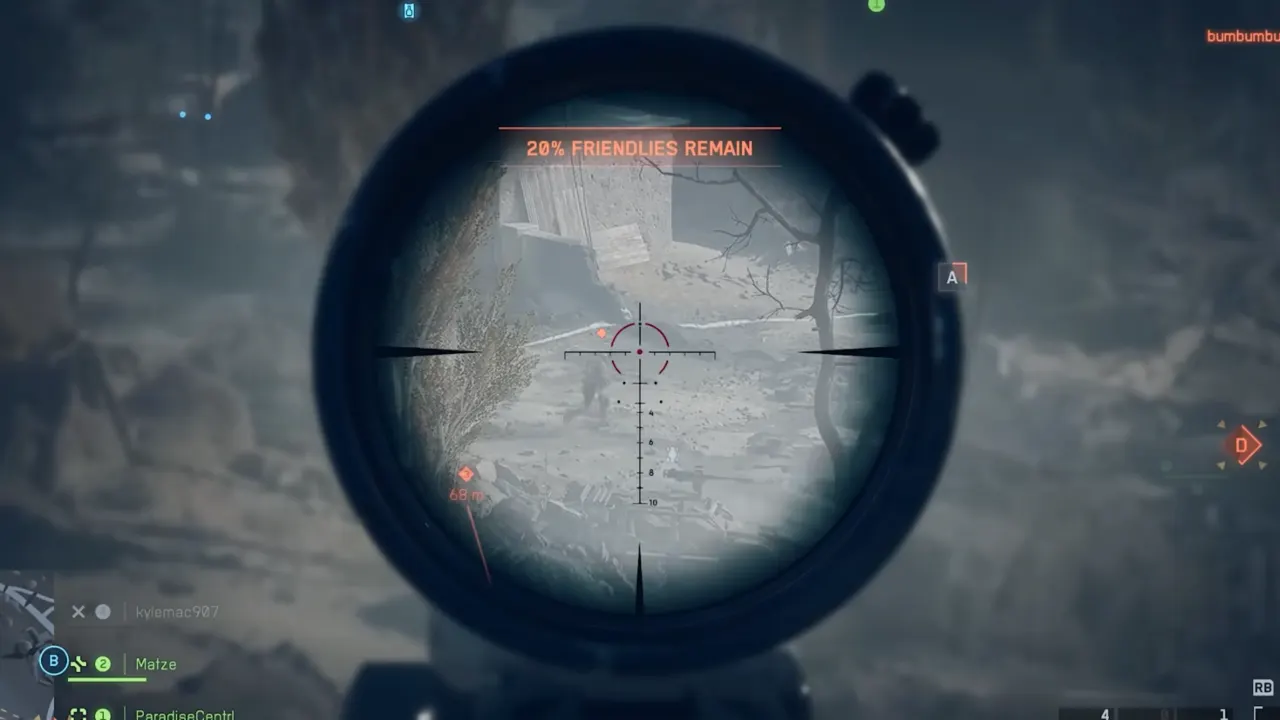
To use the Battlefield 6 Range Finder, hold B on PC and hold Down on the D-Pad on console. While scoped in, it will scan what your reticle is aimed at and auto zero in the scope. You’ll see the distance (in meters) in small white text on the HUD just above the ammo, which tells your rifle’s current zeroing range. Sniping isn’t possible under 100m zeroing, but you can increase it in 100m steps all the way up to 500m.
If you’ve changed your keybinds, double-check your settings because custom controls break the Range Finder input until they are remapped.
When and Why to Use It
Range Finder is good to use on open maps with long sightlines, places where bullet drop becomes a factor. It’s very useful for Recon class as they hold overwatch positions or deal with moving targets at range. The quick zeroing saves you from guess holdover, and the adjustment happens fast enough to make follow-up shots easier.
That said, it does cost you 10 attachment points. If you’re already confident with manual zeroing or prefer to stack other performance mods, you can skip it but for new or mid-level snipers, it’s one of the most valuable attachments early on.
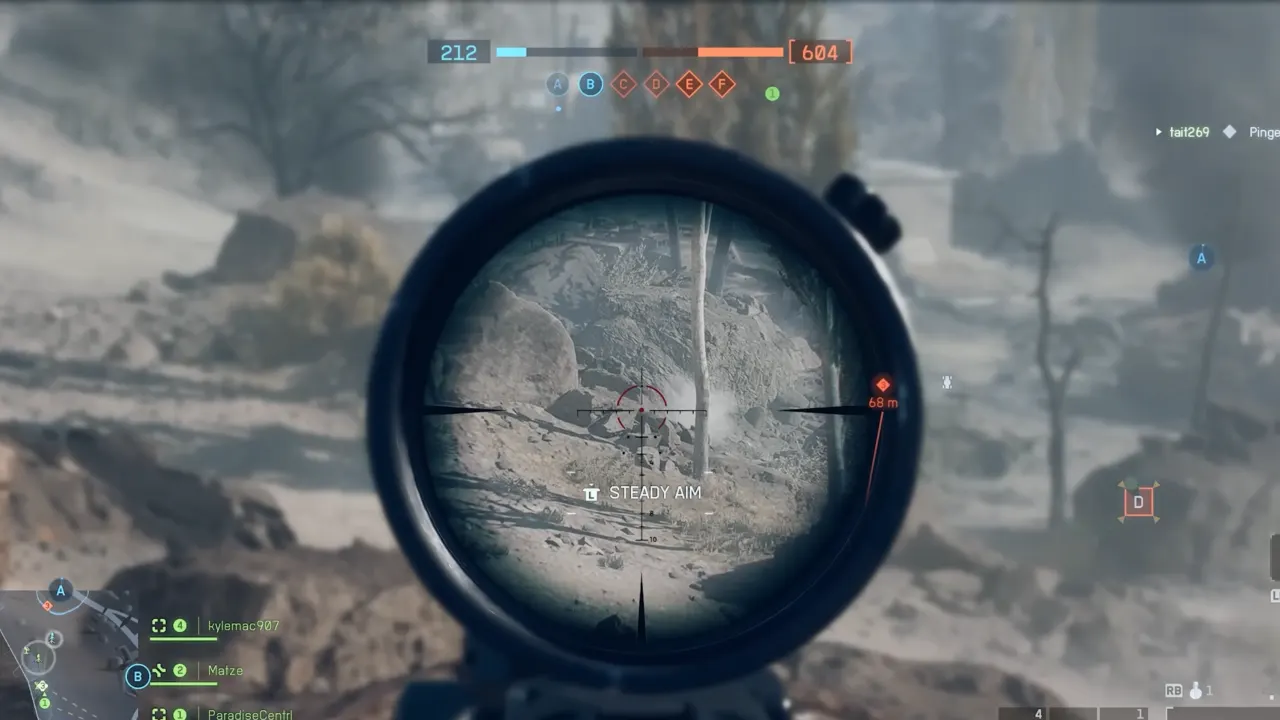
If you haven’t unlocked it yet, you can instead use the ping system to mark aim spot; the ping will show the distance in meters. Then press B (PC) or Down on D-Pad to adjust your rifle’s zeroing by 100m steps until it matches the pinged range. It’s slow and less exact than the Range Finder’s automatic calibration, but it gets the job done without a single Attachment Point cost.


