


Where Winds Meet opens with sweeping vistas and a short tutorial, but the first decision you have to make is customizing the character you will stare at for the next hundred hours. The character creator is one of the exciting and detailed systems in modern action RPGs, and hidden inside it in Where Winds Meet is Smart Customization—an AI-driven feature that can build a face from your voice or a photo.
This guide explains everything you need to know about character creation in Where Winds Meet, how Smart Customization works, how to prepare photos and recordings without facing errors, and how you can redo everything later if the first attempt isn’t as expected.
Where Winds Meet Character Creation Guide
The character creator loads as soon as you begin a new save, and the first step is to choose the gender you want in-game: Male or Female. Your gender affects which preset styles and cosmetics will appear later, so pick the one you prefer.
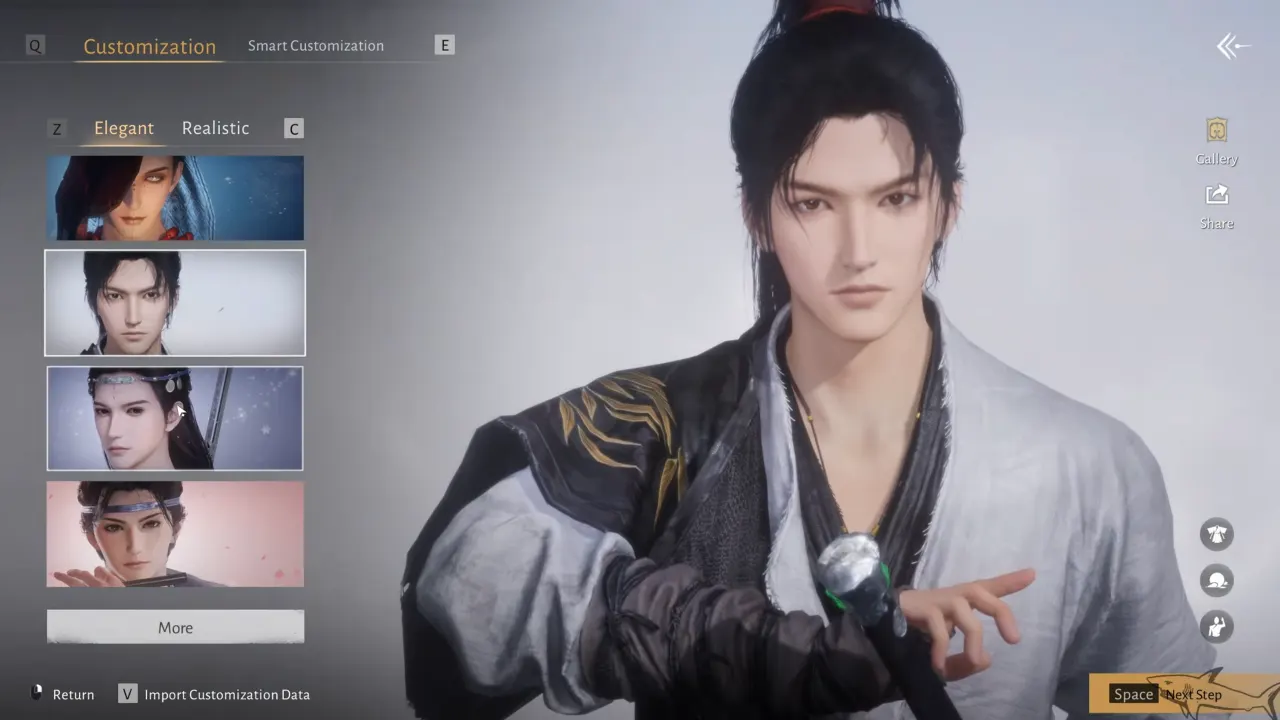
Next, the game asks to choose between two built-in presets: Elegant (polished, graceful features) and Realistic (grounded, natural faces). Both presets have multiple bases, meant to get you close to a vibe before you move to sculpting. If you would rather skip sculpting, preset selection is enough to start the game and secure the name you want, since names in multiplayer titles are unique and taken fast by others.
How to Sculpt the Face
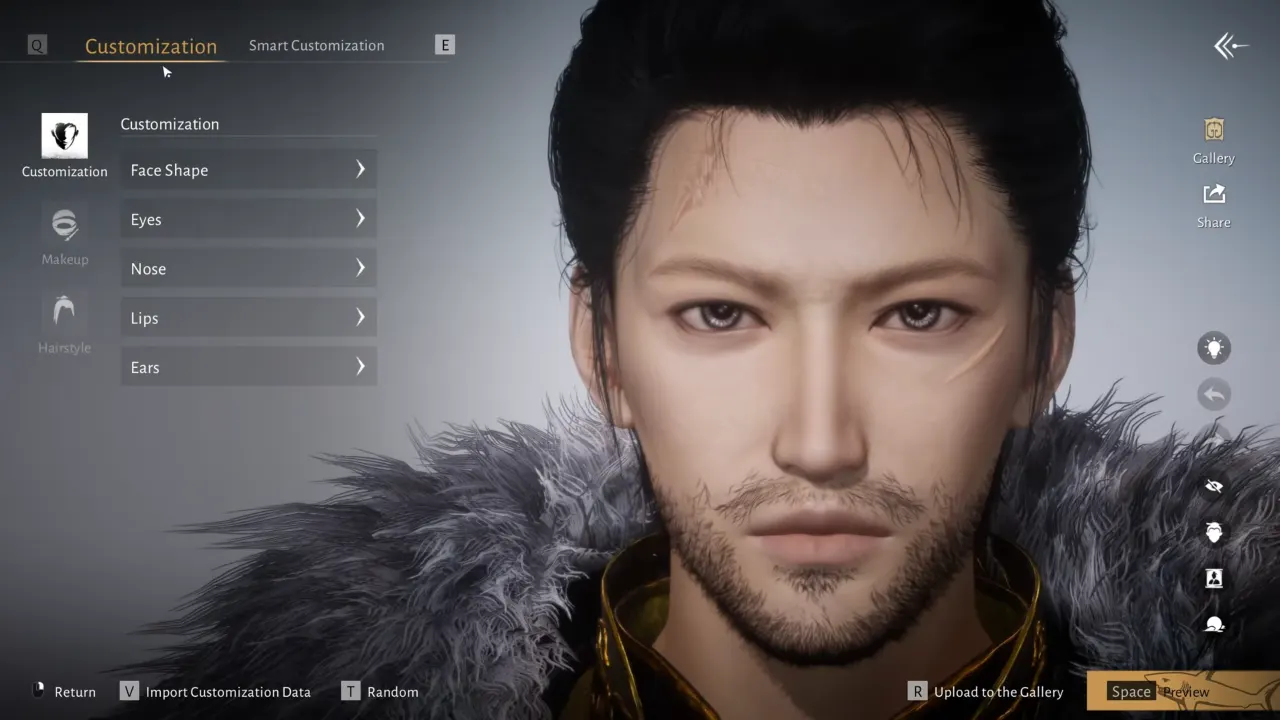
To sculpt the face manually, go to the Customization tab to find relevant options. Where Winds Meet gives you far more anatomical sliders than action RPGs usually bother. Beyond the usual “eye size” and “jaw width,” the editor offers small landmark custom options such as the glabella, philtrum, brow arches, cheekbone tilt, and jawline contour.
Every important facial category—eyes, brows, nose, and lips—has its own submenu with shape, angle, width, and symmetry options. Skin tones, perceived age, and overall face shape create the starter appearance, which you can tweak further as you like. Once the face is enough customized that the character resembles a person you’d love to play, move on to the style part.
How to Change Makeup, Hairstyle, and Other Appearance
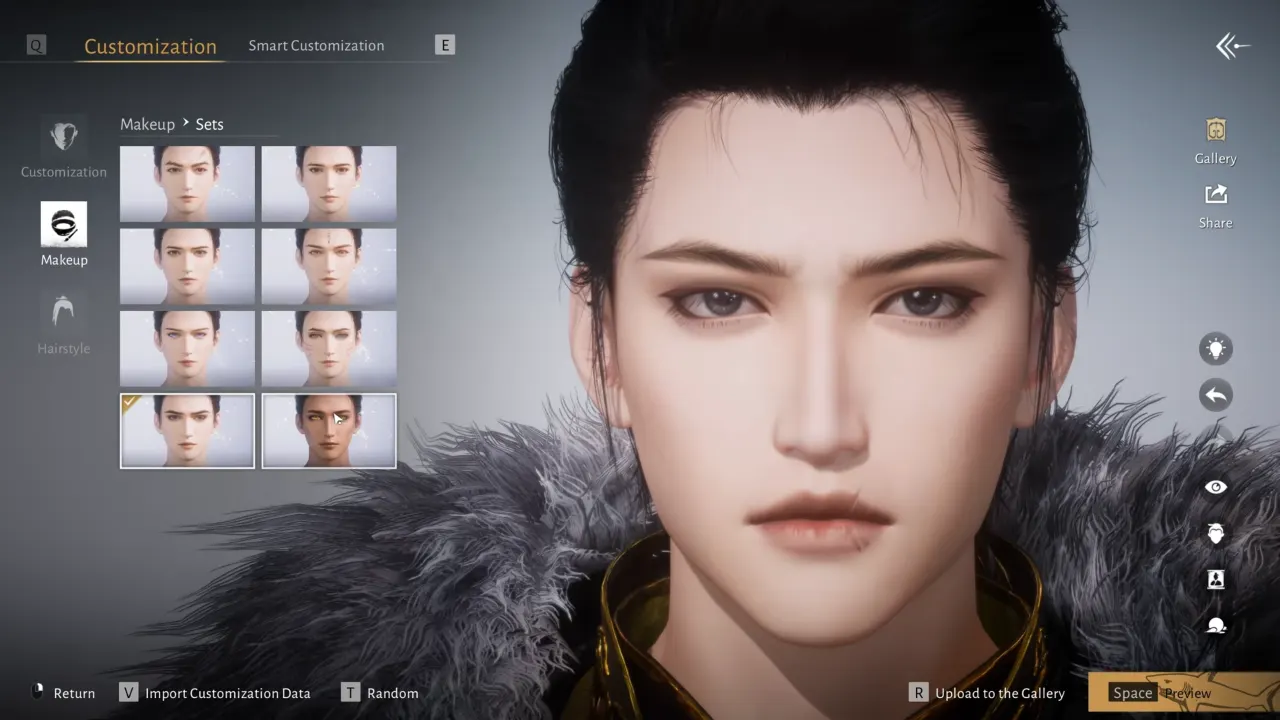
After face, the next one is the Makeup tab, including face patterns, shadows, detail paint, and accessories. This part is only cosmetic, optional, and doesn’t affect gameplay; players mostly use it to match character appearance with outfits. However, the makeup part is occasionally buggy—some devices don’t display it correctly until you create an outfit preset in the Bag and reapply the changes.
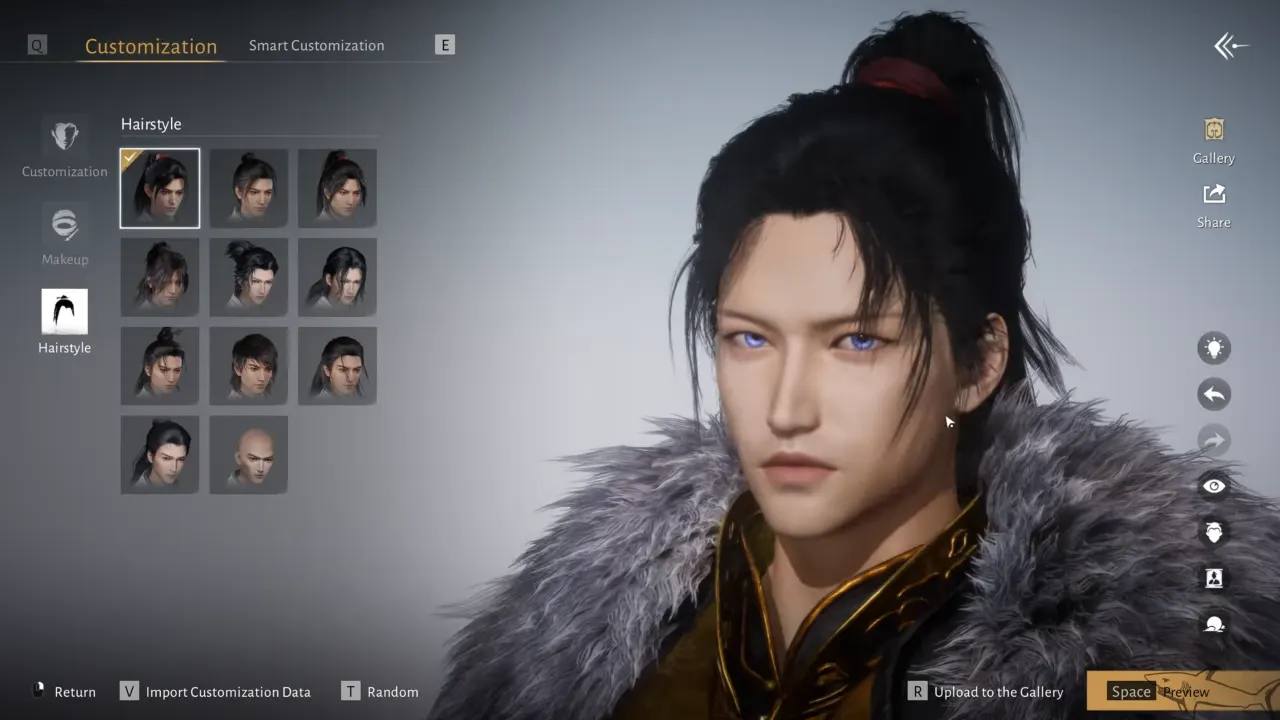
The third and last section in Customization is the Hairstyles tab. The character creator only has a small selection of base hairstyles and limited color options. You’ll unlock more hairstyle options later through the in-game shop, and once your home becomes available in the story, the inside mirror lets you try two free hairstyles every day. These mirror styles are temporary previews, and a good way to test different looks before you buy anything.
How to Use Smart Customization in Where Winds Meet
In character creation, you can find the Smart Customization menu next to the Customization tab, which offers two AI-driven settings: image import or voice recording. You can use either to generate a custom preset according to the provided input, which lets you skip face sculpting from scratch, and it also doesn’t override manual editing.
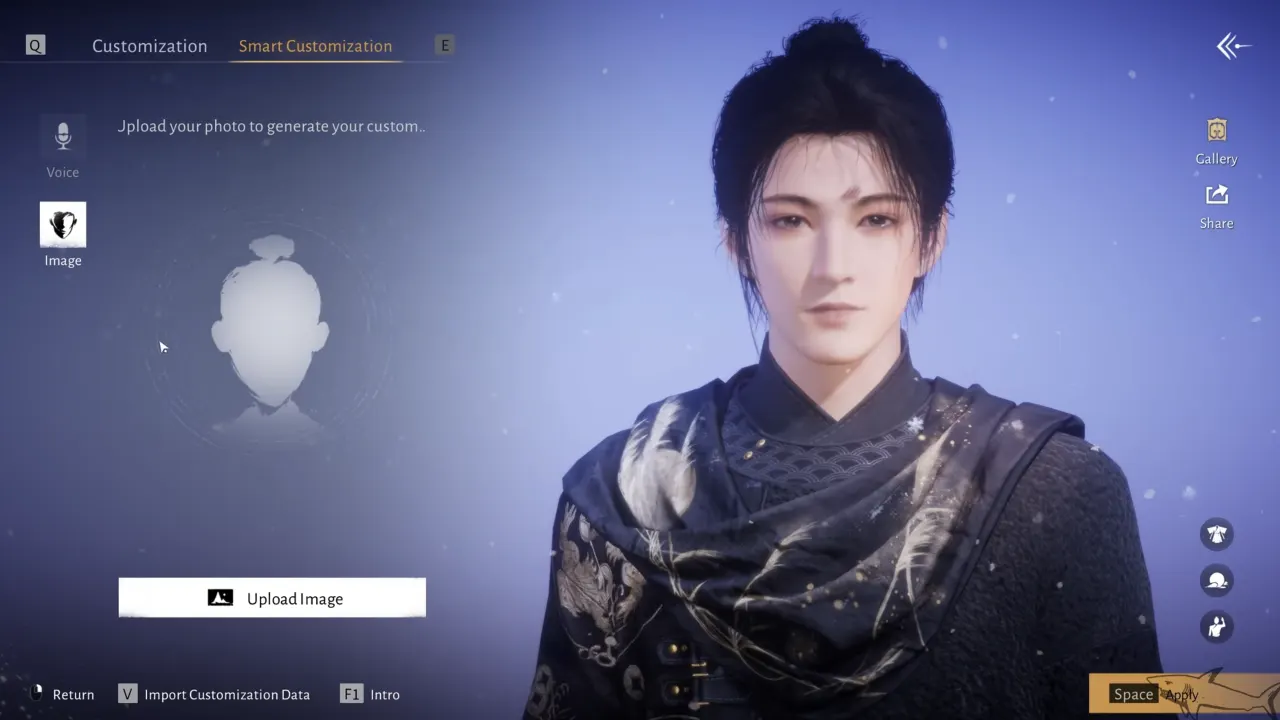
The image generator analyzes facial structure and applies the result to a preset. It produces a very close rough model that only needs minor changes from your end. To use the Smart Customization image feature, select a body type, go to the Smart Customization tab, select Image, upload a photo from your device, and allow the permission when prompted to access the gallery.
However, Where Winds Meet is strict about what image types it accepts, so most photos get rejected with the message ‘image doesn’t meet the requirements’ until you follow a few image selection factors:
- Use a close-up image of a face only, with no glasses, hats, masks, or hair covering the face, and also avoid jewelry.
- Keep the lighting even and avoid shadows.
- Use a normal-quality photo—extremely high-resolution images fail to upload.
It might take a few attempts if the image doesn’t match the criteria, but the game will eventually accept a clean portrait. Once processed, the new model loads as a new preset you can customize freely.
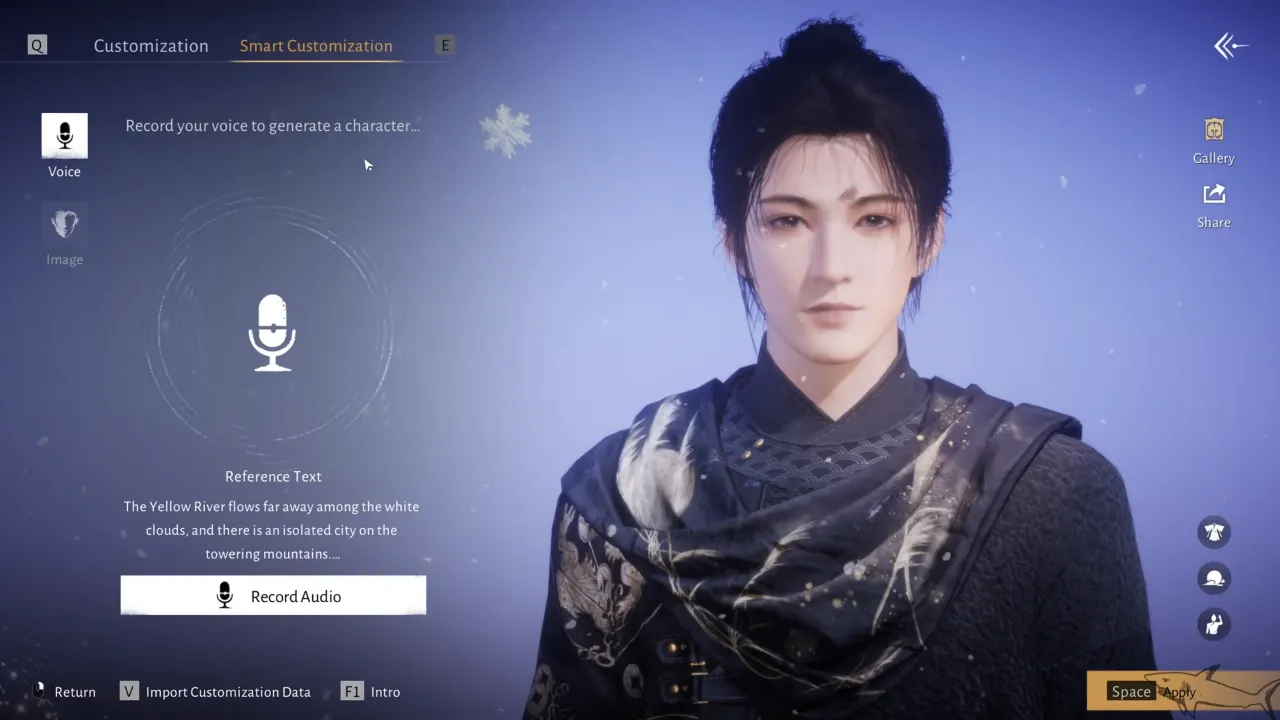
On the other hand, the voice-driven AI feature is more stable. In the same Smart Customization menu, select Voice from the left menu, click Record Audio (give mic access if asked), and read the provided lines in a clear voice. The AI analyzes tone and talk rhythm, then generates a character design based on the current voice profile. Clear pronunciation is the only main requirement, and you will likely create a valid preset on the first try.
If the in-depth character creator feels overwhelming, Smart Customization is a quick AI friend to start. Photo import gives you a structure similar to the reference image, and voice generation produces an expressive style that pairs well with your selected tone. Either way, you can move to manual adjustments afterwards.
Other Customization Options
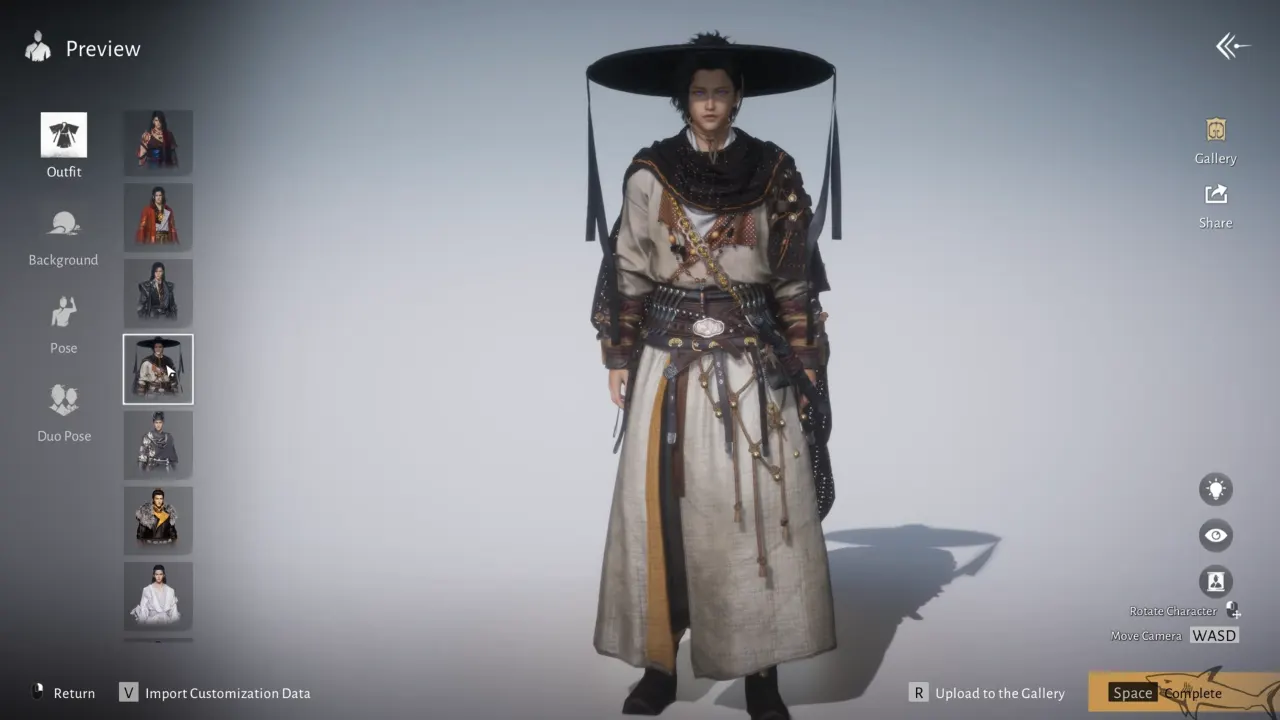
Once the face is finalized, whether sculpted manually or created by Smart Customization, you can next customize these:
- Try On (Outfits): You can preview early clothing sets here, but don’t keep the one you select during creation, as it’s only a preview.
- Background & Poses: This option sets the profile background and opening poses. You can change them anytime after you enter the game.
- Character Name: Names are unique, so be ready with backups. If you want to set a name quickly so no one else uses it, speed through a preset and return later to customize it in detail.
- Aspiration Talent: You can choose the talent between Drunken Precision or Rhetoric Edge, the minor perks involved in small mini-games during Pitch Pot and Gift of the Gab quests. Neither affects the actual combat, so pick whichever and move on.
How to Change Your Character Later
The game doesn’t trap you with your day-one customized face. Once you reach the Still Shore in the western part of Qinghe during the main story, you’ll explore Evercare Clinic in the Aunt Han quest. Completing it unlocks Cheng Xin, an appearance specialist NPC. Cheng Xin stays in the underground chamber underneath the clinic. To get to him, move behind the Evercare Clinic to find the well and jump into it. Follow the tunnels down to the treasure room, where you’ll see Cheng Xin near the door.
The first full recustomization is free, but after that, facial overhauls require a ticket (purchased with in-game jade), while makeup and color adjustments are free forever. You can also import or export character appearances via QR codes or the Gallery, and use community-made faces through codes.


