


Disney Dreamlight Valley Return to Beast’s Castle update finally brings two of the castle’s most iconic residents into the game, Lumiere and Cogsworth. Just like Belle and Beast, you won’t see them wandering into your Valley at the start. To unlock them, you’ll need to go back into the Beauty and the Beast realm, do a few story quests, and preparation tasks in your Valley first.
If you already have Belle and Beast settled in their castle, you’ll soon get a letter from Beast, who asks you to return and check on his old friends. That note is the start of a multi-part questline that ends with Lumiere and Cogsworth moving into your Valley.
How to Get Lumiere and Cogsworth in Disney Dreamlight Valley
Before Lumiere and Cogsworth appear in your Village and you become their guest, a few conditions have to be met:
- Unlock the Beauty and the Beast Realm: This door is on the third floor of the Dream Castle and costs 12,500 Dreamlight, marked with a rose icon.
- Recruit Belle and Beast: Both characters must already live in your Valley. If you haven’t finished their quests, work through them first, specifically Into the West Wing! and A Prince in Disguise.
- Build Beast’s Castle: Belle and Beast move into the Valley once you build their home, which costs 20,000 Star Coins. To build the house, place its blueprints, and interact with Scrooge McDuck.
- Check your Mailbox: After completing the above, you’ll receive a letter from Beast titled “My Friends at the Castle.” This officially unlocks the new questline.
Once you’ve received the letter, you can re-enter the Beauty and the Beast realm and begin the quests to unlock Lumiere and Cogsworth in Disney Dreamlight Valley.
Quest 1: The Haunting of the Beast’s Castle
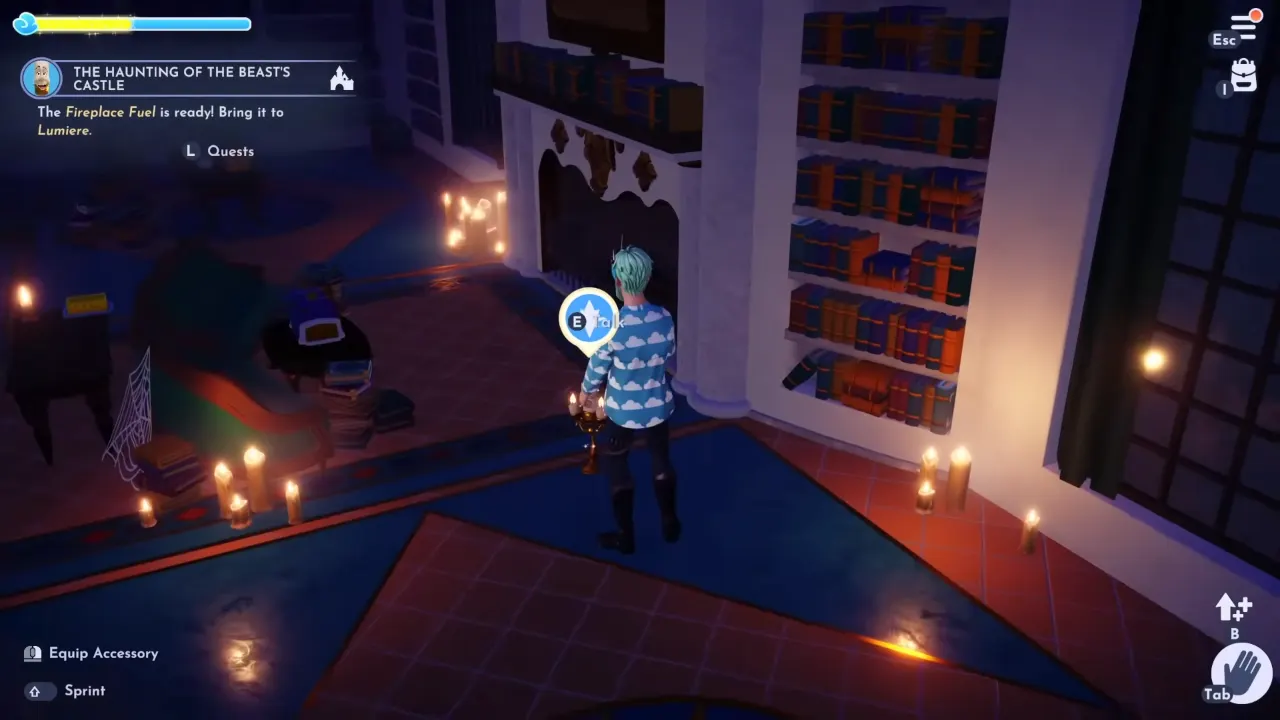
With the letter in hand, head back to Beast’s Castle. The atmosphere is darker than usual, setting up the “haunted” theme. Inside the library, you’ll meet Lumiere, who’s eager to brighten up the place.
Light the Fireplace
Lumiere asks you to restore some light. To do this:
- Enter the small passageway connected to the library.
- Collect three special ingredients, including 3 Castle Canoil, 1 Castle Softwood, and 1 Castle Paper from the crate inside.
- Use these at the nearby crafting station to create Fireplace Fuel.
- Return to the library and use the fuel to light the fireplace.
The castle lights up slightly, but the strange events aren’t over yet.
Capture the Flying Painting
Next, a painting starts floating around the hall. Chase it until you can interact and catch it; it’ll loop around the room a few times, but it’s simple to grab. Take the painting by clicking E and hang it on the wall at the hinted place behind the grand piano in the main hall. You will receive an Enigmatic Box and a Domestic Manual page 1, as rewards.
Rescue Cogsworth
After reporting back to Lumiere in the Library, he suggests something supernatural is going on as the castle seems to be haunted by an old housekeeper’s ghost. When Lumiere asked me about my belief in ghosts, I said yes, that I believe in ghosts. These choices have consequences for the upcoming events in quests, so you might better go with the same choice as I don’t know what happens with ‘no’ choice.
To continue, head out into the castle gardens. The maze is overgrown with Night Thorns, so clear your way through. At the center, you’ll finally meet Cogsworth, who has been caught up in the castle’s troubles. Once he meets with Lumiere, they argue long about the ghost thing, as Cogsworth doesn’t believe in their existence, but Lumiere is hell-bent that the castle has a ghost. Anyway, this quest ends here, and you can move on to the next A Growing Mystery quest.
Quest 2: A Growing Mystery
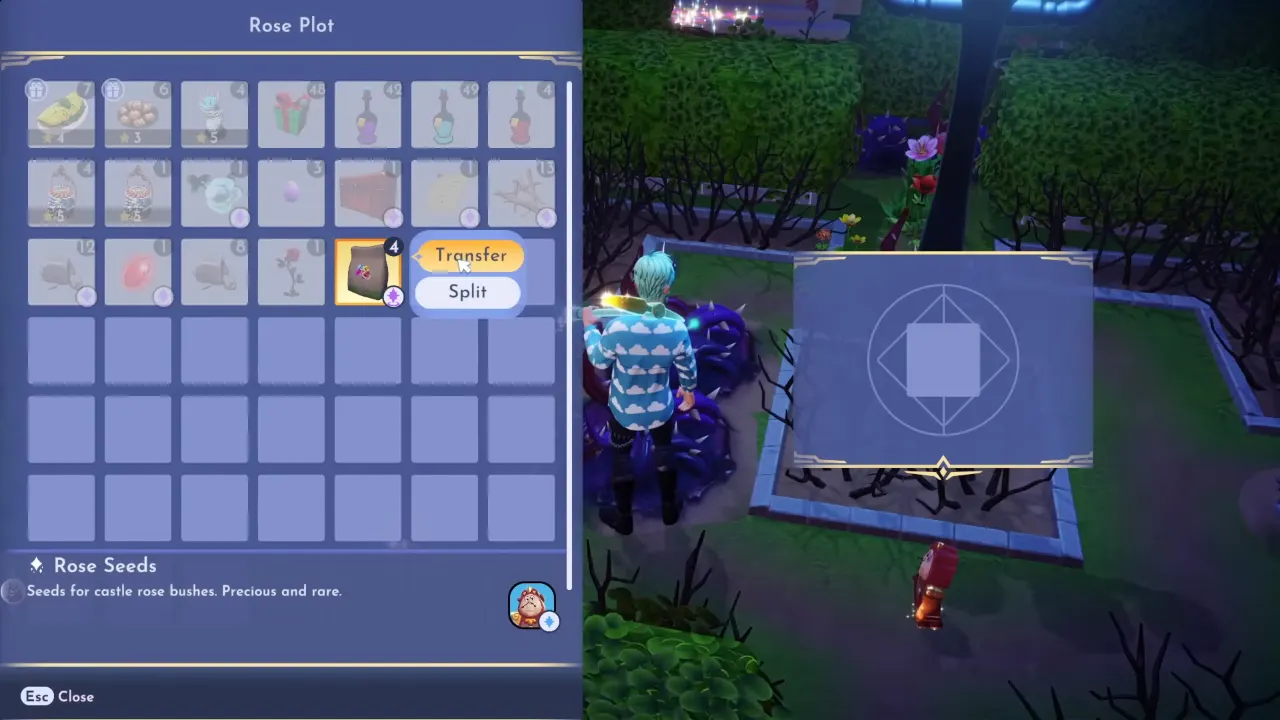
Once Cogsworth is back in the picture, he notices the state of the gardens outside the castle. The once-beautiful rose maze has wilted, and he insists it needs to be restored before anything else can move forward, this quest tasks you to replant the roses.
Find the Rose Seeds
To find the missing rose seeds, head back inside the castle to Beast’s private room, which is marked by the two lion statues near the main entrance. Inside, you’ll find a wooden crate. Open it, and you’ll get four Rose Seeds.
Take these seeds back into the garden maze and plant them in the bare soil plots at the center. Unfortunately, after planting, nothing happens as the roses won’t sprout. That’s when Cogsworth realizes they’ll need a special fertilizer to take root, and he’ll tell you to use it on roses when you talk to him.
Craft the Rose Fertilizer
You’ll need three different resources, which can be found at the castle grounds:
- 8 Castle Softwood: Scattered all over the garden maze. Look for small wood piles lying near the hedge paths.
- 3 Castle Stone: Break the rocks inside the maze to collect this stone, which is rare in the Realm.
- 3 Rich Soil: To get it, return to your Valley and dig while harvesting crops until you get three pieces.
Once the ingredients are in your inventory, go to the crafting station in the garden. Craft the Rose Fertilizer, then apply it using your watering can on each of the planted roses. This time, they’ll bloom properly and fill the maze with color again.
Decorate the Castle with Roses
With the flowers restored, you’ll harvest six roses in total. Cogsworth doesn’t want them left in the garden, though he asks you to use them to brighten up the castle interior. Take three roses inside and place them in the empty vases next to the grand piano in the main hall. When you place the rose in the last vase, pick the dropped First Enigmatic Key, and the Domestic Manual Page 2, and go back to talk to Lumiere and Cogsworth. This completes the current quest, and they will send you into the next quest, “Belle, Book, and Candle.”
Quest 3: Belle, Book, and Candle
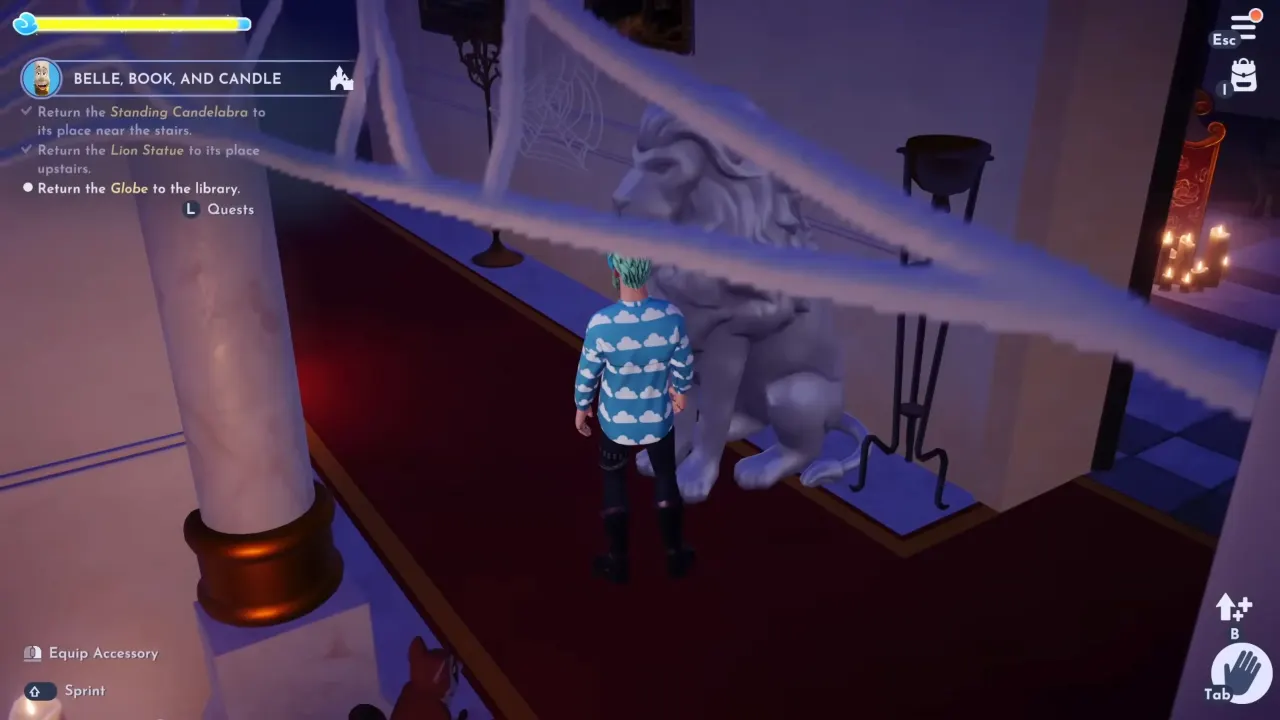
Once the roses are restored in the garden, Lumiere takes over with a new idea. He insists that the castle must be put back in order before they can solve the mystery. Now you need to tidy up some out-of-place key décor pieces.
Reorganize the Castle’s Décor
These are the three objects that you need to move to their places:
- Standing Candelabra: Pick it up and return it beside the staircase in the main hall, just to the left of the piano.
- Lion Statue: Carry it upstairs and put it back next to the door of Beast’s Room.
- Globe: Head into the Library and place it in the center of the room.
As soon as the third item is placed, a Second Enigmatic Key and another torn page fall to the floor. Collect both, then return to Lumiere in the piano room.
Recover the Damaged Domestic Manual
Lumiere now admits that he hasn’t been able to track down the actual book these pages belong to, and since he won’t dare search the West Wing himself, he sends you upstairs to do it. Go to Beast’s Room and interact with the pile of books near the large painting to collect the Damaged Domestic Manual.
Take the damaged book back to Lumiere. After some discussion, he agrees that the only person who can help repair it is Belle.
Repair the Book with Belle’s Help
Leave the Realm and return to your Valley. Go inside Beast and Belle’s castle (important: you have to find Beast inside, or the quest won’t advance). Talk to both of them, and Belle will give you some glue to repair the Domestic Manual. With the glue in hand, head to any crafting station in your Valley and combine it with the damaged book to create the Repaired Domestic Manual.
Return the Book and Unlock the Third Key
Take the repaired book back to Lumiere in the Realm. By now, he has created a display stand for it. Place the manual on the stand, and when you do, the Third Enigmatic Key appears.
At the same time, a clothing sack and another torn page drop onto the floor. Open the sack to receive a Masquerade Mask, and pick up the invitation that spawns beside it. Lumiere explains that these are gifts from the mysterious “ghost” and that they’ve been summoned to prepare for a Masquerade Ball.
That closes out Belle, Book, and Candle and sets the stage for the finale in the next quest.
Quest 4: A Guide to Better Castle-Keeping
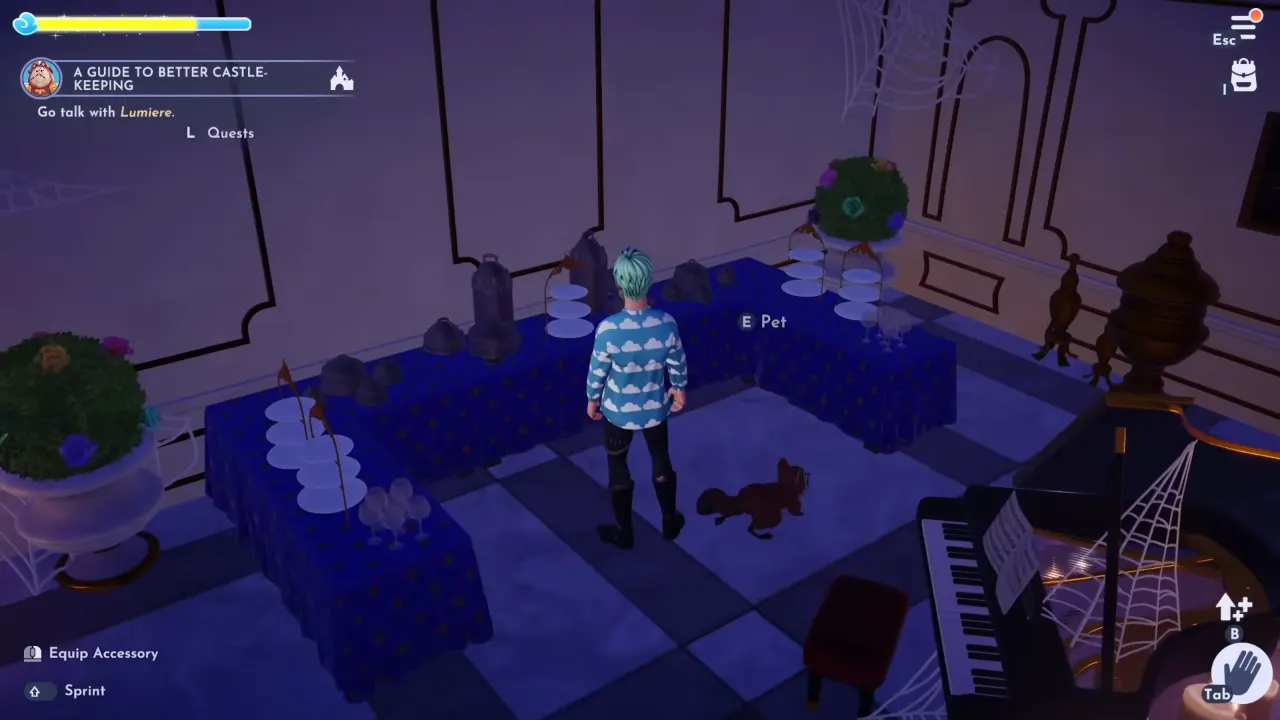
The Masquerade Ball is next, but Cogsworth, true to his nature, insists it can’t go forward without proper preparation.
Find the Fine Cutlery
Speak to Cogsworth first. He tells you to fetch the Fine Cutlery stored in the garden cellar, which is just outside in the garden, near the maze entrance. Retrieve the cutlery and return to the main hall. Place it on the large table to the left of the piano, and the rest of the table will set itself.
Prepare the Feast: Charcuterie Board
Next, Lumiere asks you to prepare food fitting for the occasion, a Charcuterie Board. The ingredients are scattered around the Realm:
- Oyster: Found in a crate inside the passageway between the Library and Beast’s Room.
- Creepy Crawly Crab: Also inside a crate in the same passageway.
- Chilling Cucumber: Sitting on the edge of a Library table, right of the passageway.
- Booyère Cheese: On a table near quill and ink in the Library.
- Screamed Butter: Behind the sofa in the Library.
With everything collected, use the cooking station inside the passageway to prepare the Charcuterie Board. Place it on the same banquet table as the cutlery.
Decorate with Rose Garlands
Once the food is set, Cogsworth reminds you the hall still needs proper decoration. For this, you’ll craft Rose Garlands. Collect the required items:
- 8 Castle Softwood: Picked up by removing Night Thorns in the garden.
- 3 Rainbow Rose Bouquets: You should have these from the previous rose-restoration quest.
- 3 Castle Detritus: Grab them from the sack near the garden’s crafting table.
Use the crafting station to create the garlands, then place them on the wall near Cogsworth in the piano room.
The Masquerade Ball
With the cutlery set, the food ready, and the decorations complete, the ballroom is prepared. Talk to Cogsworth to confirm everything is finished. Lumiere and Cogsworth reminisce as the Masquerade Ball begins, and you’re prompted to take a selfie with them in front of the garlands while wearing your Masquerade Mask.
Bring Lumiere and Cogsworth Home
After the celebration, Lumiere is eager to join the Valley immediately. Place his house in your Valley to welcome him. Cogsworth, however, stays behind out of duty until Beast intervenes. When you speak with Beast back in your Valley, he writes a formal letter insisting that Cogsworth join as well. Deliver the letter to him in the Realm, and he finally agrees to move in.
Place his house in your Valley, return to Beast’s castle, and watch the reunion cutscene where Belle, Beast, Lumiere, and Cogsworth all celebrate being together again. That concludes A Guide to Better Castle-Keeping, and from this point on, Lumiere and Cogsworth are permanent residents of your Valley in Disney Dreamlight Valley.
With both characters unlocked, you can now work on their friendship quests. These aren’t part of the castle mystery chain but give more depth to their personalities:
- Lumiere’s Friendship Quests: Focus on his role as a host and entertainer. You’ll help him prepare elaborate meals, stage a small show, and bring extra flair to life in the Valley.
- Cogsworth’s Friendship Quests: Involves tasks of organize and order. Expect to collect resources to “fix” small things around the Valley and assist him in keeping everyone on schedule.
Both characters can also be leveled up for typical villager benefits, such as increasing your gathering and resource skills based on which role you assign them.


