


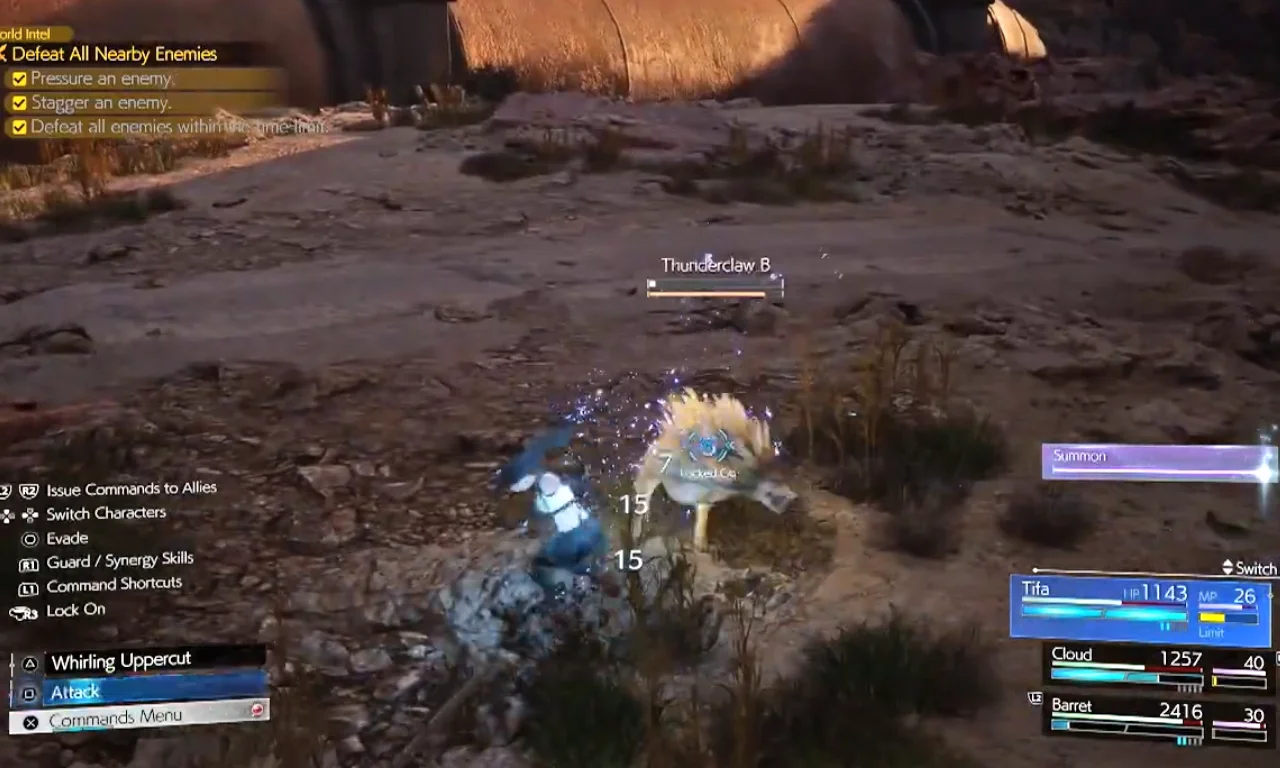
Thunderclaws in Final Fantasy 7 Rebirth are Mako drunk wolves that move way faster than their usual Grasslands variety. Dealing with them for Fiend Intel 6: Voltaic Canine task from Chadley can be hard because you have limited time to complete three objectives: pressure Thunderclaws, stagger them, and kill them before time runs out.
Rather than targeting their elemental weakness, if you try to hack and slash your way through, you’ll likely kill them before they get pressured, or you’ll run out of time chasing them around the arena. Here’s how to pressure Thunderclaw in Final Fantasy 7 Rebirth.
Final Fantasy 7 Rebirth Thunderclaw Location
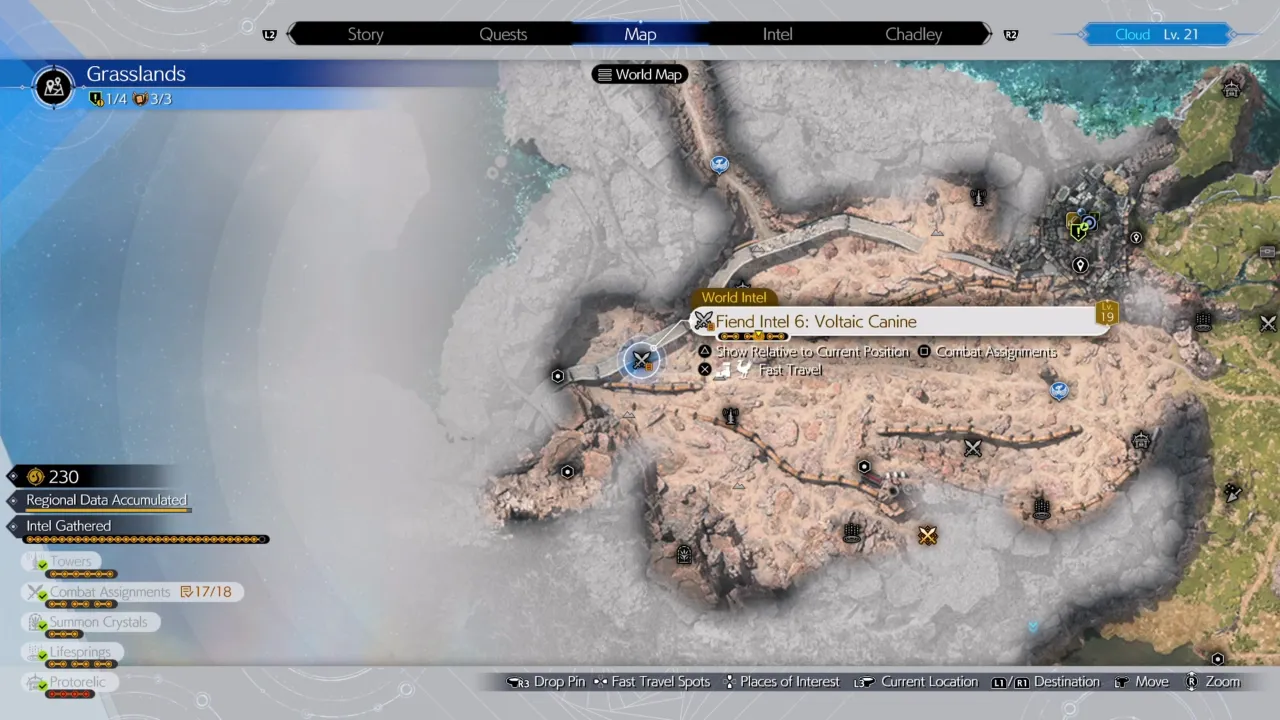
You can find the Thunderclaw in the arid wasteland part of the Grasslands region. First, activate the nearby Wastelands Remnawave Tower to reveal the location data on your map, and then look for the icon labeled Fiend Intel 6: Voltaic Canine, southwest of Kalm and just south of the Wildflower Plateau.
To reach them easily, start at the raised highway and find the dirt road running along its northern side. Follow this path west past the local Chocobo Stop. You will spot the two Thunderclaws prowling near where the Mako pipeline meets the highway.
[related_post title=”How to Pressure Fonadu in Final Fantasy 7 (FF7) Rebirth”]How to Pressure Thunderclaw in Final Fantasy 7 Rebirth
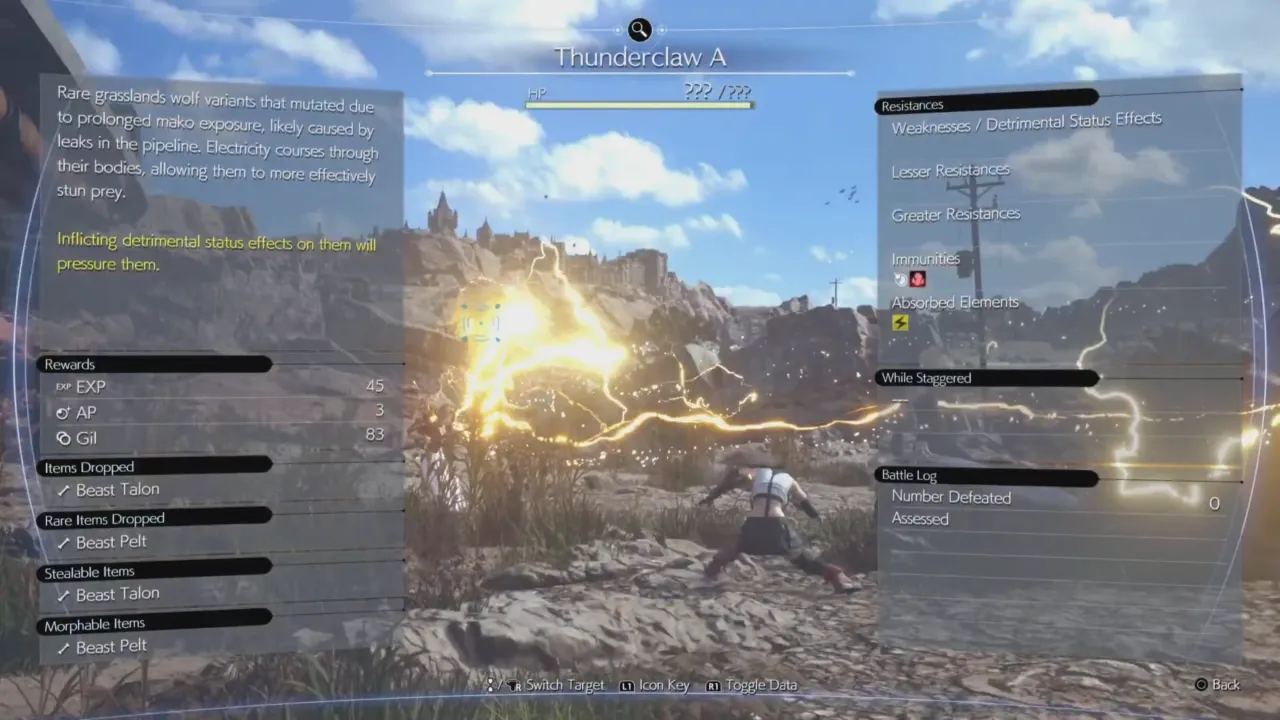
Pressuring a Thunderclaw is different than many other early game creatures. The Assess ability tells that they have no elemental weaknesses and can absorb Lightning damage, so Thunder will only heal them and waste your MP. It’s unusual because most enemies enter pressure mode through elemental weaknesses, but Thunderclaw has no usual weakness.
While immune to Stone and Proportional Damage, any red (or negative) icon status effect will instantly pressure Thunderclaw when successfully applied. It includes:
- Poison
- Silence
- Sleep
- Slow
- Stop
- Stun
- Toad
- Debrave
- Defaith
- Petrify
- Berserk
- Fury
- Sedate
Since you’re likely completing this task very early, your inventory is probably thin. Red XIII has Poison Materia equipped by default when he joins your party. You can keep it on him or move it to Cloud or Tifa, depending on what you prefer. When the fight starts, cast the Bio spell on one of the wolves as soon as you have ATB charge. The poison effect will take hold, and the word Pressured will appear on screen. Switch targets and repeat the process for the second enemy.
Once a Thunderclaw is pressured, you should switch to attacks that build the stagger gauge fast. Cloud is excellent thanks to his Focused Thrust ability, though Tifa can also do the job with her rapid strikes like Whirling Uppercut or Omnistrike.
[related_list titles=”Final Fantasy 7 (FF7) Rebirth Final Boss Fight and Ending Explained, How to Beat the Mindflayer in Final Fantasy 7 (FF7) Rebirth, How to Beat Phoenix in Final Fantasy 7 (FF7) Rebirth”]You’ll find this fight much easier after you unlock more debuffs later in the game. Early Grasslands builds lack variety and might leave you struggling to trigger the pressure state. Come back after you’ve expanded the Materia collection if the first few attempts don’t go your way. Moving on to other regions allows you to return with better spells and a strong party. Spells like Deprotect and Deshell, or Sleep are good to use against Thunderclaws. Don’t forget to keep watch of the clock and take down both enemies fast to secure the complete status from Chadley.


