


Assassin’s Creed Shadows update 1.1.6 introduced a new side quest, A Puzzlement, and a part of it is to open a secret Isu Glyph door by tracking down strange markings across the map. After Naoe and Yasuke come across a sealed Isu door carved into a mountain in Wakasa, the game has you collect all 13 Glyphs you need to open it. One is given during the A Puzzlement quest, and the rest can be found throughout Wakasa, Omi, Yamashiro, and Tamba. This guide explains how to start A Puzzlement, where to find all the Glyphs in Assassin’s Creed Shadows, and how to solve the riddles to open the door to get all the great rewards.
How to Start A Puzzlement in Assassin’s Creed Shadows
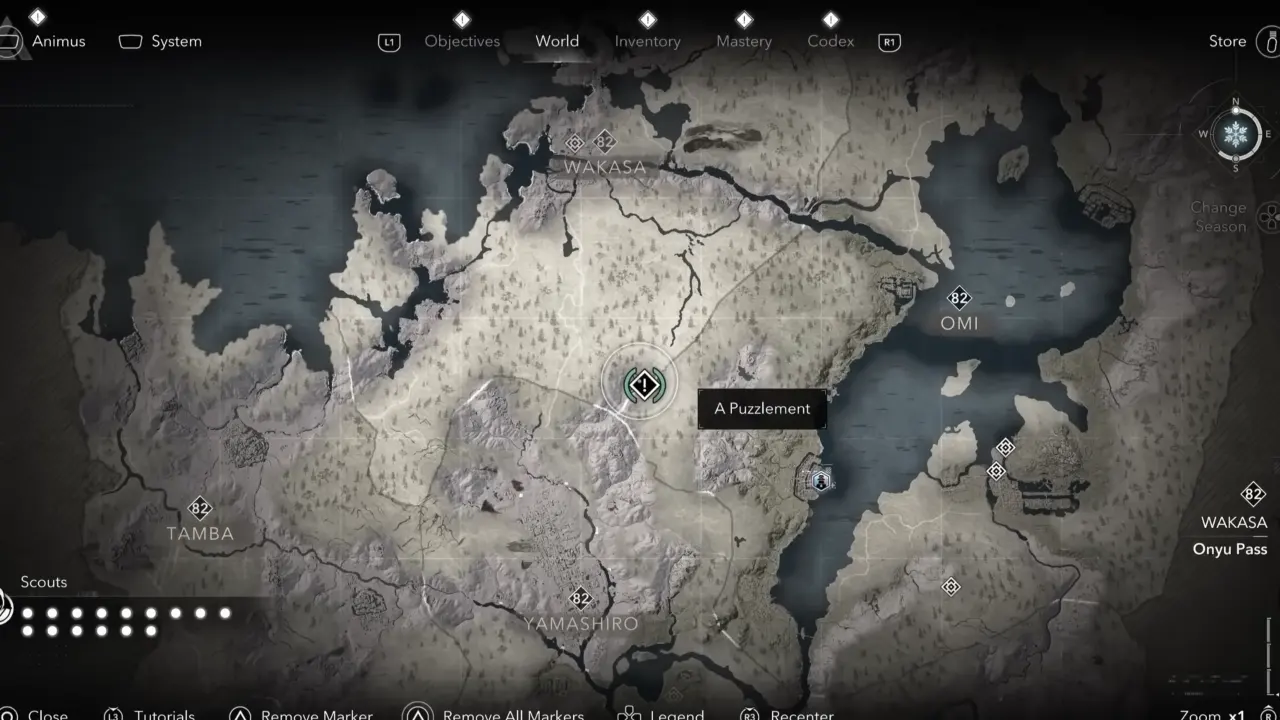
Unless you have unlocked Yasuke as a playable character, you can start the A Puzzlement quest. Follow the quest marker to head to the Genbu Highlands in northern Yamashiro, not far from Hanazono Castle, where you also begin the Assassin’s Creed Shadows x Attack on Titan story quest. Once there, Naoe and Yasuke will have a good talk with Kinu and Kane in a cutscene, two treasure hunters who have no idea what they’ve found—a sealed Isu vault door covered in glowing symbols.
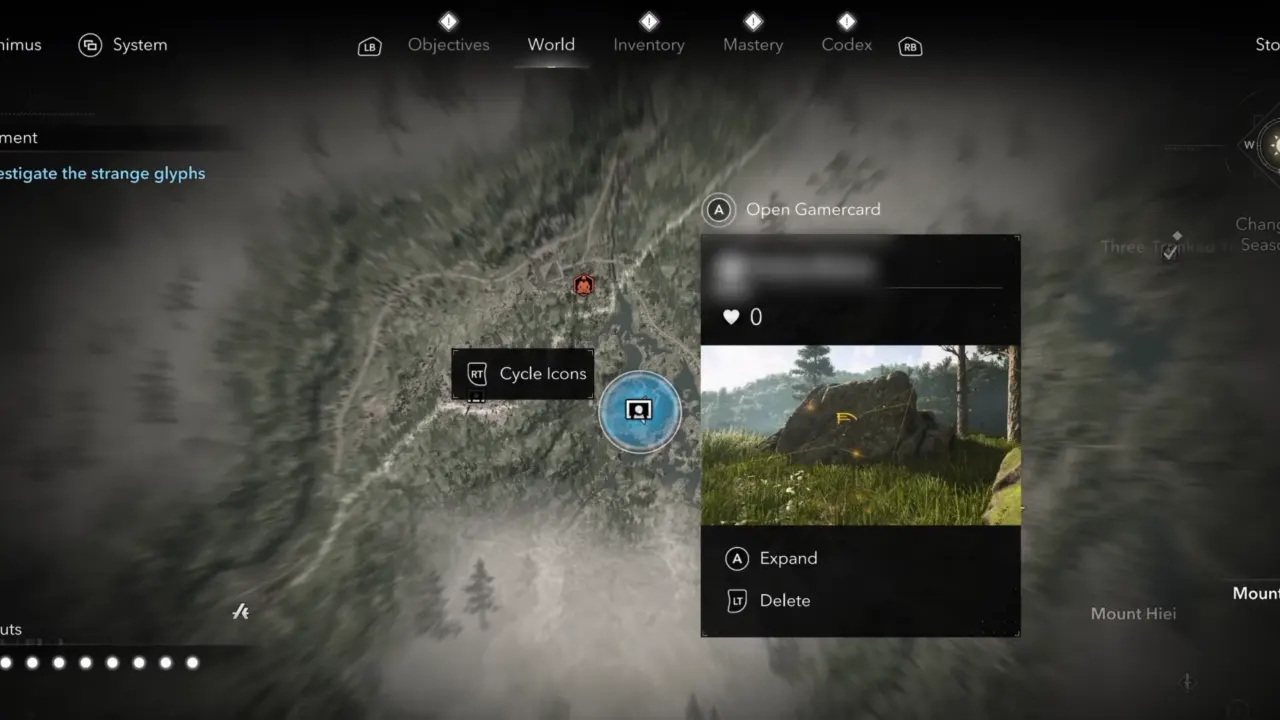
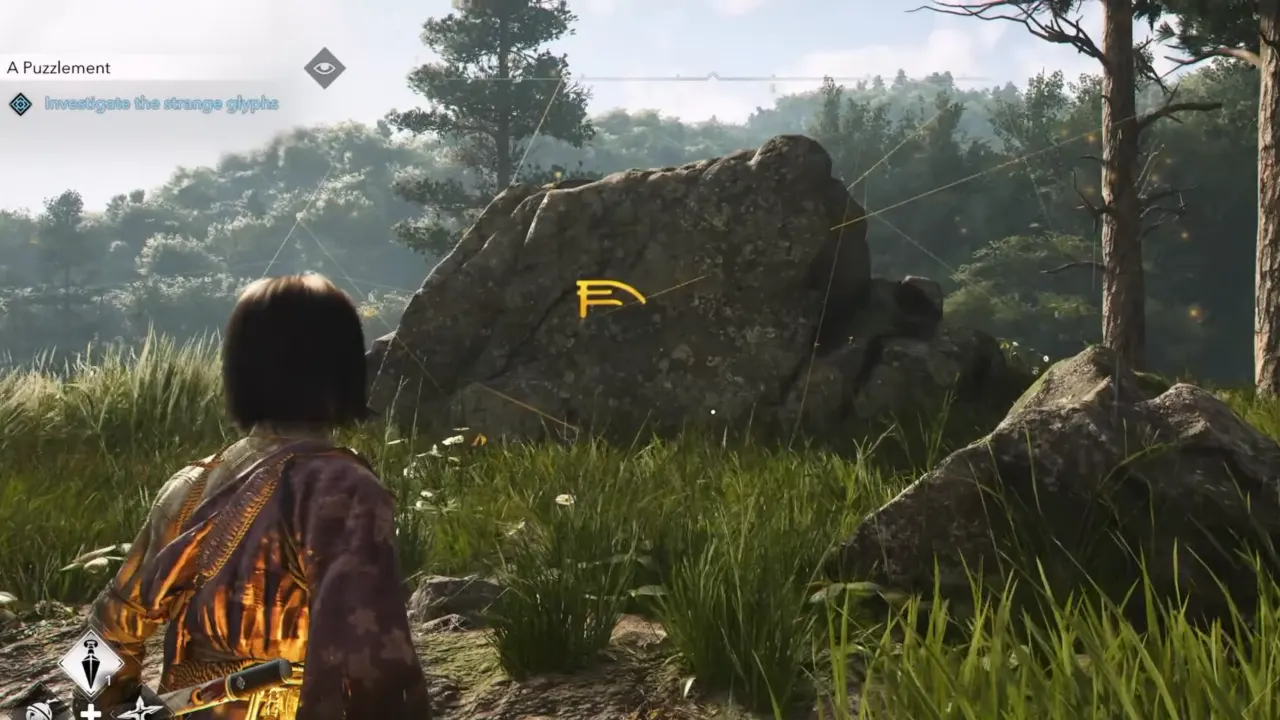
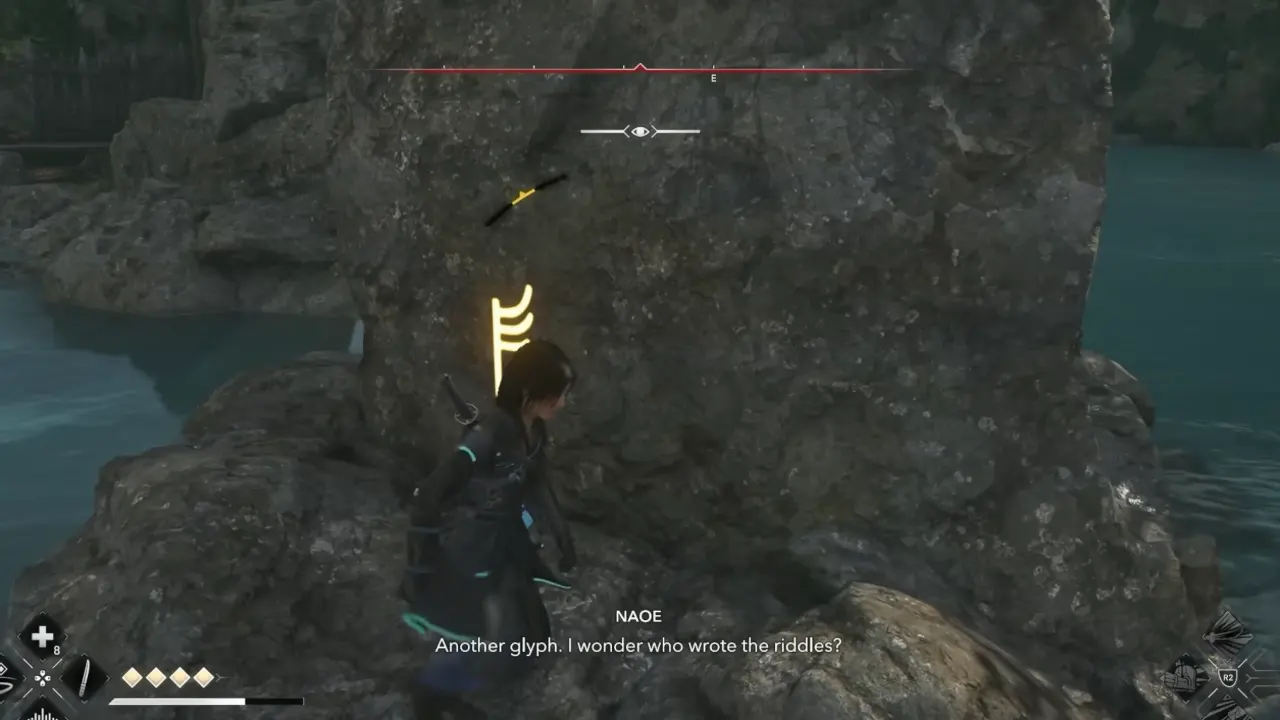
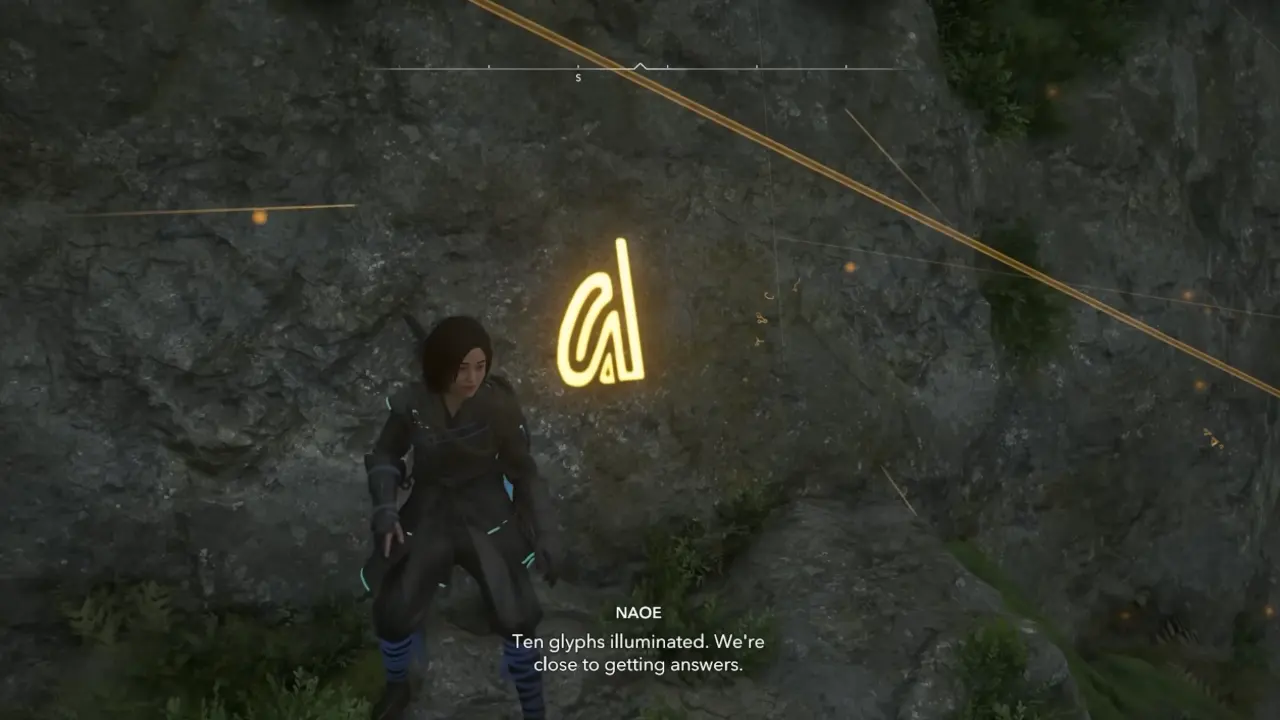
They will give you the Riddle Scroll Beacon, which you must first equip when searching for the Glyphs. When you get closer to the glyph, the Beacon pulses, and once you find the carvings, Observe them to register the glyph. A Puzzlement automatically leads you to the first glyph, which means you collect the first during the quest. Though the remaining 12 Glyphs must be found manually, we’ve listed the locations for each, including their directions with map hints.


All Glyph Locations in Assassin’s Creed Shadows
Glyph of the Vault — Wakasa
Near Kaiji’s courtyard
Marshlands are full of treasure
Vaulting their secrets
The only glyph the game hands you. From the A Puzzlement quest entrance, move east toward the marked boulder with the carving. Observe it to unlock the rest of the hunt.
Glyph of the Arch — Wakasa / Lake Suigetsu
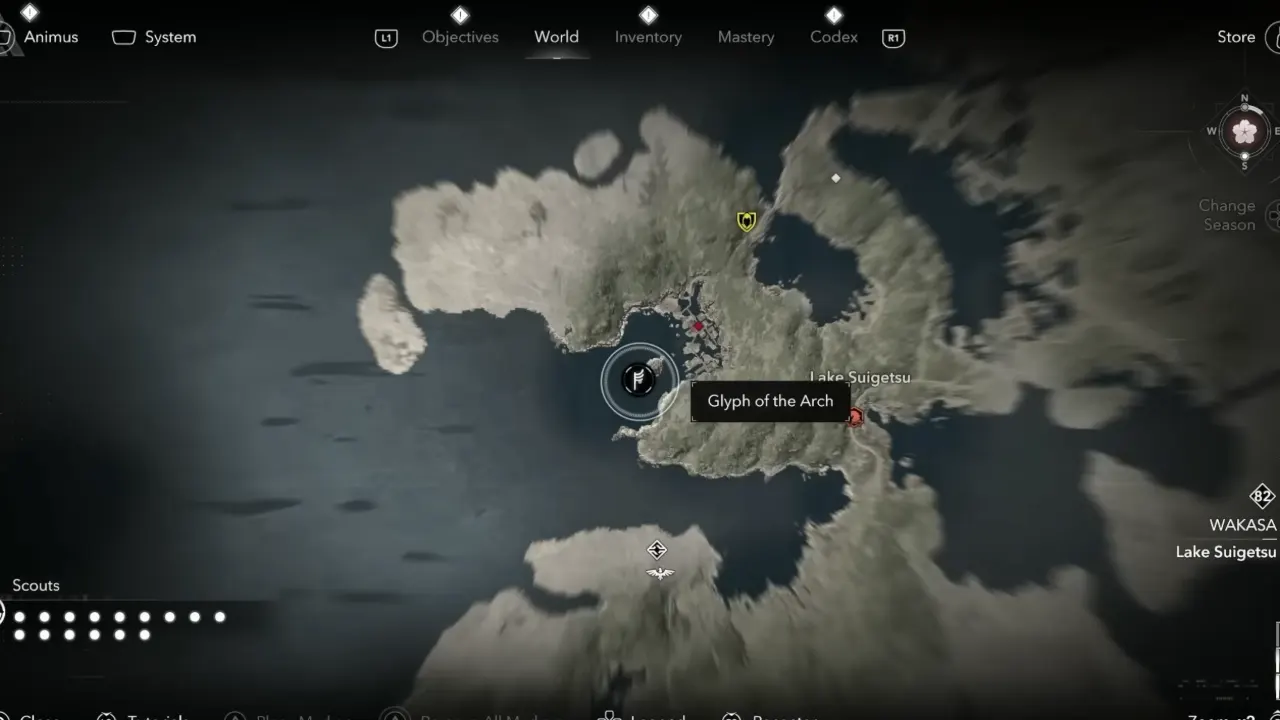
Arch of stone in sea
Looking to rock and Alcove
To hold its treasure
Head to Hiruga Bay and look southwest across the water to find a small island in Lake Suigetsu. Bandits usually camp there, so deal with them first, then check the stone facing the sea to find the glyph riddle.
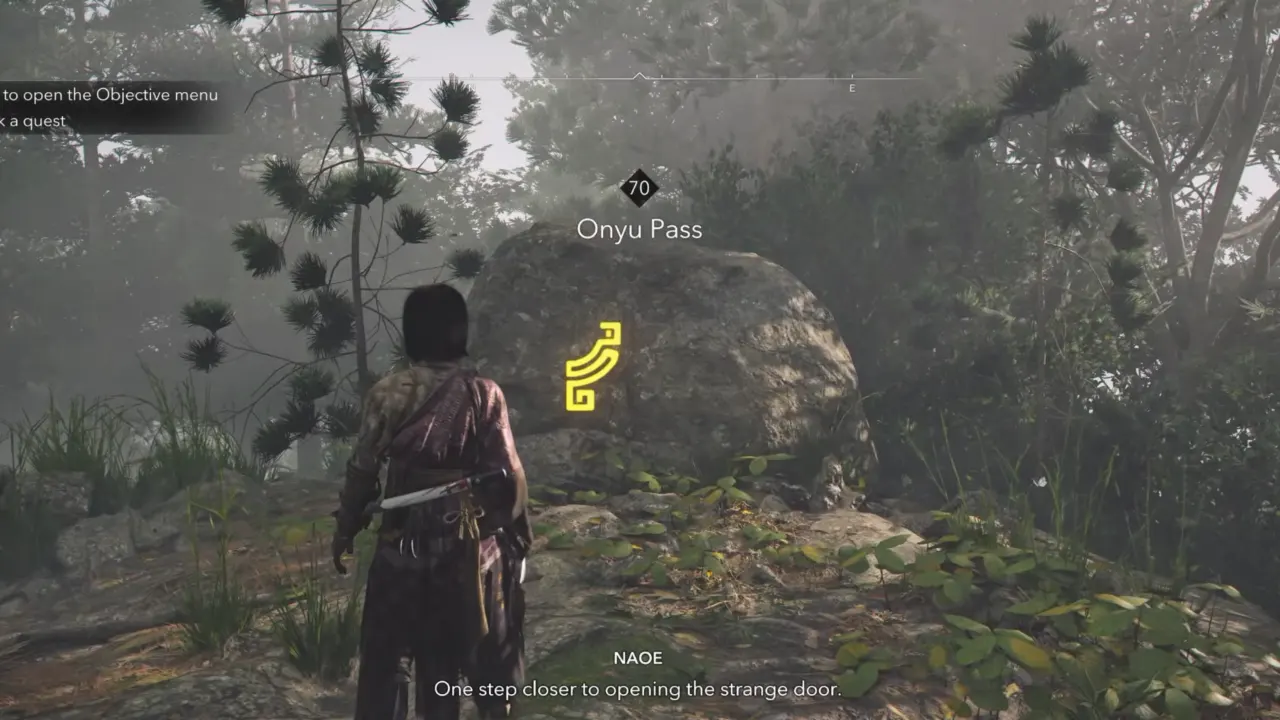
Glyph of the Sky — Wakasa / Onyu Pass
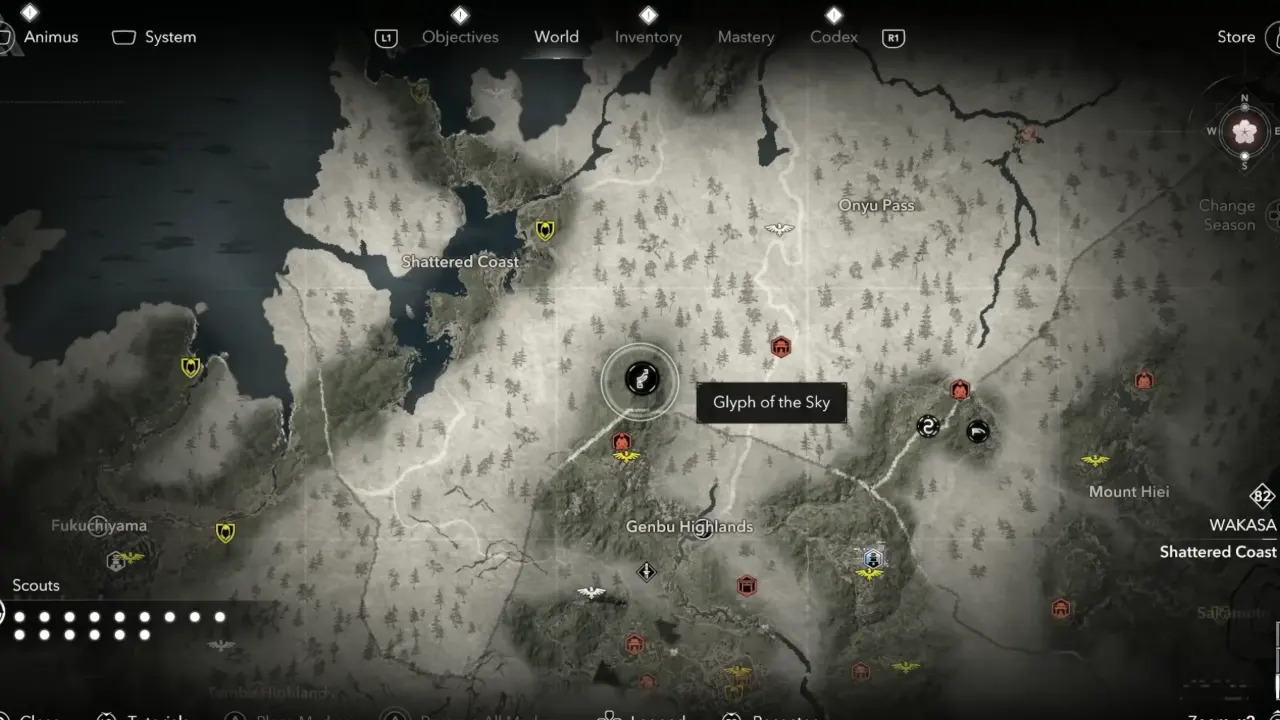
Between two rivers
Edging forest and heaven
Closest to the sky
This is the awkward one north of Genbu Highlands. Fast travel to Kuramadera Pagoda, then take the northern trail into the mountain. There’s a shallow pond between lanterns; to the right of the bamboo grove is a climbable section that lets you scale the slope. The glyph is on the summit ridge overlooking the forest.
Glyph of the River — Wakasa / Mount Uchinakao Forest

Slithering river
Cradles the harvest to come
Reviving the ruins
From the Mount Peak fast travel point, walk east past ruined houses towards the northwest of Mount Uchinakao in Wakasa. The glyph is etched on a rock face in the river pools just ahead.
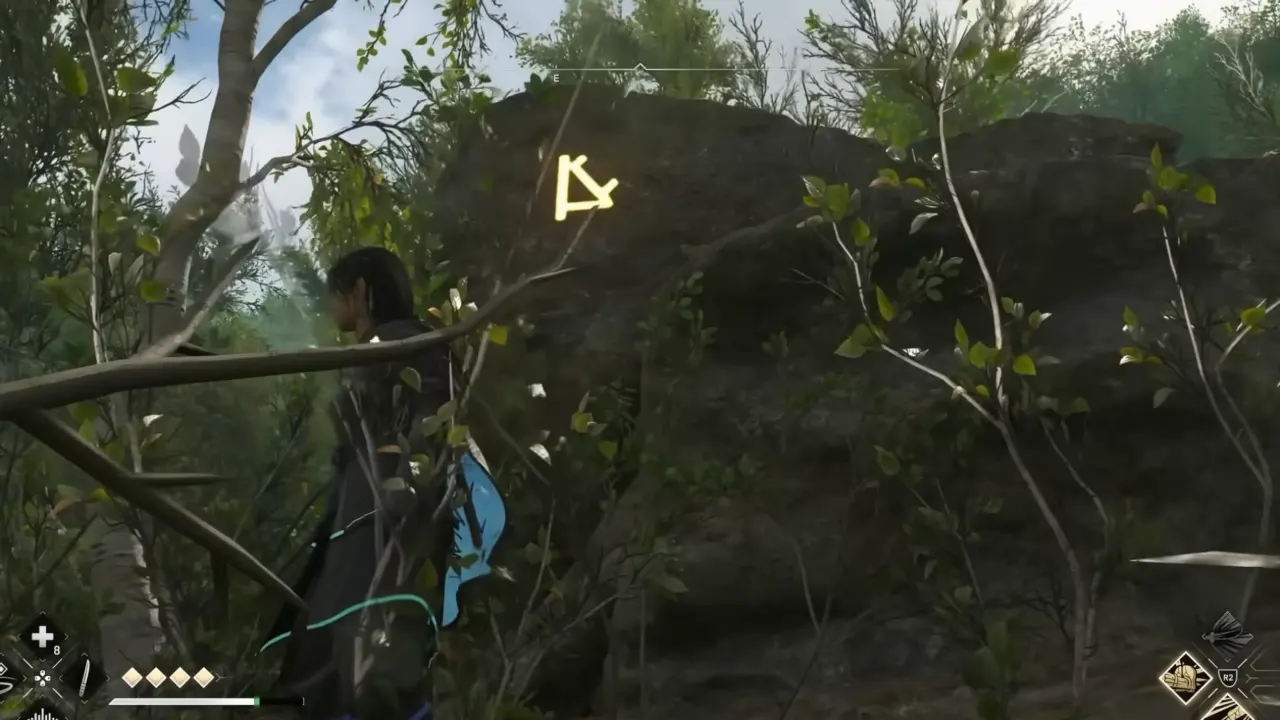
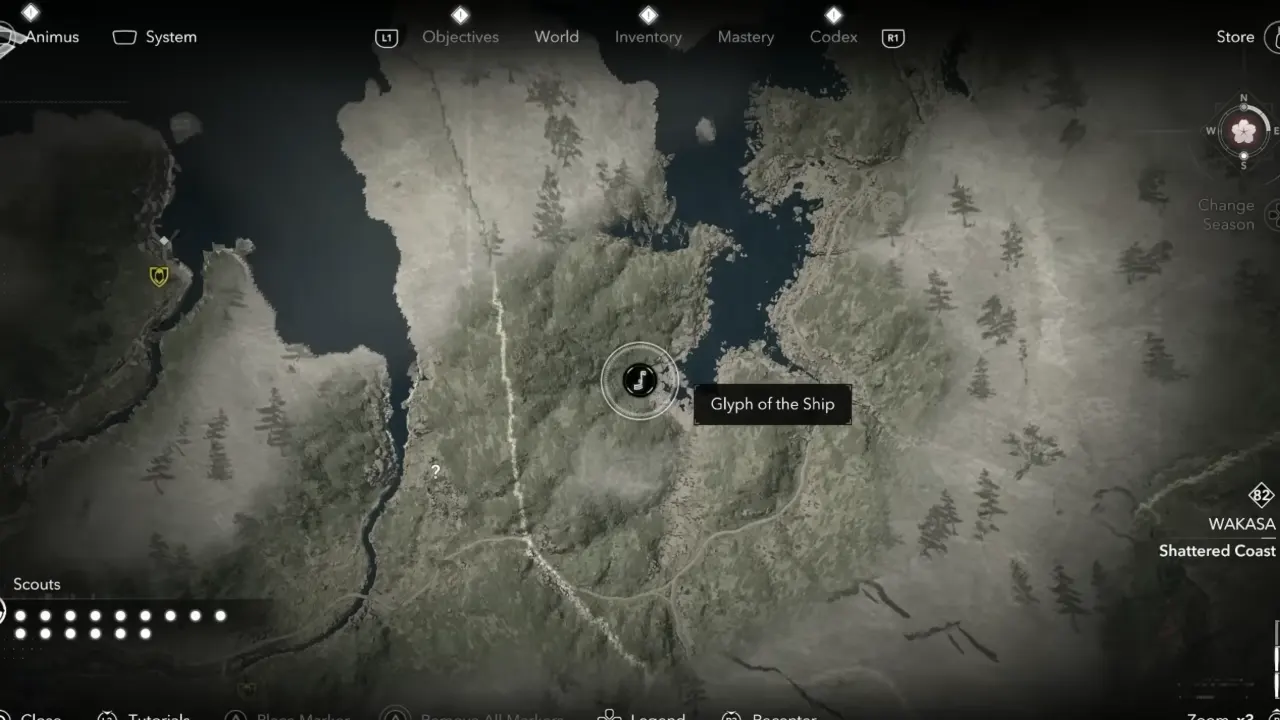
Glyph of the Ship — Wakasa / Shattered Coast
A shattered mountain
Down Wakasa and Tamba
The great ship waiting
Travel to either Outer Maizuru (Wakasa) and then head to the southern end of the Shattered Coast. The riddle carving is on a sloped cliff above the broken shoreline.
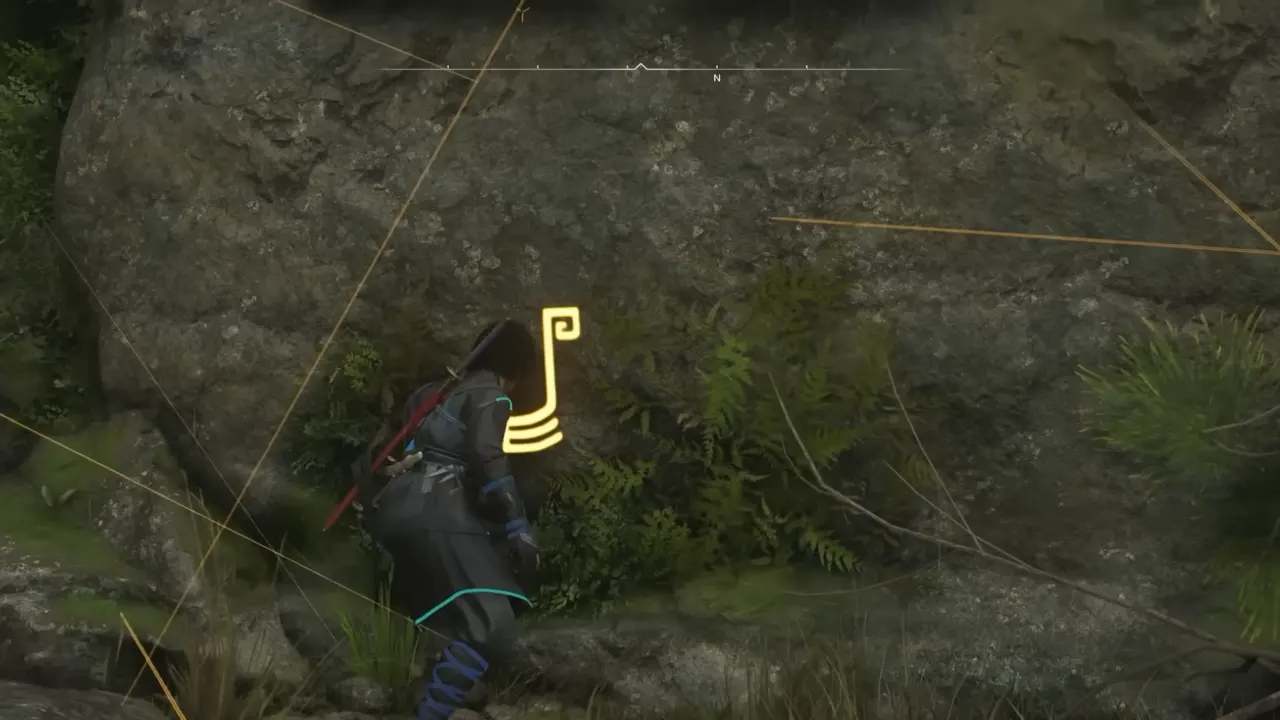
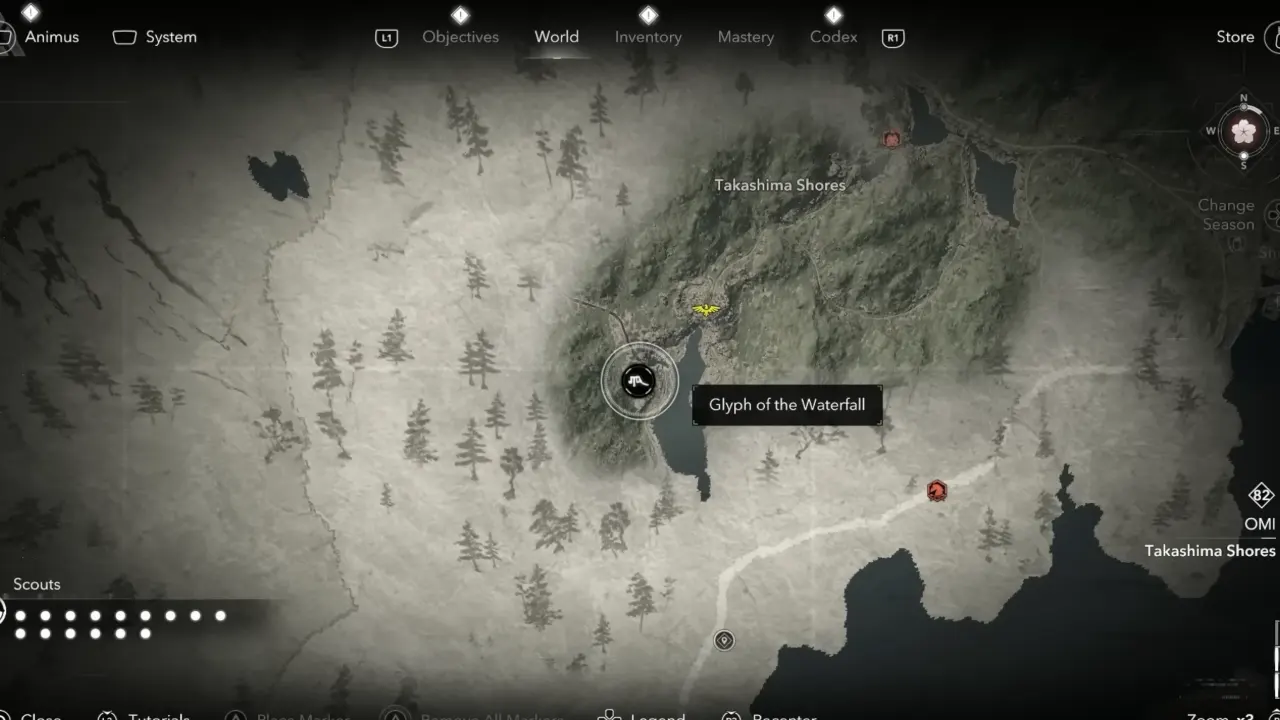
Glyph of the Waterfall — Omi / Takashima Shores
Cascading waters
Within the arms of Mount Peak
A secret laid bare
From the Mount Peak viewpoint, drop down toward the upper waterfall ledge in the southwestern part of the Takashima Shores. Climbing from below can be tricky, so approach from above and walk down to the rock shelf beside the falling water.
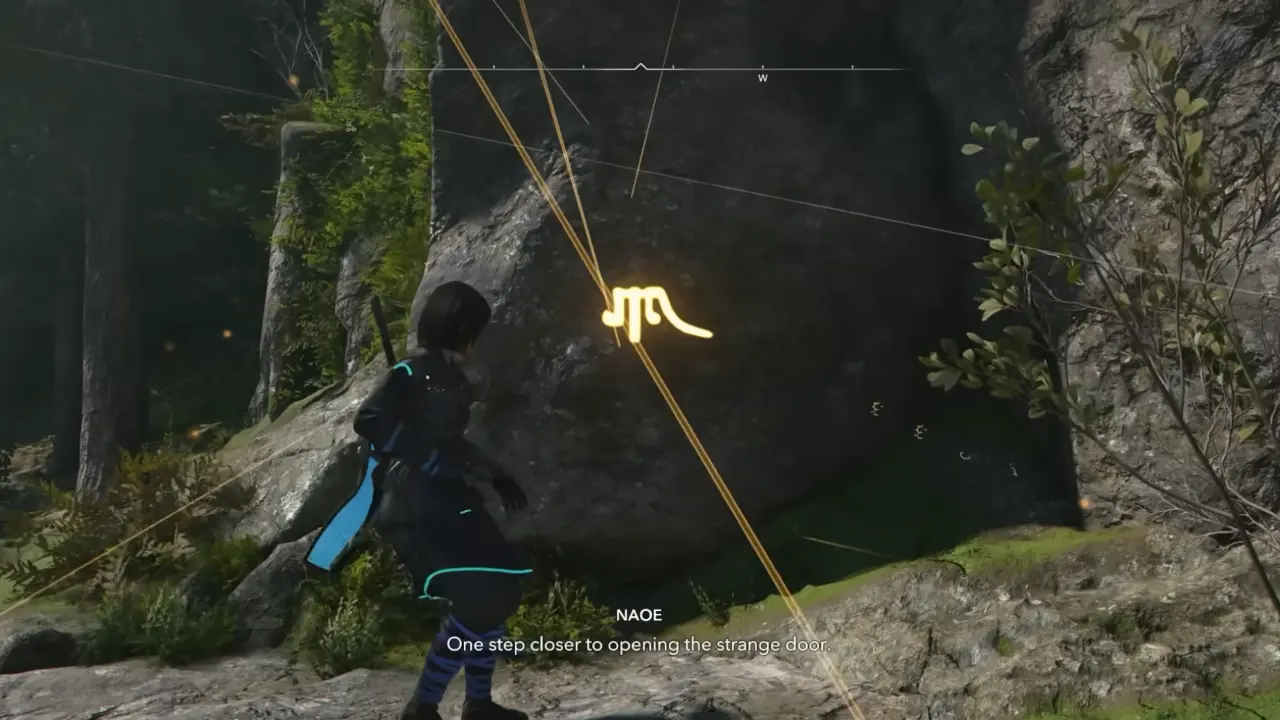
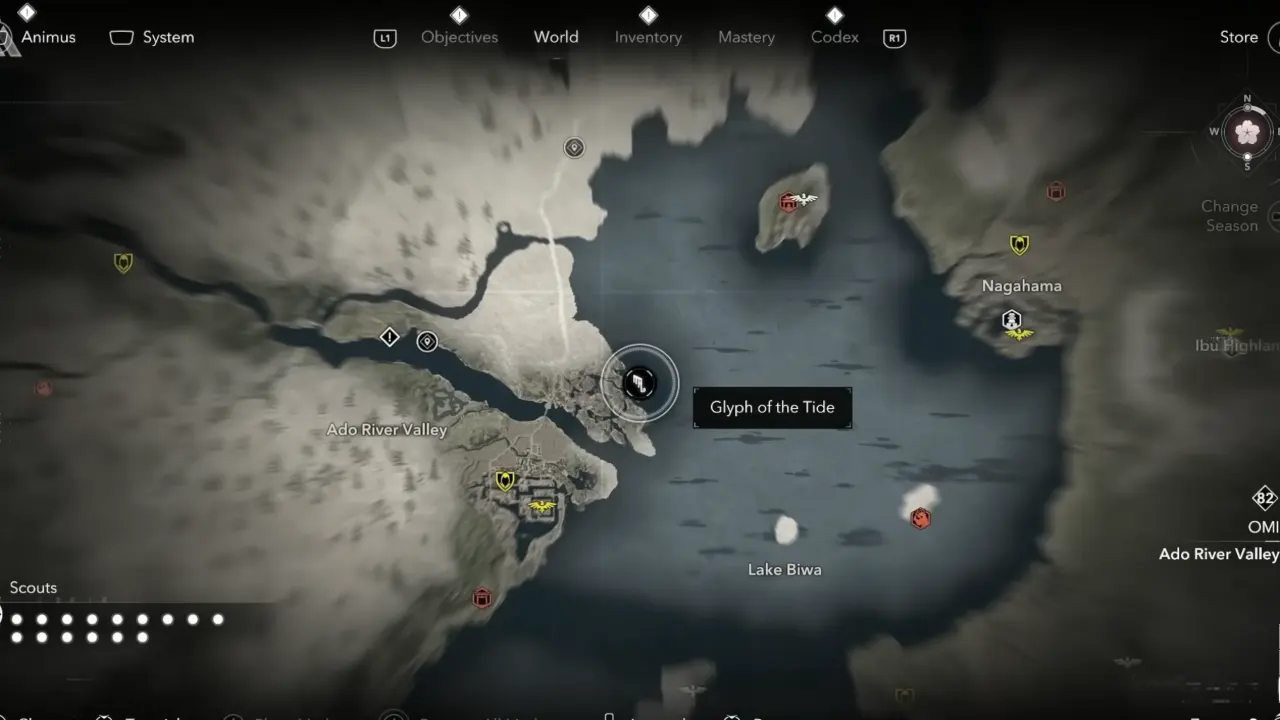
Glyph of the Tide — Omi / Lake Biwa Shore
Resting by the shore
Rocked to sleep by Biwa’s waves
Near glades and lumber
From Omizo Kakurega, move north along the river, then cut east toward the small island cluster at the lake’s edge. The glyph is on the northeast islet at the shoreline.
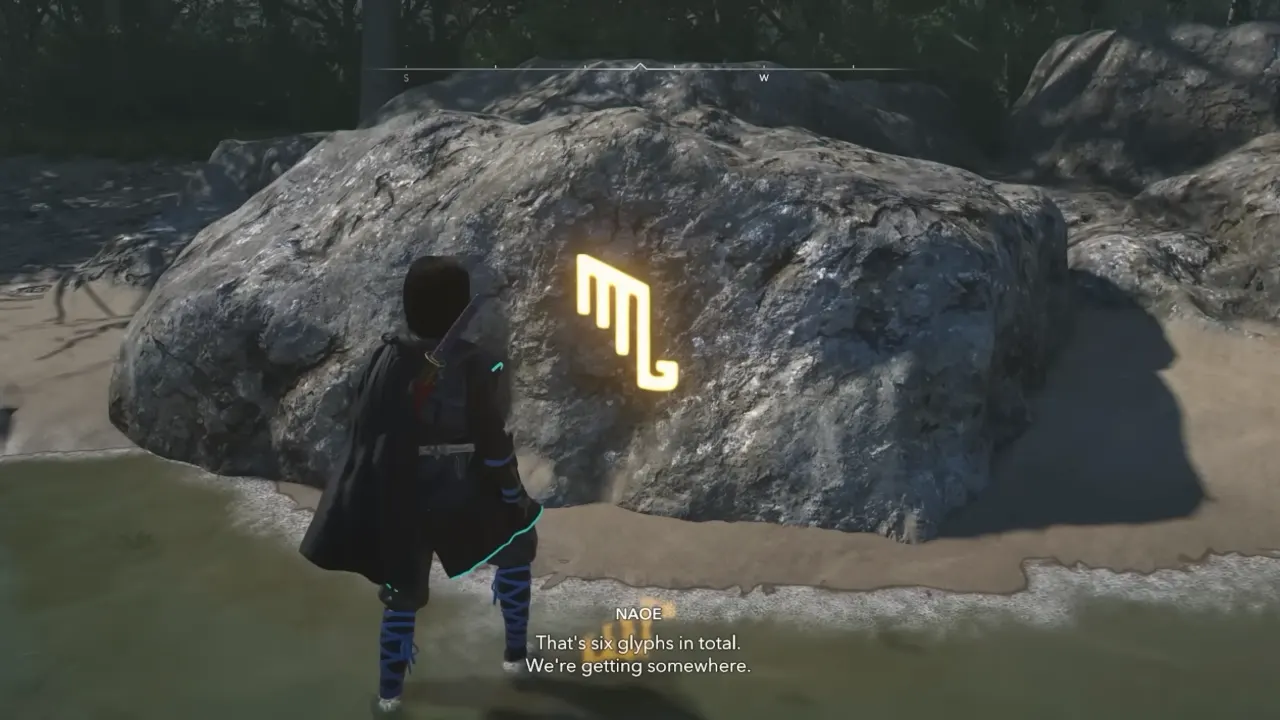
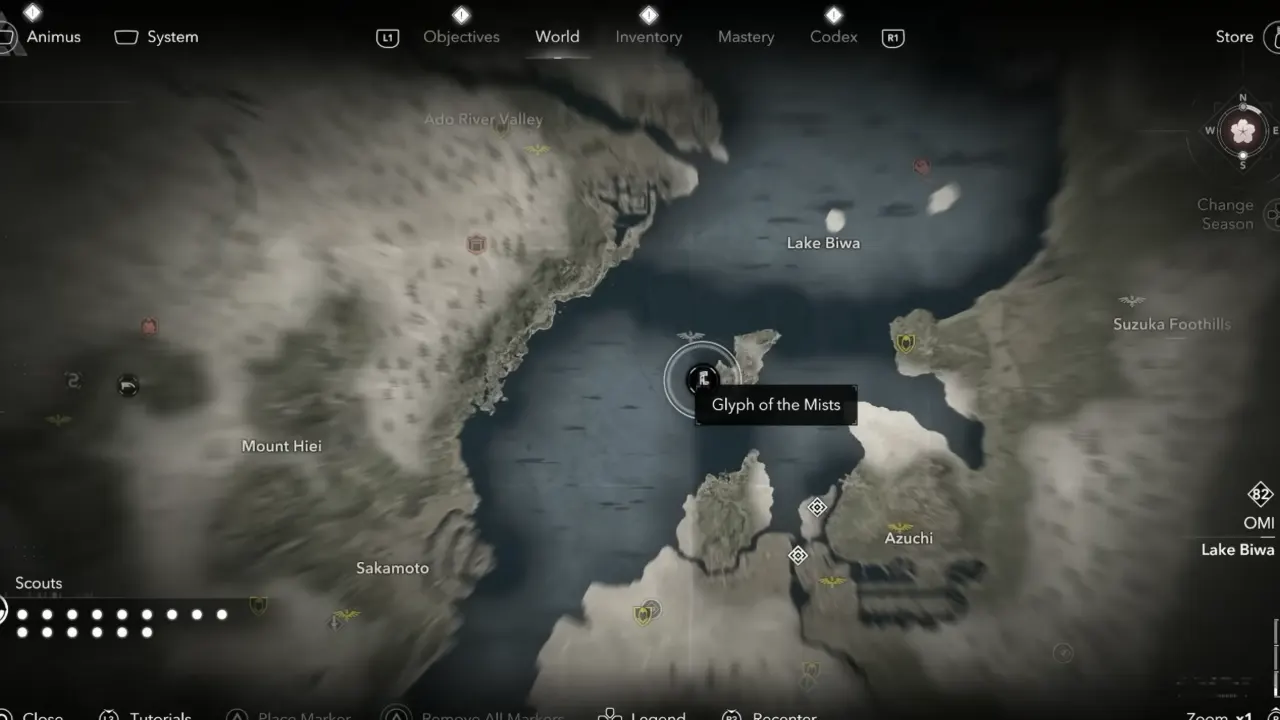
Glyph of the Mists — Omi / Okishima Island
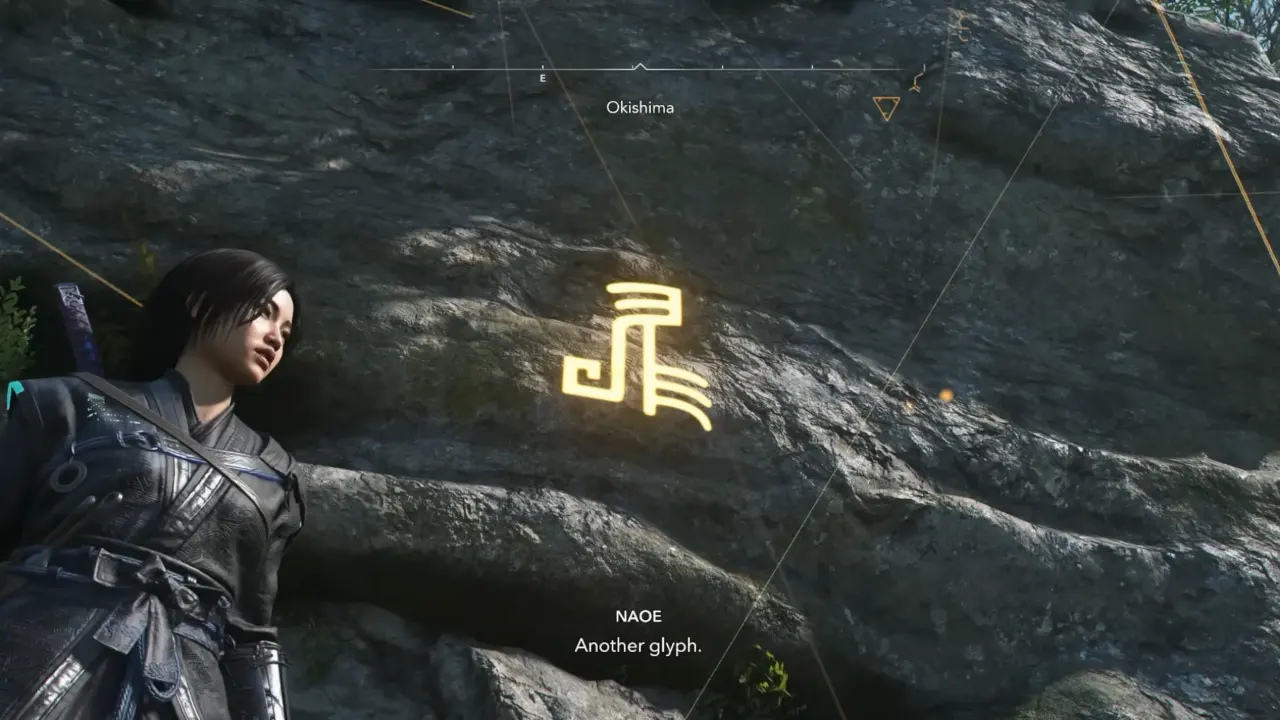
Mists of Azuchi
A land lost within the lake
Where cats become lords
Travel to Okishima Island, located in Lake Biwa, by water or fast travel. From the Kakurega, walk southwest toward the cliffs behind the shrine. Drop down the backside to reach the carving on the stone wall.
Glyph of the Watchtower — Omi / Mount Hiei
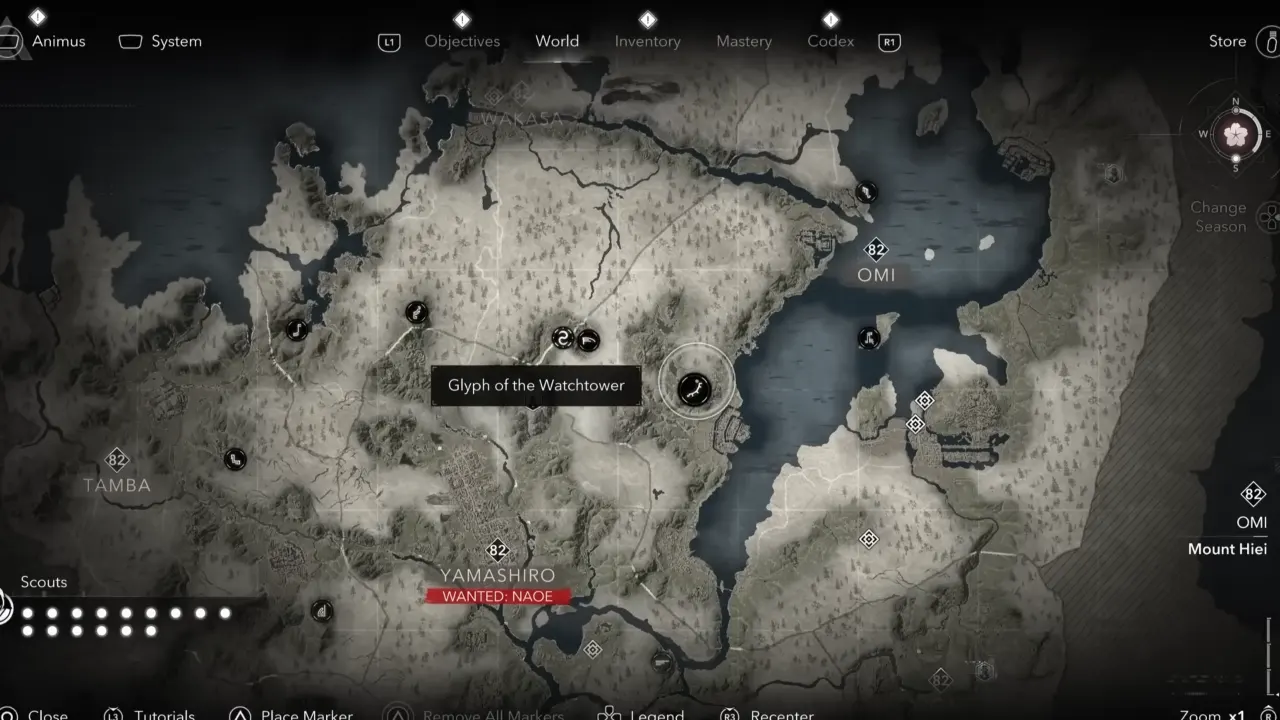
Trees try to hide it
Under a watchtower’s gaze
Saikoji awaits
Fast travel to Sakamoto, then follow the western road into the partially deforested foothills southeast of the Mouth Hei area. From under the ruined watchtower ridge, climb the slope to find the glyph facing the valley.
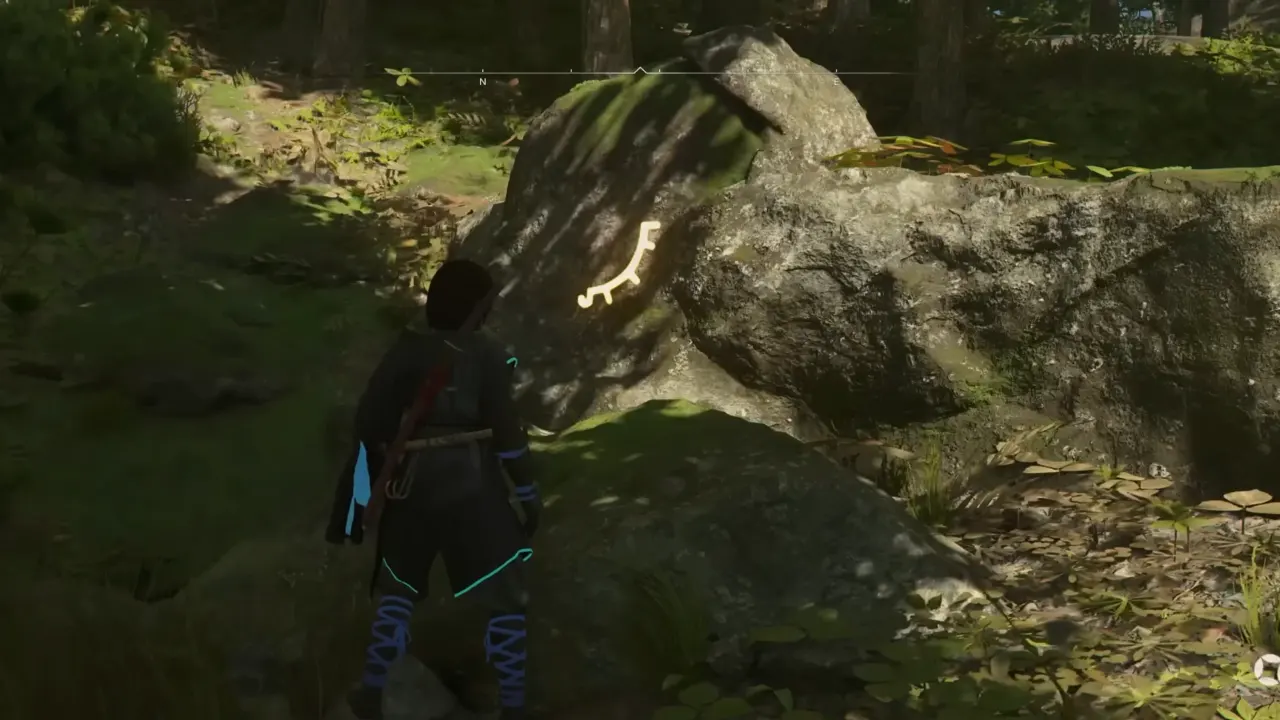
Glyph of Silence — Tamba / Path of Silence
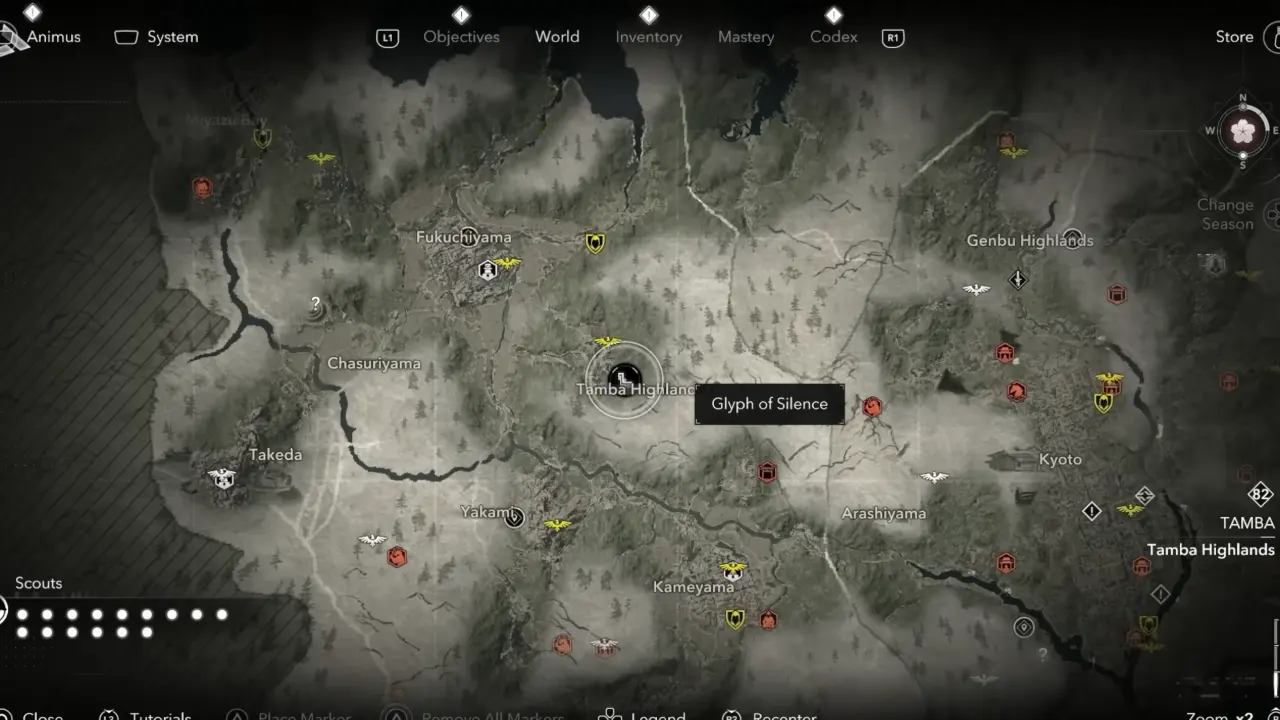
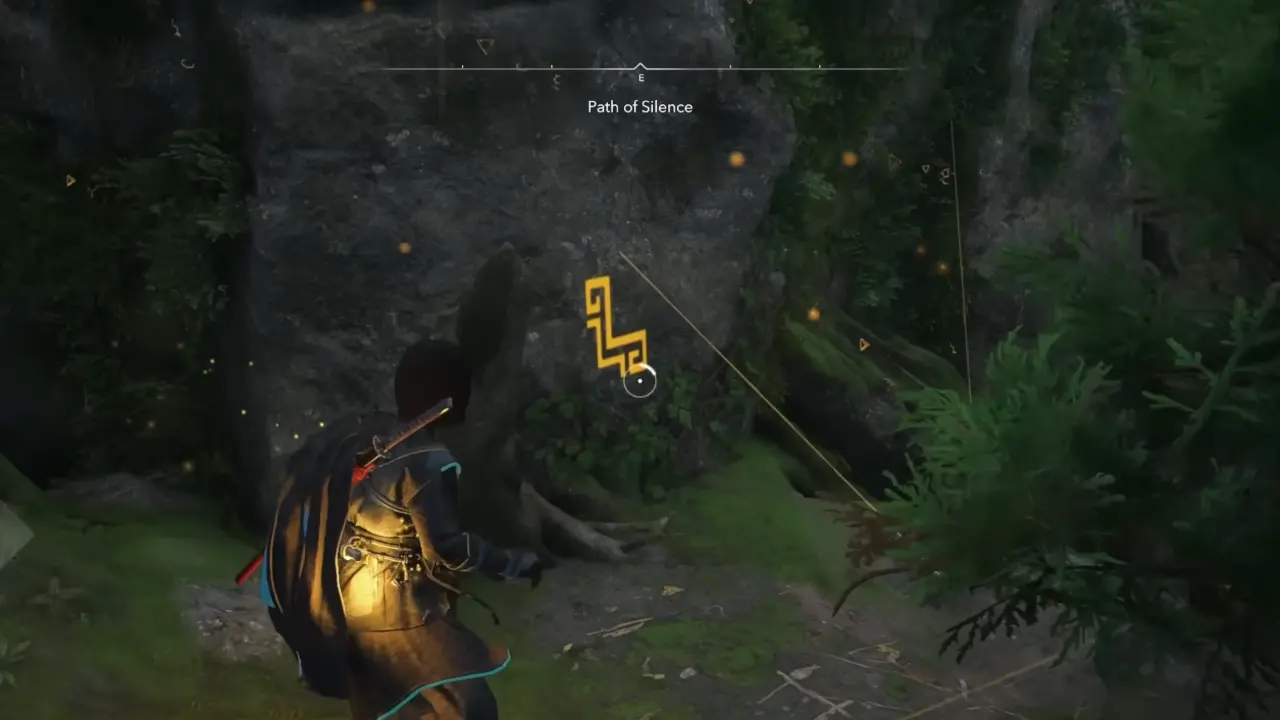
A Path of Silence
Leading wanderers to dive
Far into themselves
Head to the entrance of the Path of Silence trial, and you will find the glyph directly along the route.
Glyph of the Stone — Tamba / Silver Lands
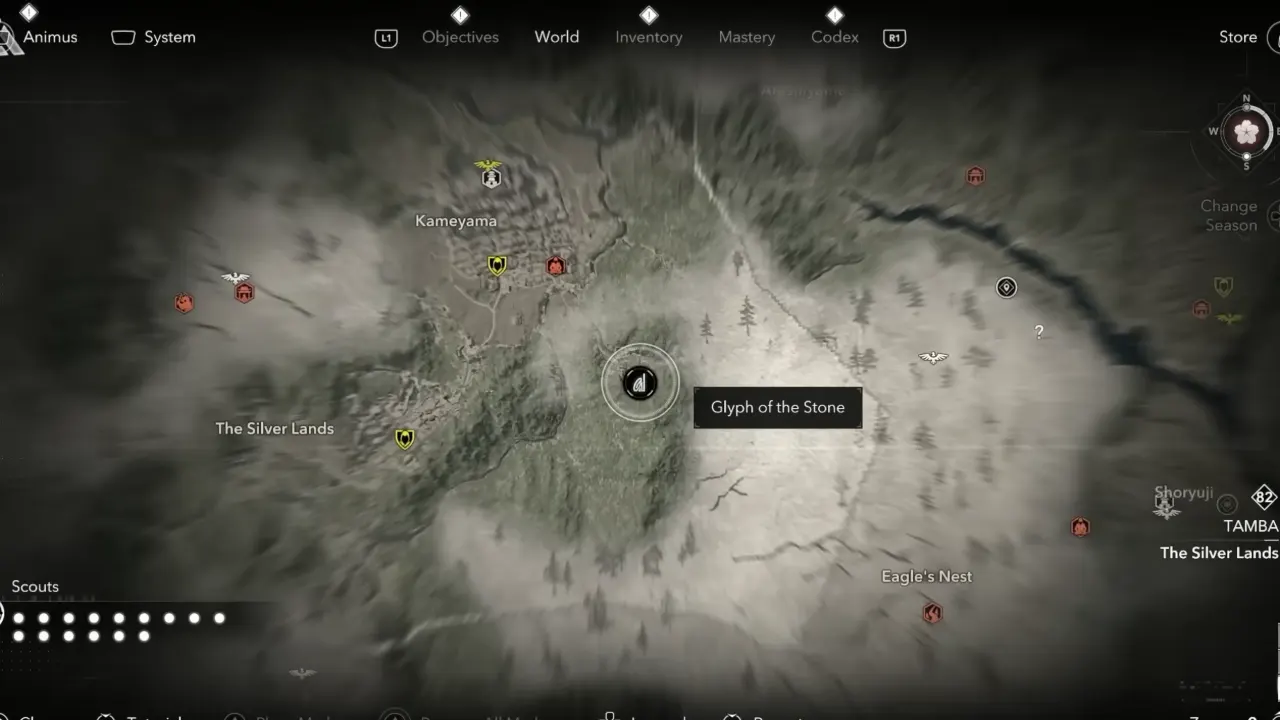
By Kameyama
A stone’s heart cracked wide open
Tada miner’s dream
Southeast of Kameyama, there’s a break in the mountains leading to a small enemy camp. Behind the campfire, climb the rocky tiered ledges to reach the glyph riddle carved into the cliff.
Glyph of the Sakura — Yamashiro / Yamazaki Forest Path
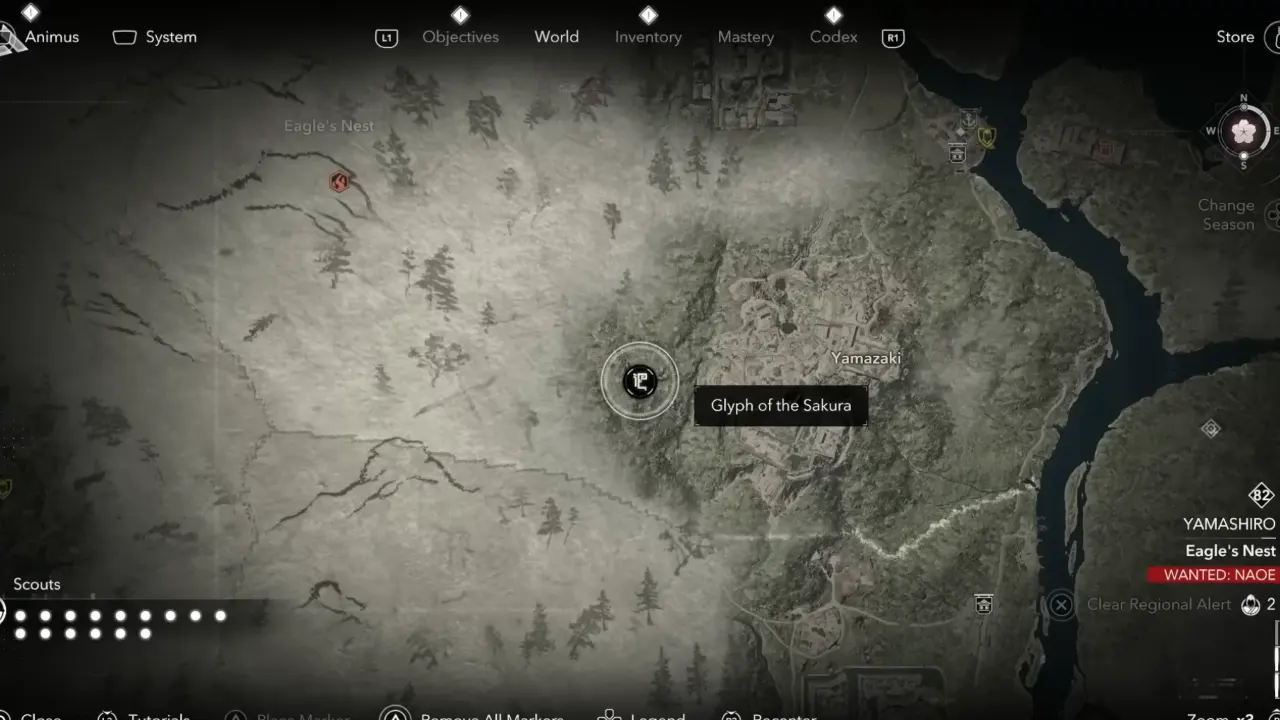
Yamazaki looms
In spring over tree and pink
Beacon of petals
Travel to Yamazaki Castle Viewpoint and hop over the western walls. Follow the forest path lined with stone lanterns. On the left side of the trail, just before the overlook, the sakura-themed glyph can be found on a boulder.
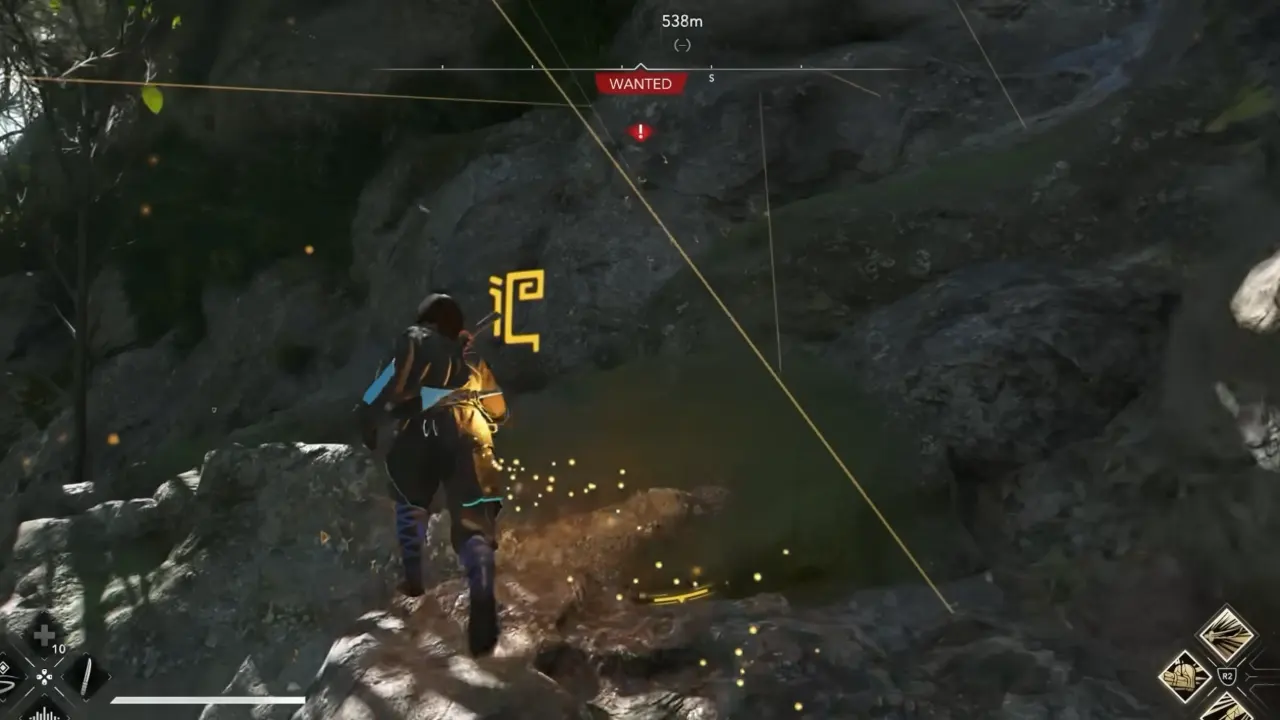
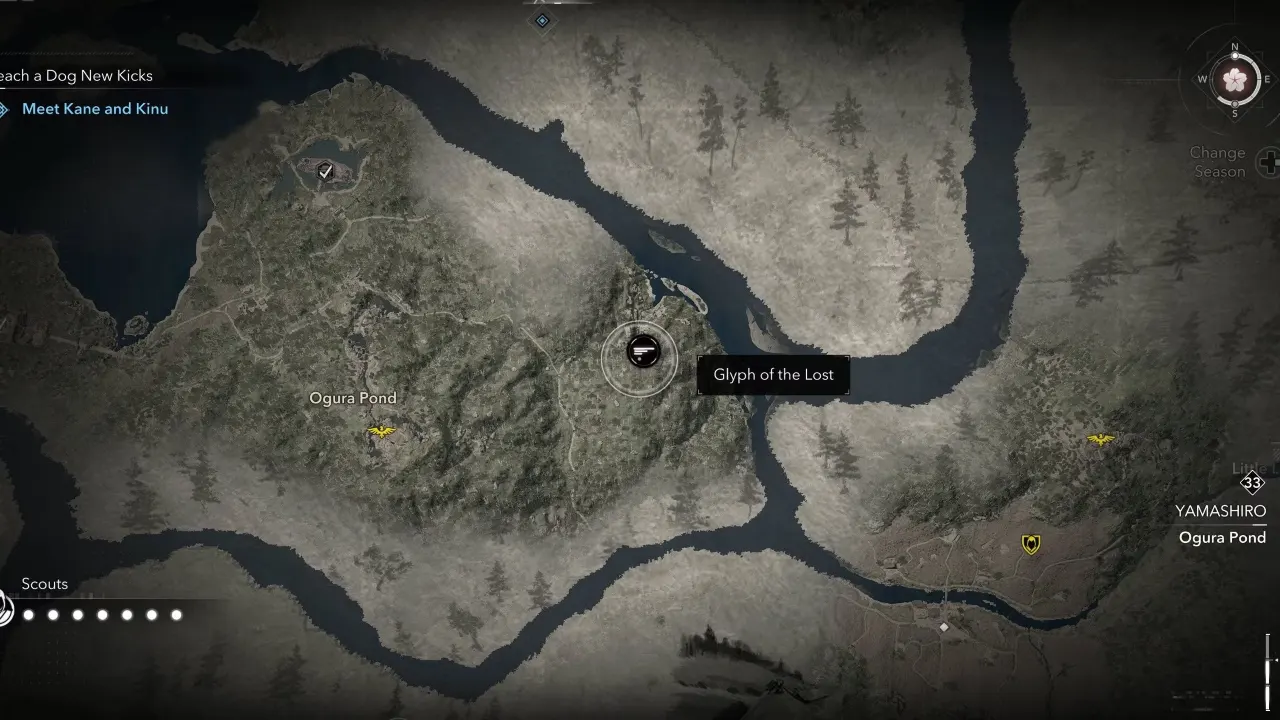
Glyph of the Lost — Yamashiro / Ogura Pond
Water lost the way
On edge of Ogura Pond
Waiting for the fall
Head to the eastern bank of Ogura Pond, where a thin waterfall drops from the ridge. Climb straight up beside the water to find the glyph in the cliff.
How to Open the Isu Glyph Door
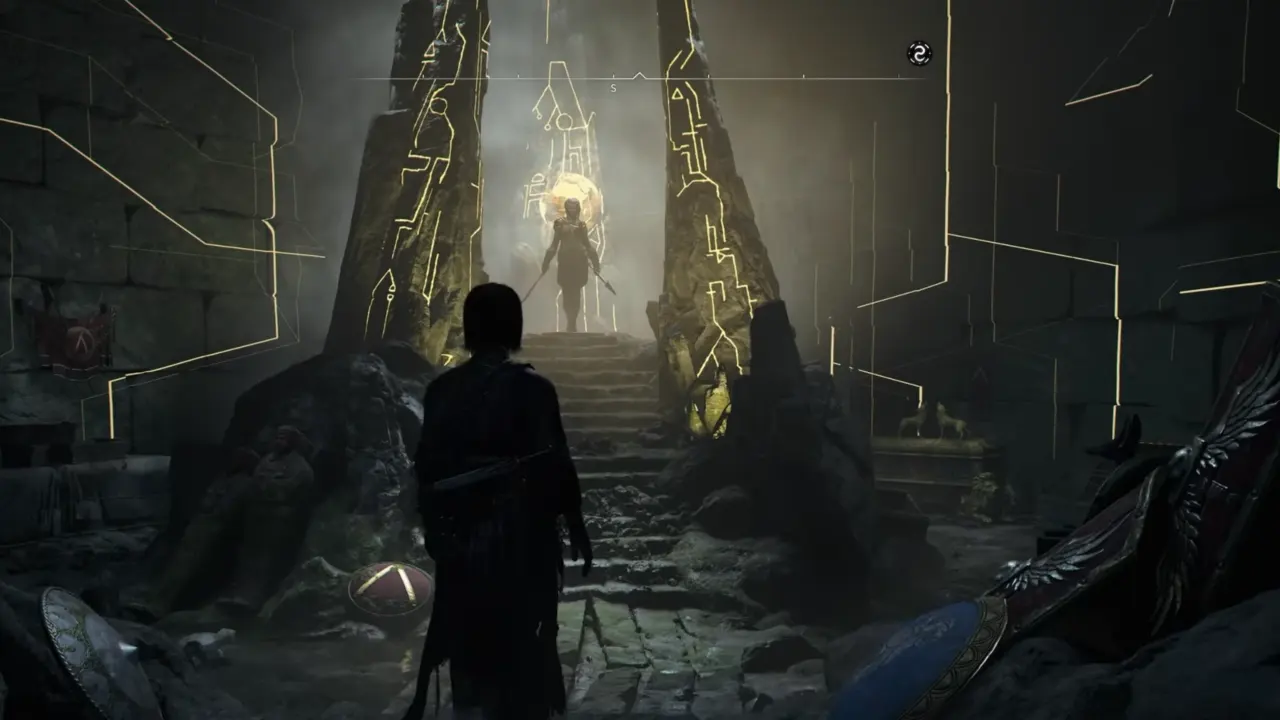
Once all 13 Glyphs are activated, fast-travel back to the Isu Glyph Door in Genbu Highlands. With the Riddle Scroll Beacon equipped, approach the door, and a short scene will play as the Isu door unlocks. Inside, you’ll find a complete Isu vault decorated with relics, all of which are from Assassin’s Creed Origins, Odyssey, and Valhalla, and unique rewards for Naoe and Yasuke:
Weapon Rewards
For Naoe:
– Isu-Forged Blade Legendary Tanto
– Wisdom of Atlantis Engraving
(+Weapon DPS, +Posture DPS, +Ability Damage, +Vulnerable Damage)
For Yasuke:
– Isu-Forged Spear Naginata (Legendary Katana)
– Strength of Atlantis Engraving
(+Weapon DPS, +Posture DPS, +Ability Damage, +Critical Damage)
Both weapons emit faint embers and leave golden light trails, which anyone who played Odyssey: Fate of Atlantis will recognize. There’s a large statue in the center that gives the Statue of Kassandra Outdoor Cosmetic and, more importantly, a small chest behind the central obelisk.
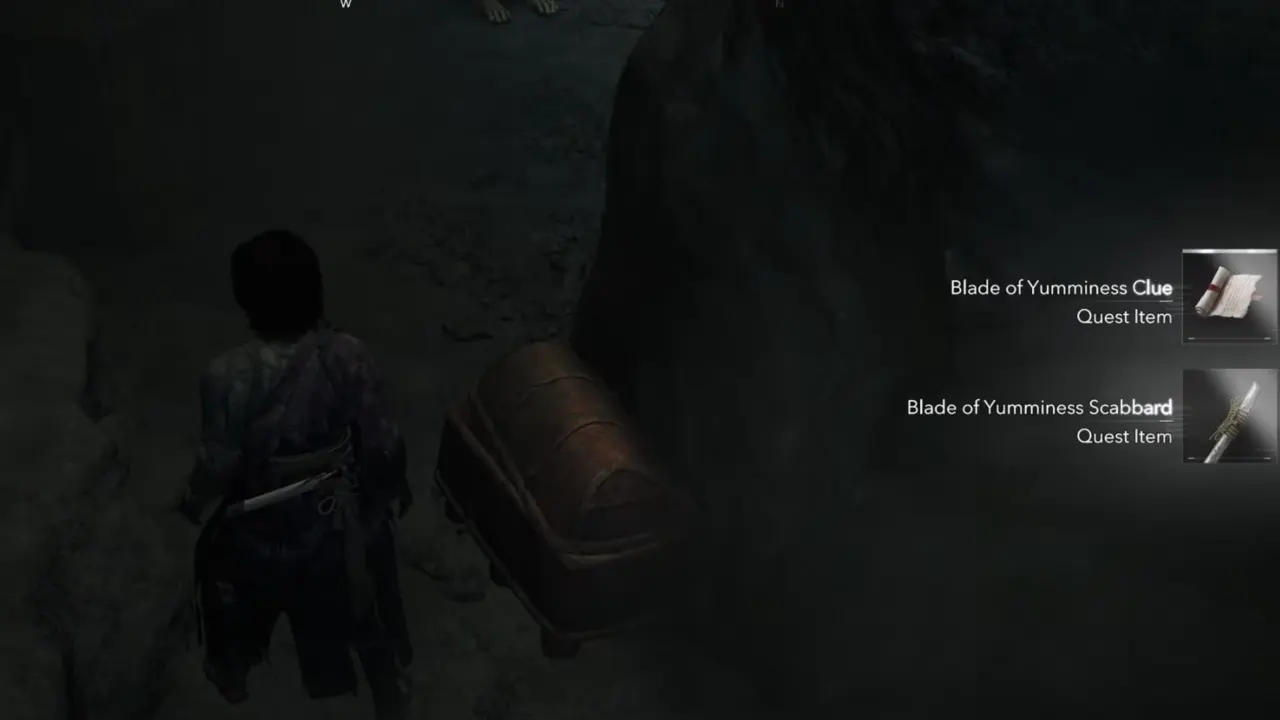
Open it to collect the Blade of Yumminess Clue and the Blade of Yumminess Scabbard weapon from Odessy, but it’s currently broken and needs a reforge to get back in working form.
How to Reforge the Blade of Yumminess
You will go on a small exploration quest again to find 3 Blade of Yumminess before Yasuke can rebuild the weapon at the crafting station inside the vault.
Blade of Yumminess Clue
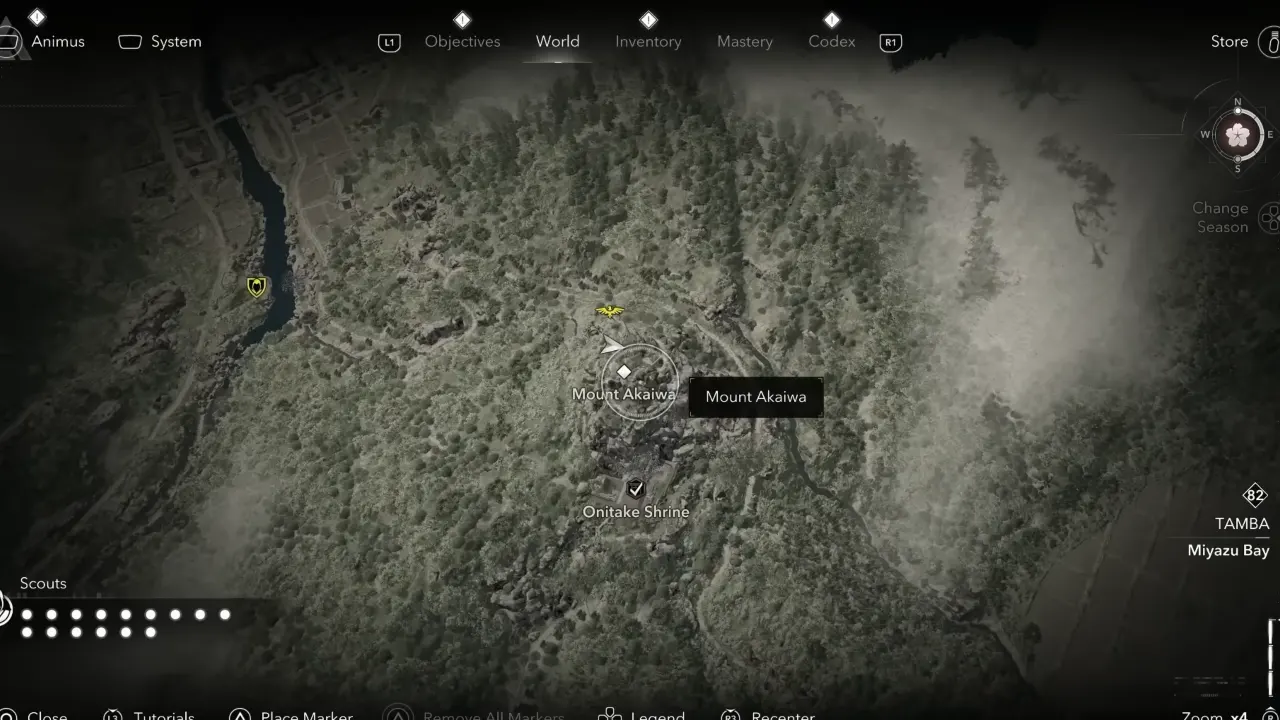

Go to Mount Akaiwa Viewpoint, north of Onitake Shrine in the Tamba region. The chest can be found directly below the viewpoint’s tree branch. Loot it to get the Blade of Yuminess Blade and Guard of Yumminess Clue.
Guard of Yumminess Clue


Travel to Myoken Shrine in the southeast of Saika in Kii Province. Walk behind the shrine and carefully drop down the cliffside to find a lone chest on a small ledge along the cliff containing Blade of Yuminess Guard and Handle of Yumminess Clue.
Handle of Yumminess Clue
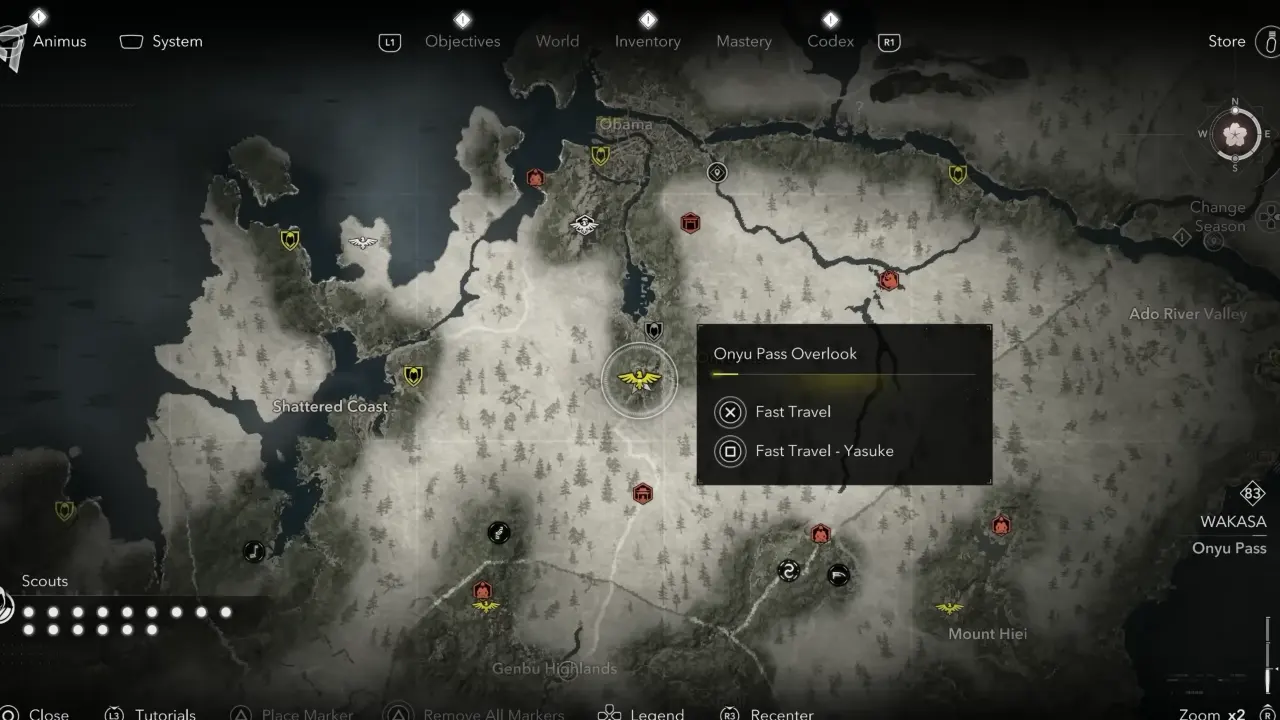

Fast travel to Onyu Pass Overlook in Wakasa, and from the higher tree branch, jump down into the small pond to go underwater. The final chest is on the pond floor with the Blade of Yuminess Handle and Saya of Yumminess Clue (instructions to return to the vault).
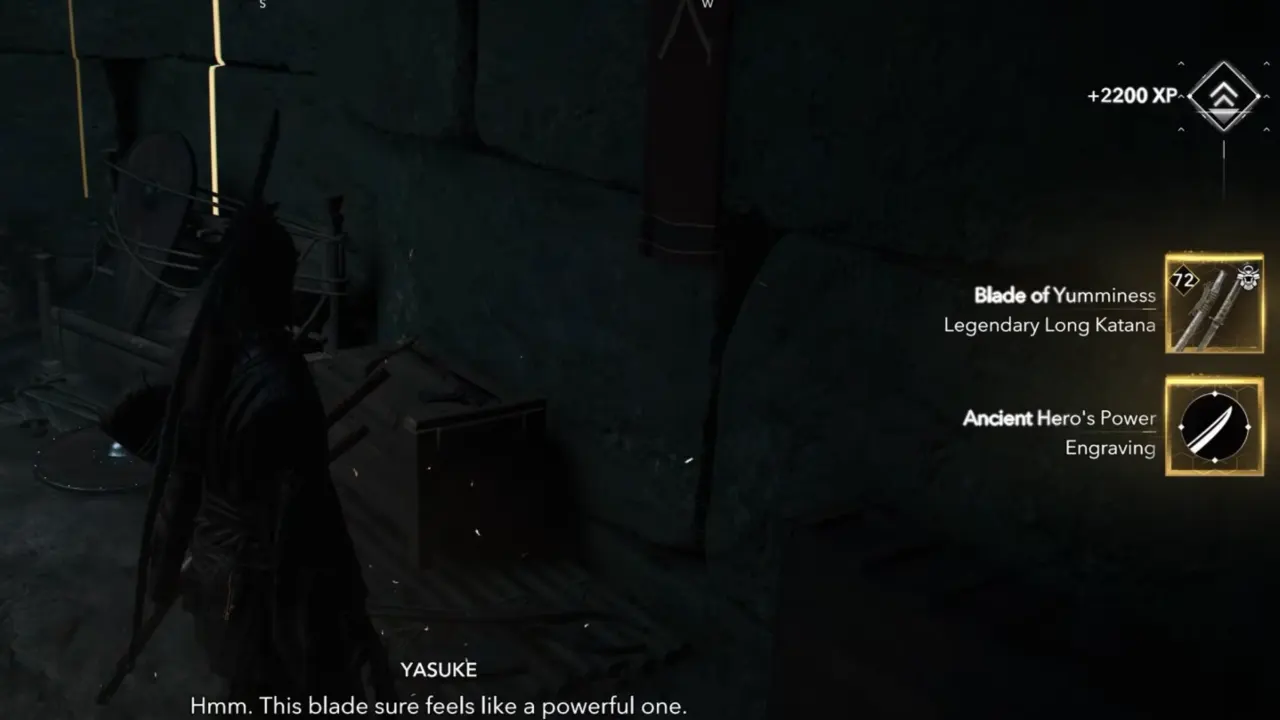
Enter the Isu vault as Yasuke, equip the Beacon again, and interact with the workbench when ‘Reforge the blade‘ prompts appear beside the right wall. Once done, you will receive the Blade of Yumminess Legendary Long Katana and Ancient Hero’s Power Engraving.


